Setting up Remove Branding for Tickets
With the Remove Branding add-on, you can customize what your customers see in ticketing emails. To make sure you're set up properly, follow the instructions below.
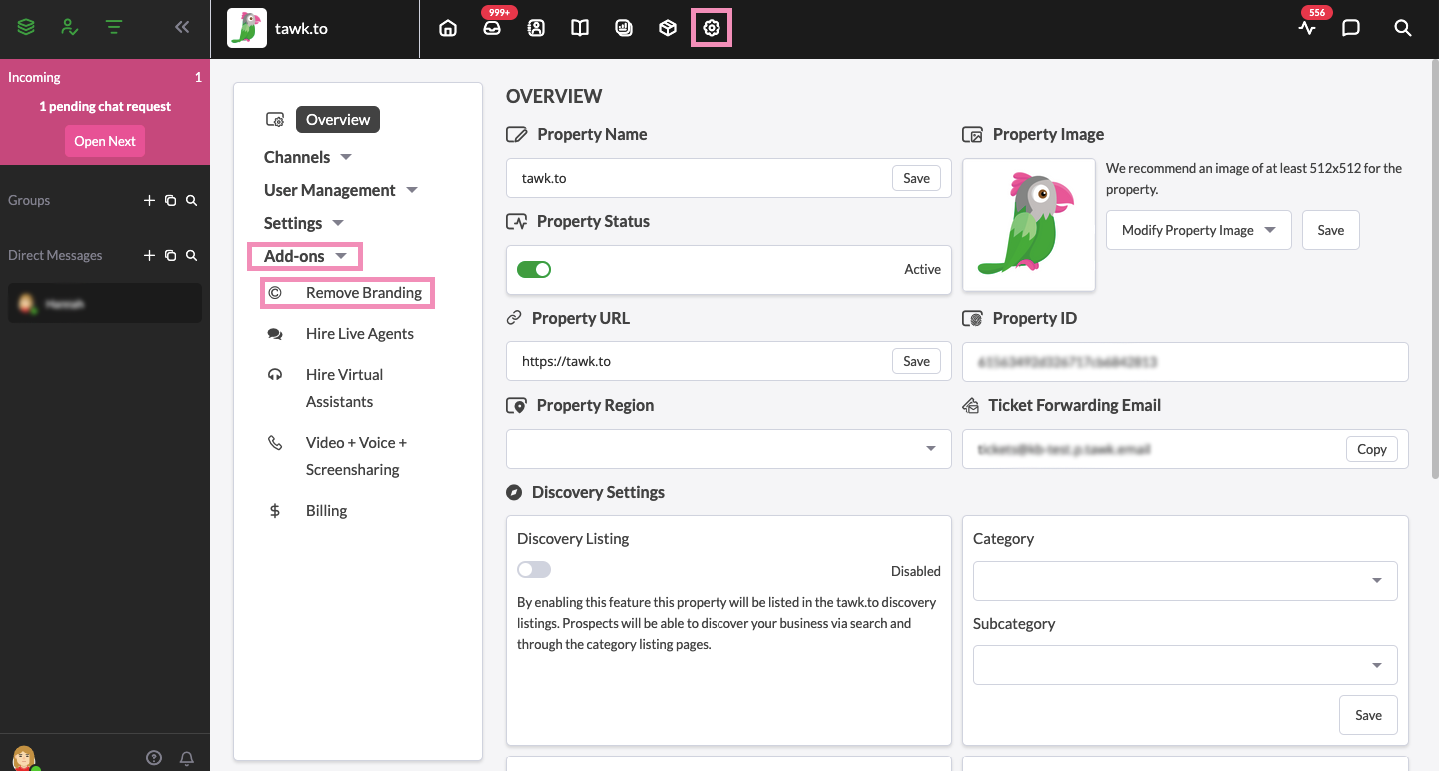
If you have multiple properties, check to make sure you're viewing the correct one. Hover over the current property name in the upper-right menu to select a new property from the list.

Once you've purchased the Remove Branding add-on, you can customize the following features in the settings.
Note: The Remove Branding add-on is charged per property.
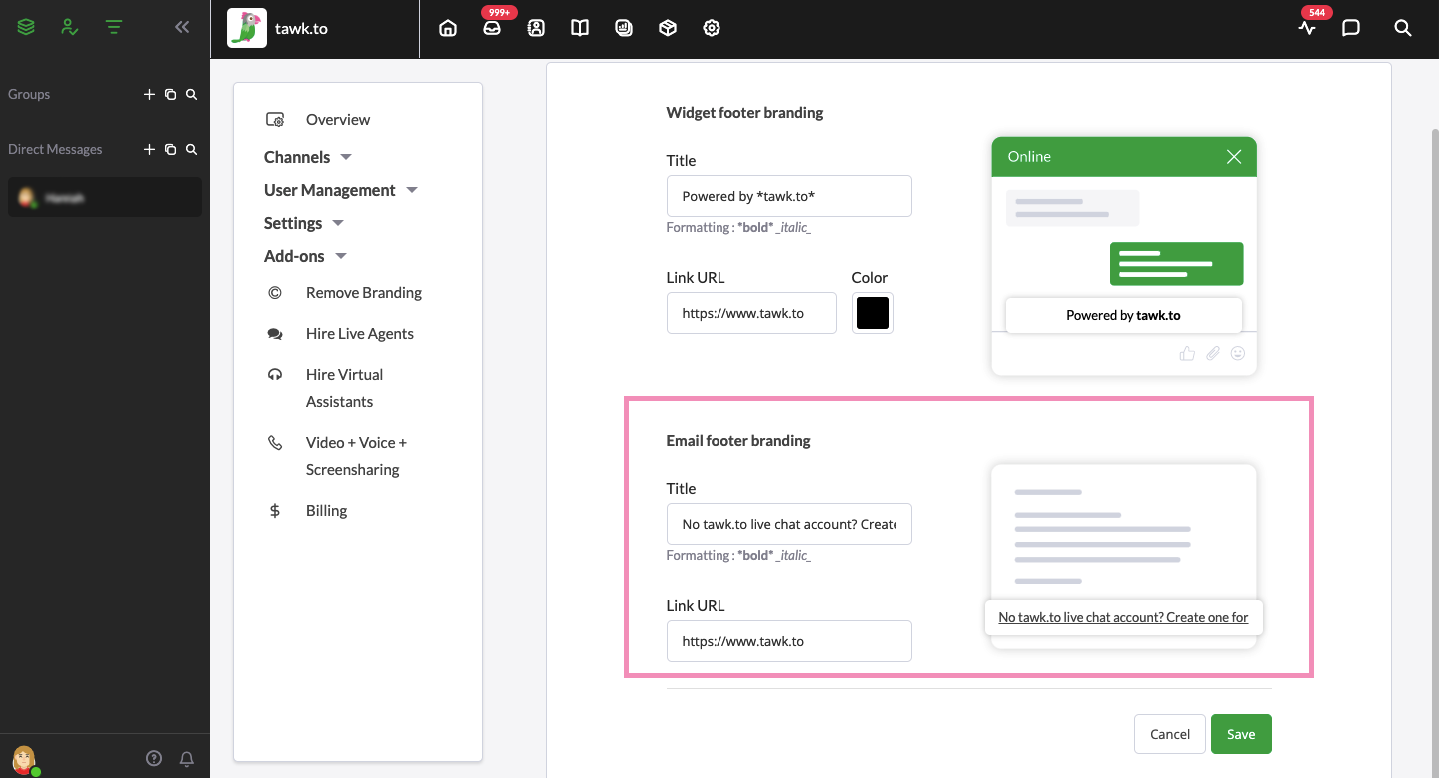
Email footer branding
The Email footer branding is a link that appears at the bottom of emails sent via the Dashboard. Every email sent through the Dashboard will have the email footer link. By default, it is set to read "No tawk.to live chat account? Create one for free here" and link to the main tawk.to website at https://www.tawk.to
You can change this text by changing the Title. You can also change the formatting to either bold or italic by surrounding the text with asterisks (*) for bold or underscores (_) for italics. The email footer text is limited to 256 characters.
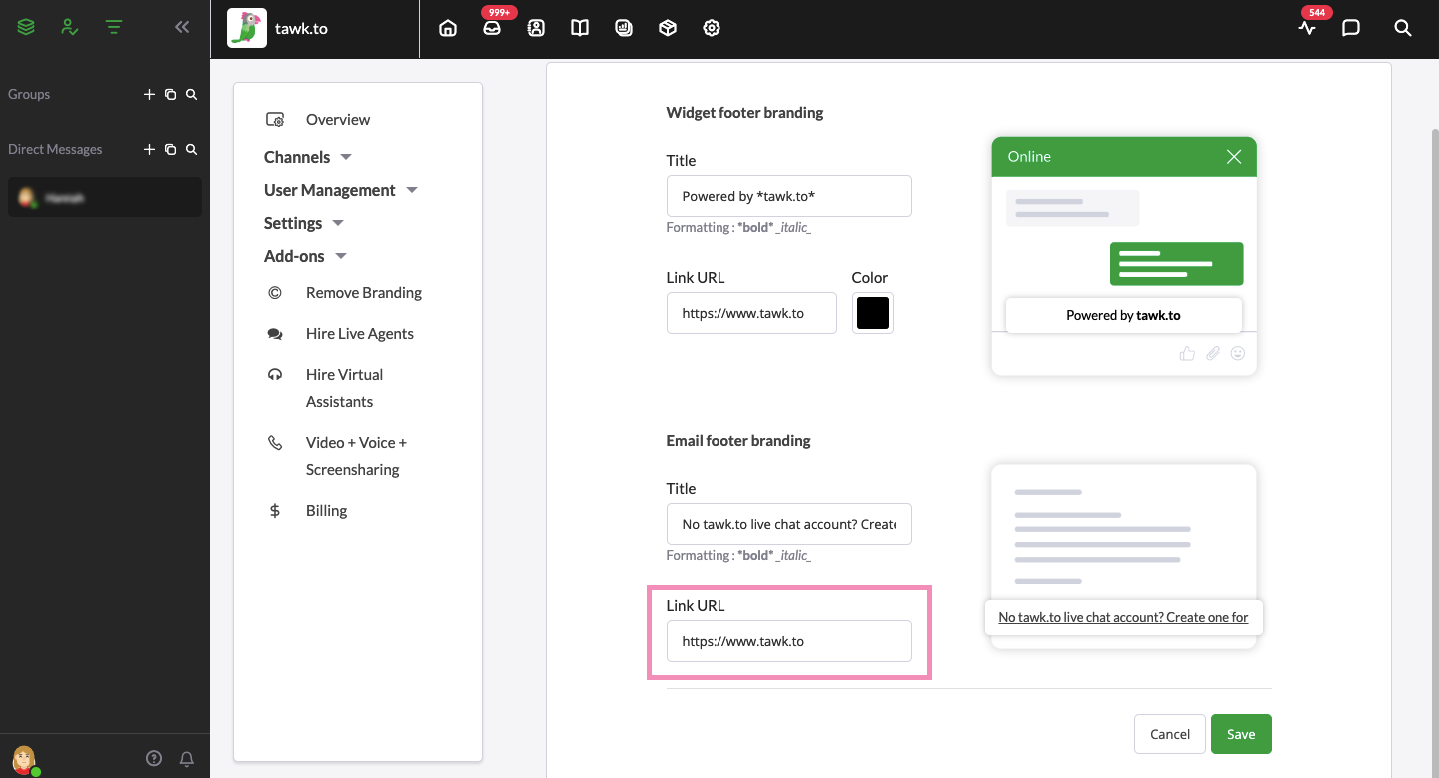
To change where the link will send the email recipient, change the Link URL.
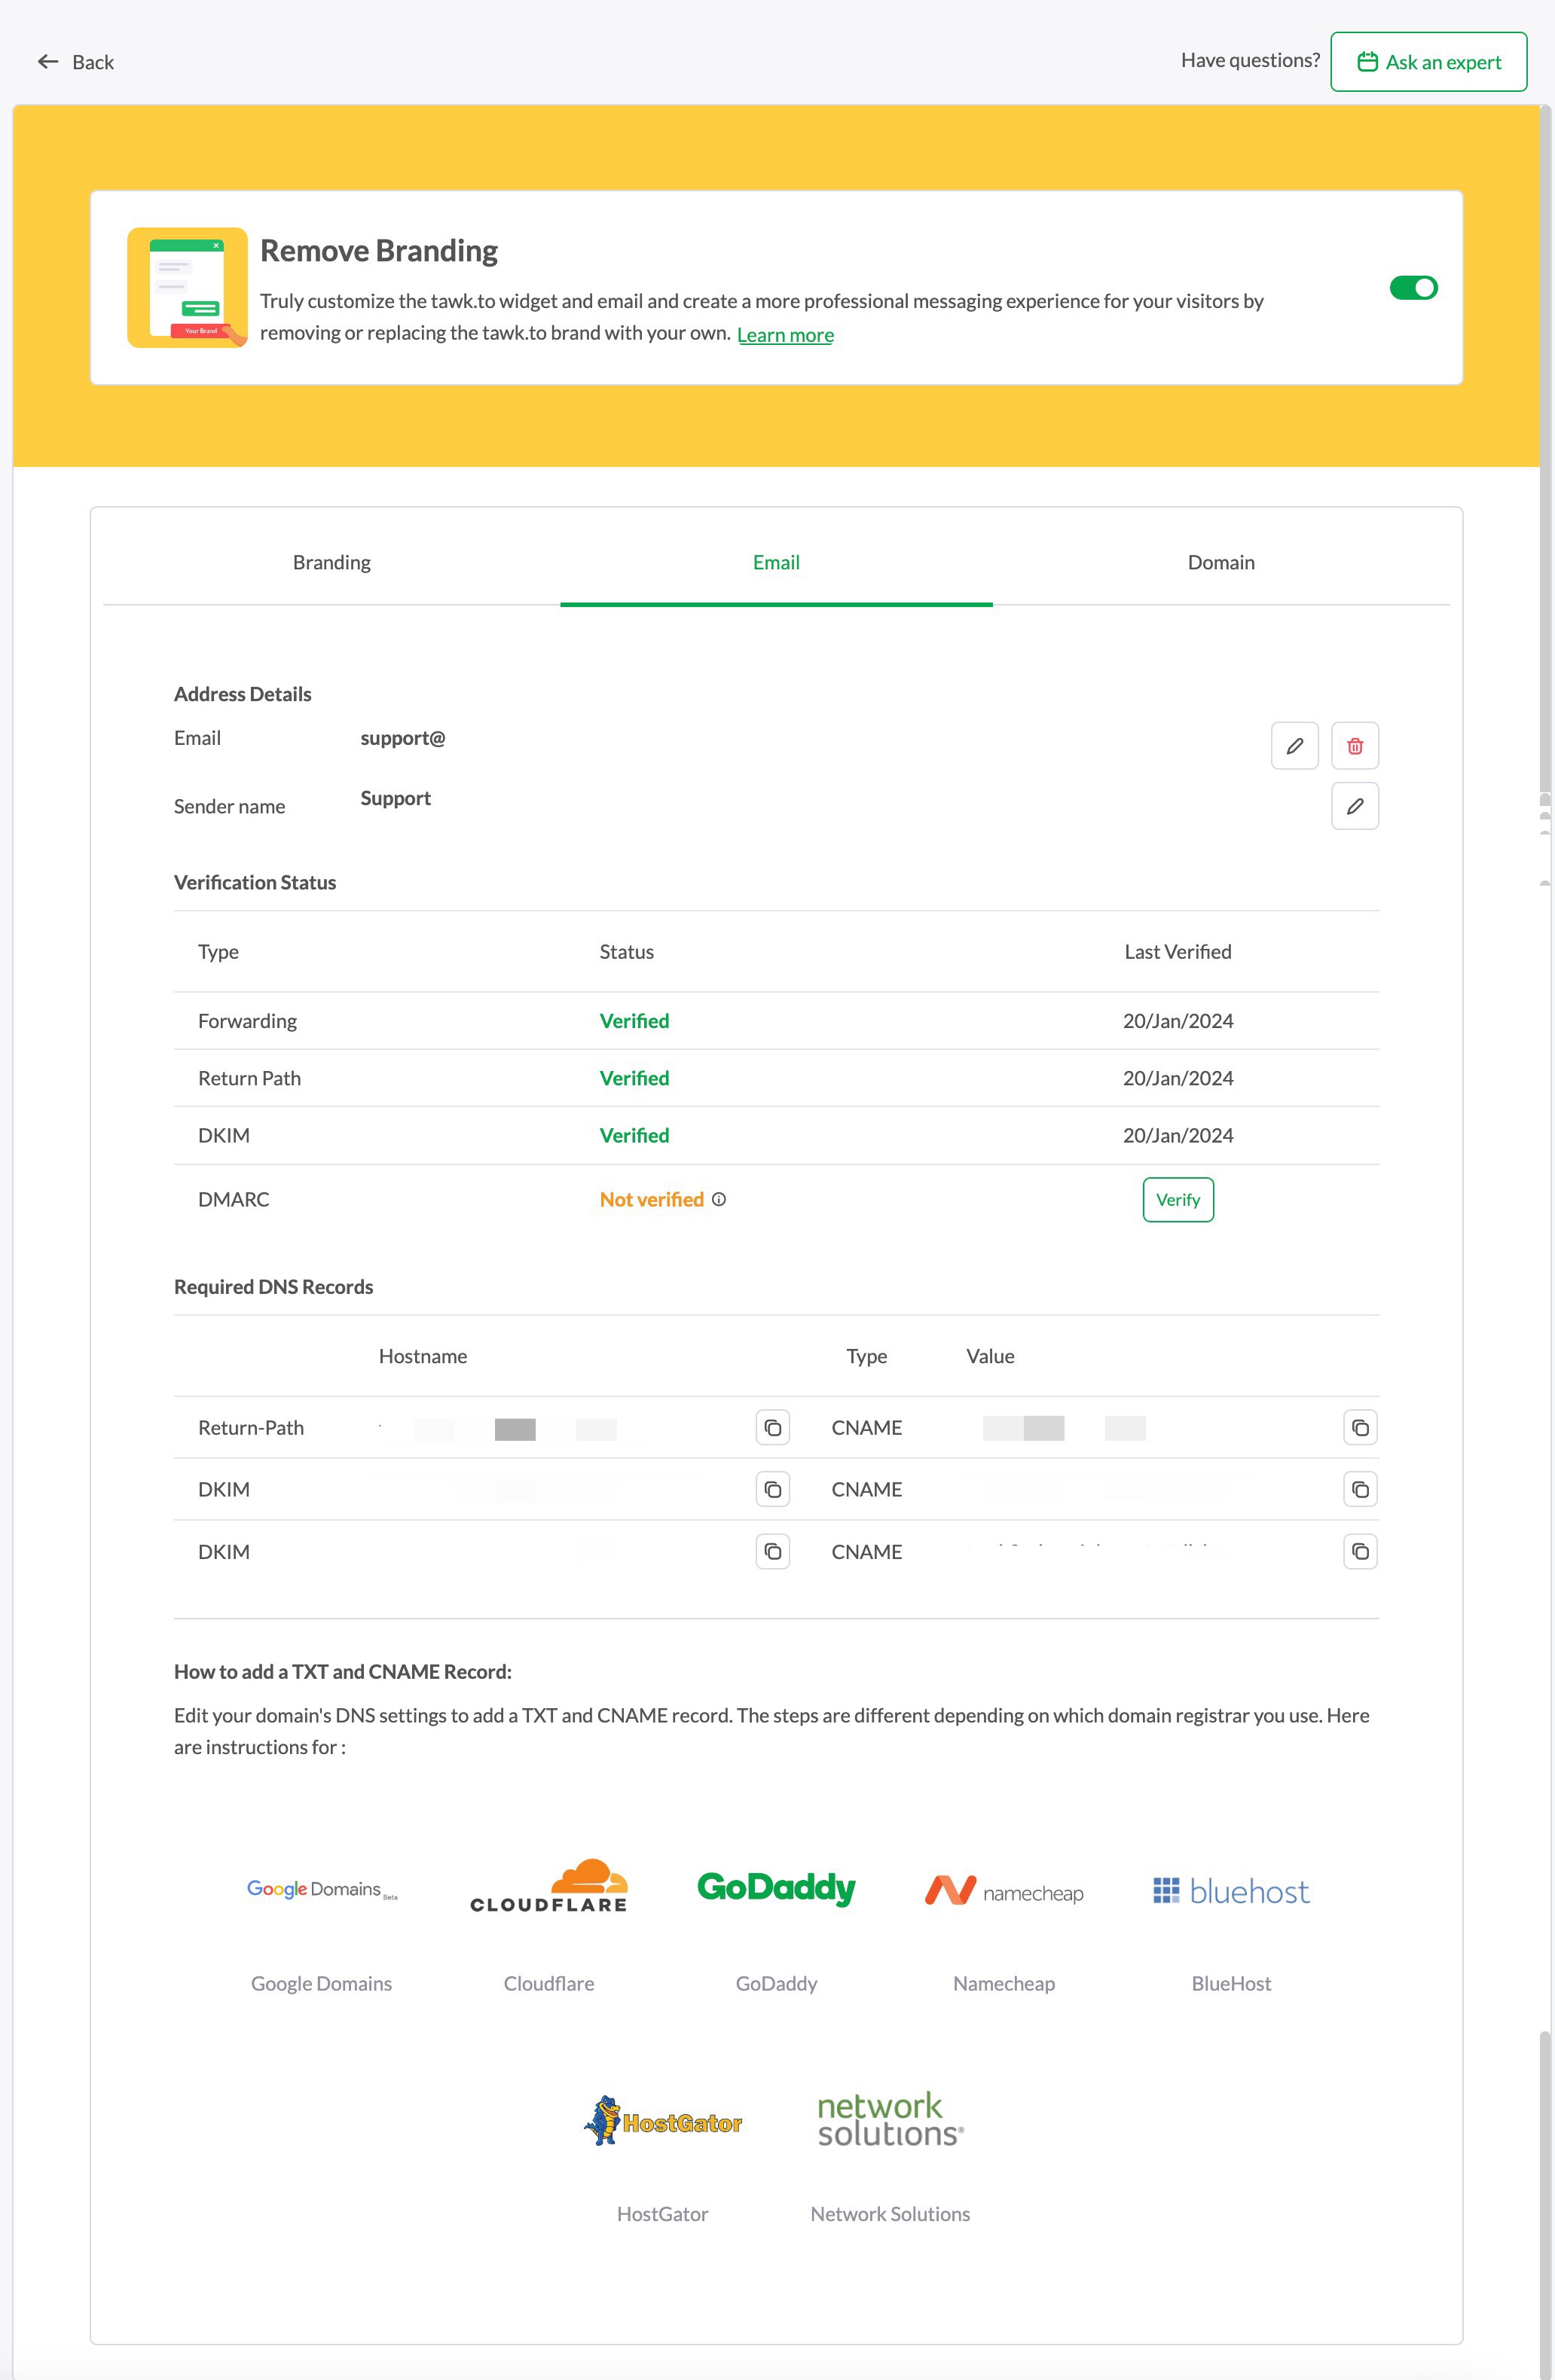
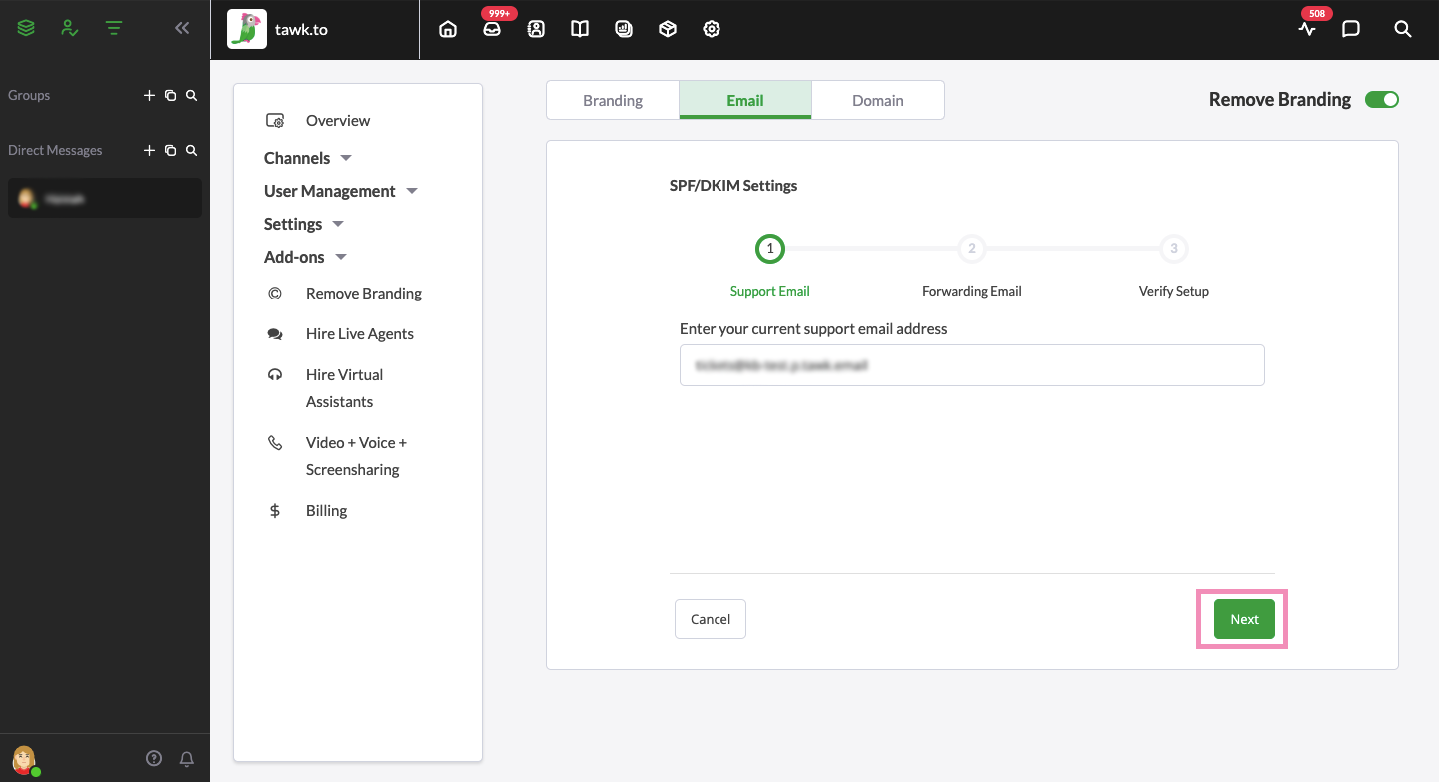
Here, you can set up your support emails to use your own domain by creating a Return Path, as well as setting up your Domain Keys Identified Mail (DKIM) and Domain-based Message Authentication, Reporting, and Conformance ( DMARC ). This helps to prevent spam, detect forgeries, and ensure mail is sent from an authorized server.
Enter the email you want to use as your support email and select the green Next button.
Next, you'll need to set up forwarding for the account. There are links to Gmail, Yahoo and Outlook to help you set the forwarding up correctly based on the email provider you use.
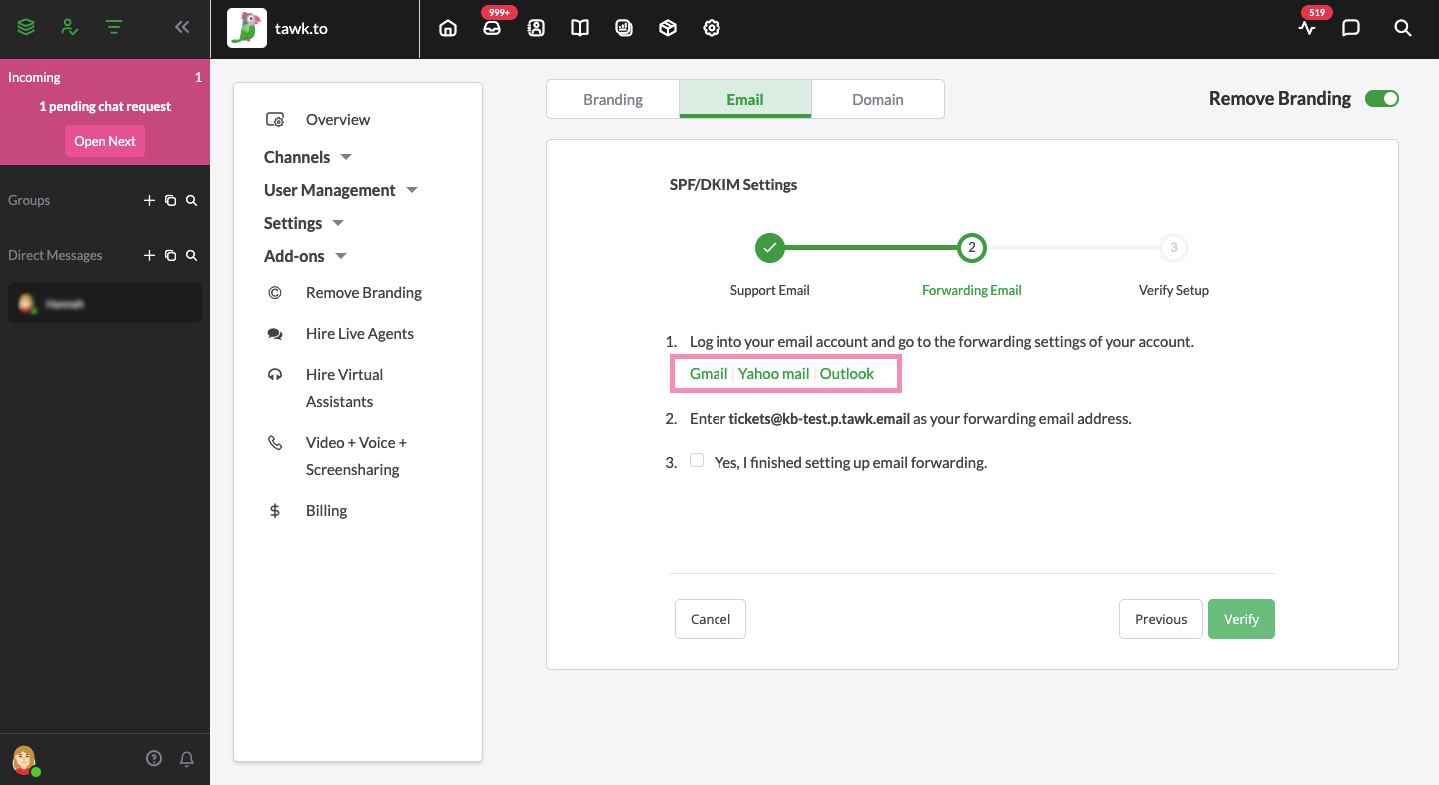
Enter the text in bold ending with @tickets.tawk.to as your forwarding email address.
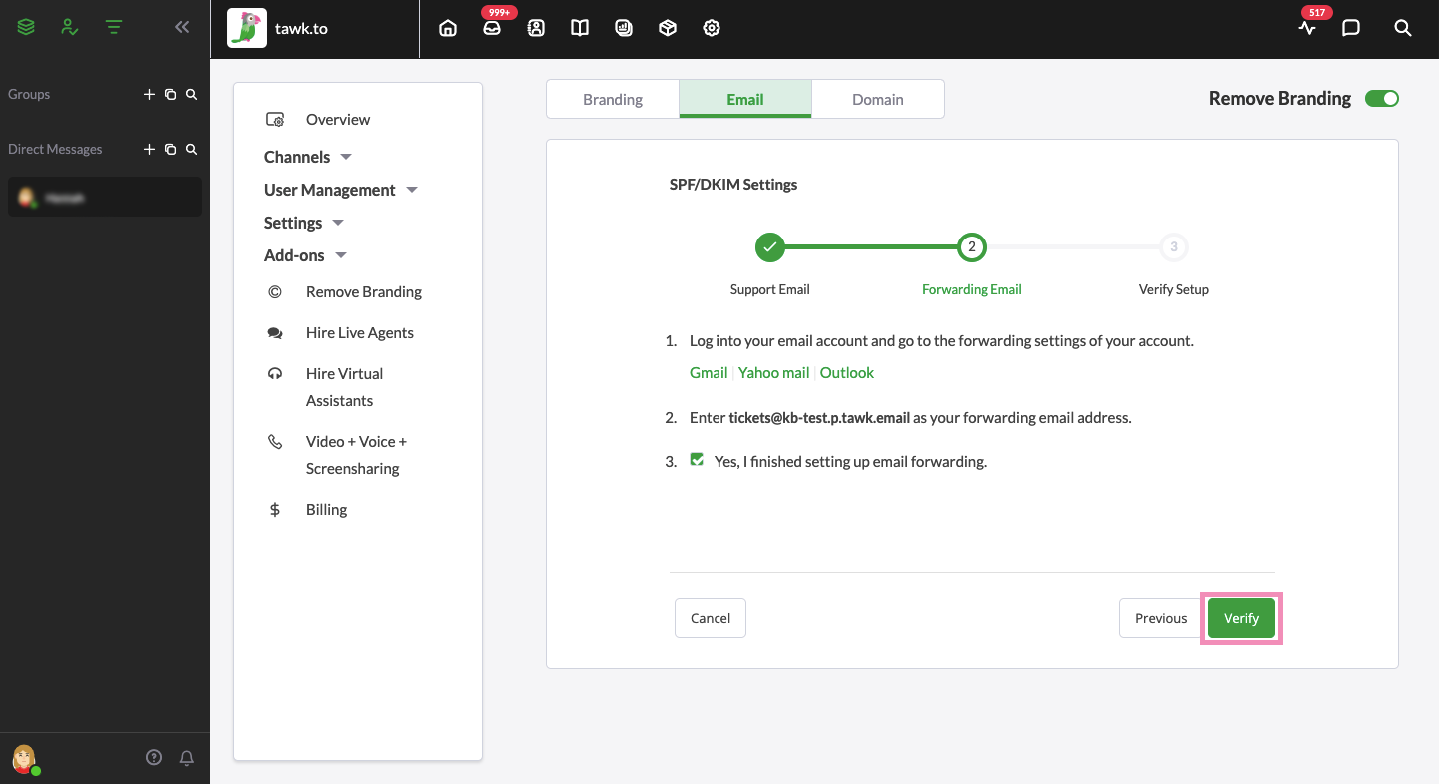
When you're ready, mark the check box and continue by selecting the green Verify button.
We will then check to verify that email forwarding has been set up correctly.
It can take some time for the verification process, so be sure not to leave the page before you see the result.
If the verification is unsuccessful, select the green Start Over button to go through the three steps again. Keep an eye out for typos. Even the smallest error in the text can lead to an unsuccessful verification.
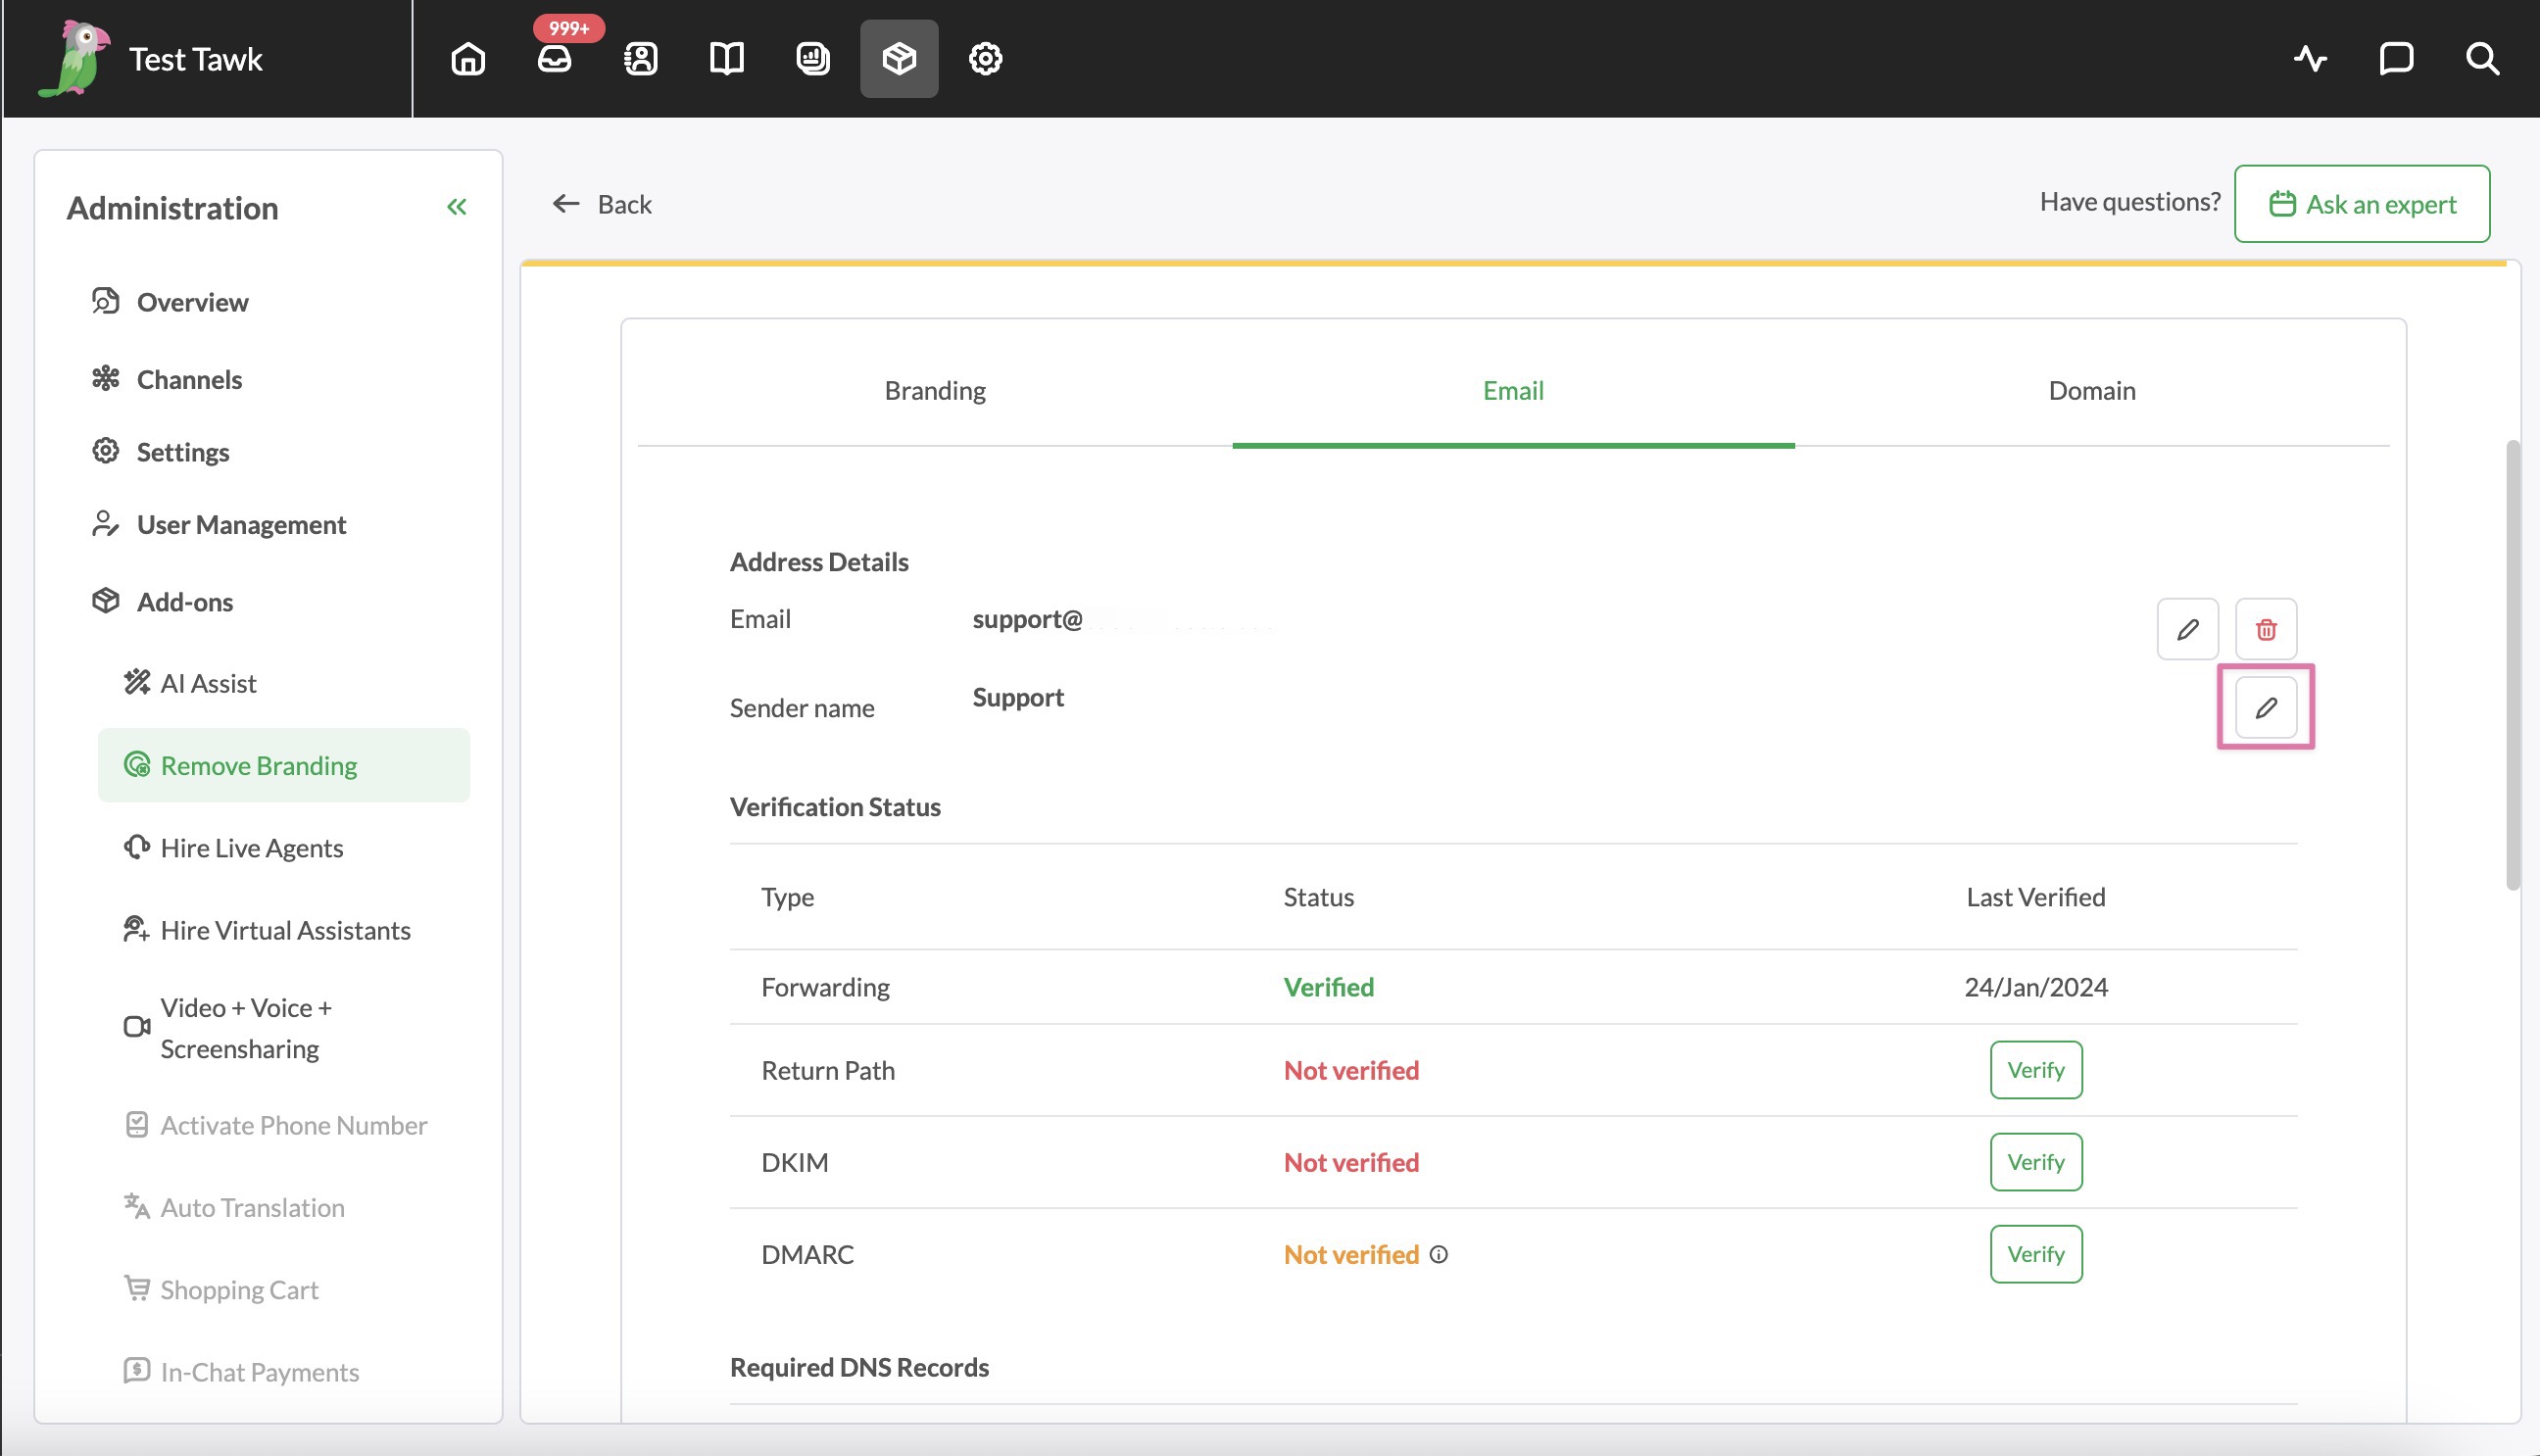
Once the verification is finished, click the green Done button to view the current settings.
Changing the email will send you back through the verification process.
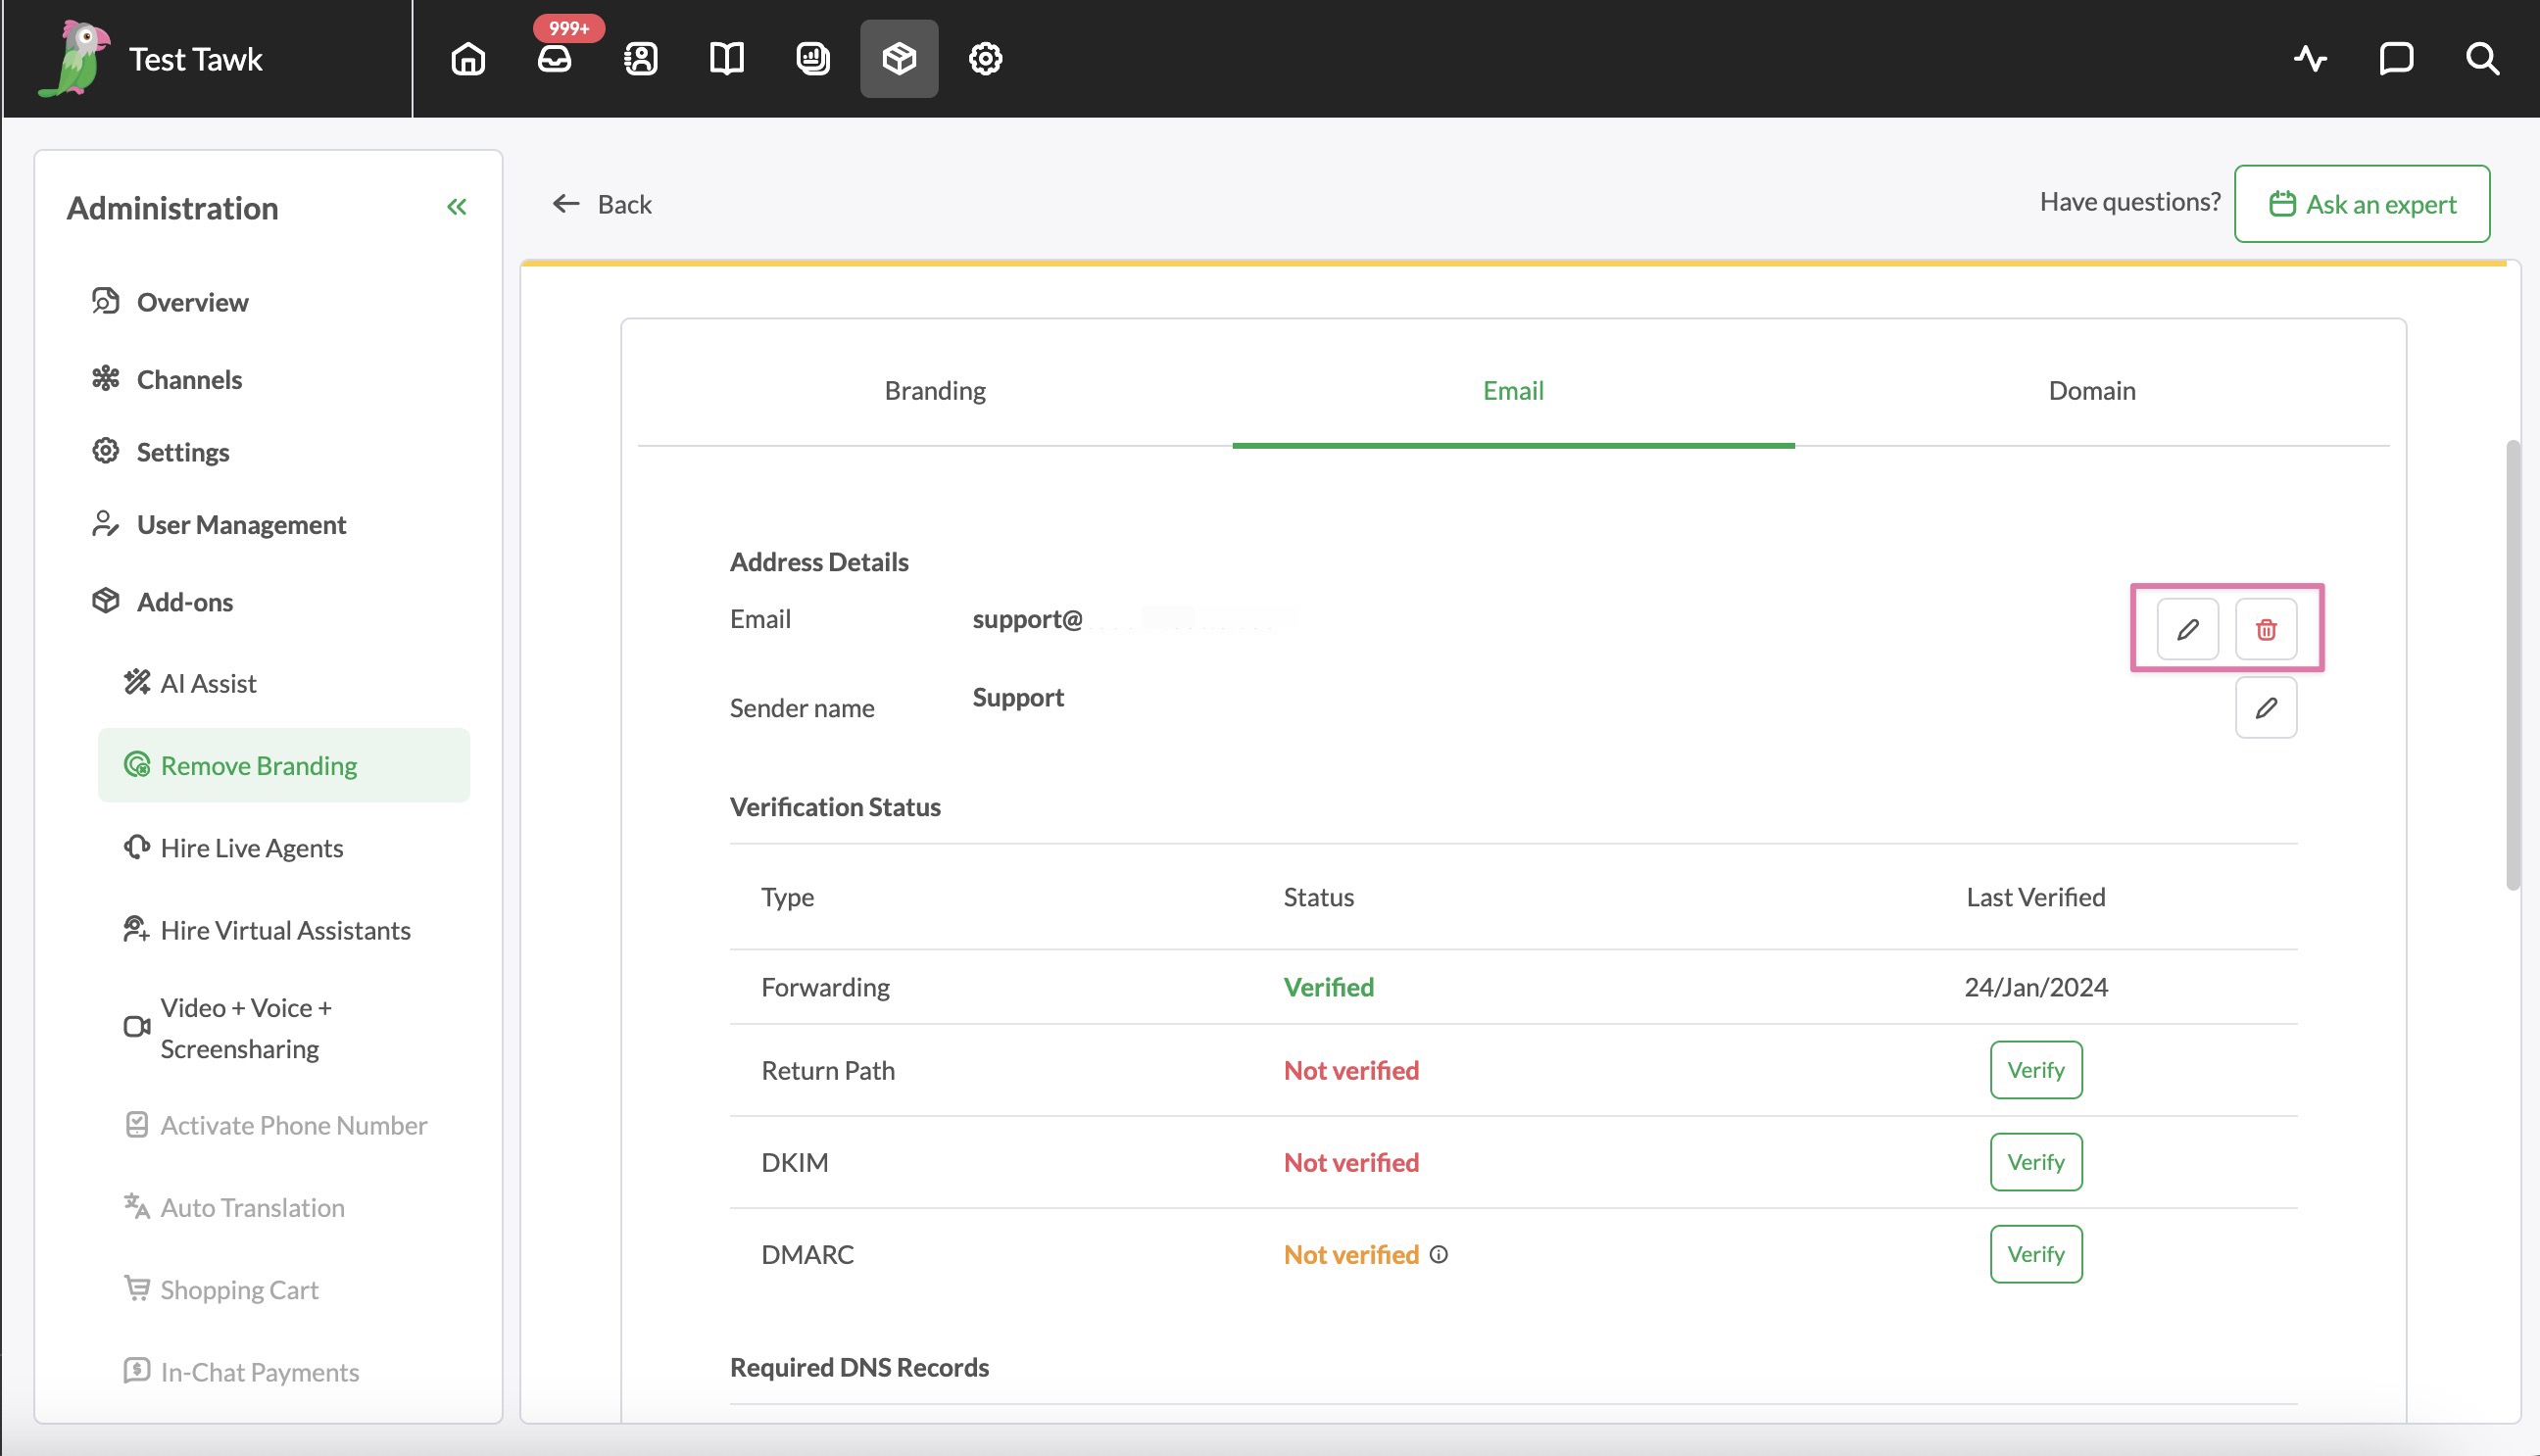
Changing the sender name will change the name that appears as the sender for each email.
Now that your email forwarding is set up correctly, you can set up your Return Path and DKIM settings.
Return Path
The tawk.to Remove Branding Add-on uses a Return-Path address.
A Return-Path address is the specified address for receiving bounced emails and feedback. This address, which is set in the email's Return-Path header, handles undeliverable messages. It's not visible to recipients. Known by various names such as bounce address, envelope sender, or MAIL FROM, the Return-Path plays a crucial role in managing email deliverability and response.
In short, sent emails are sent from the businesses sub-domain and not the tawk.to email domain.
To set up your Return Path, you'll need to add a CNAME type DNS record in your domain manager.
The Hostname and Value are provided in the Required DNS Records section.
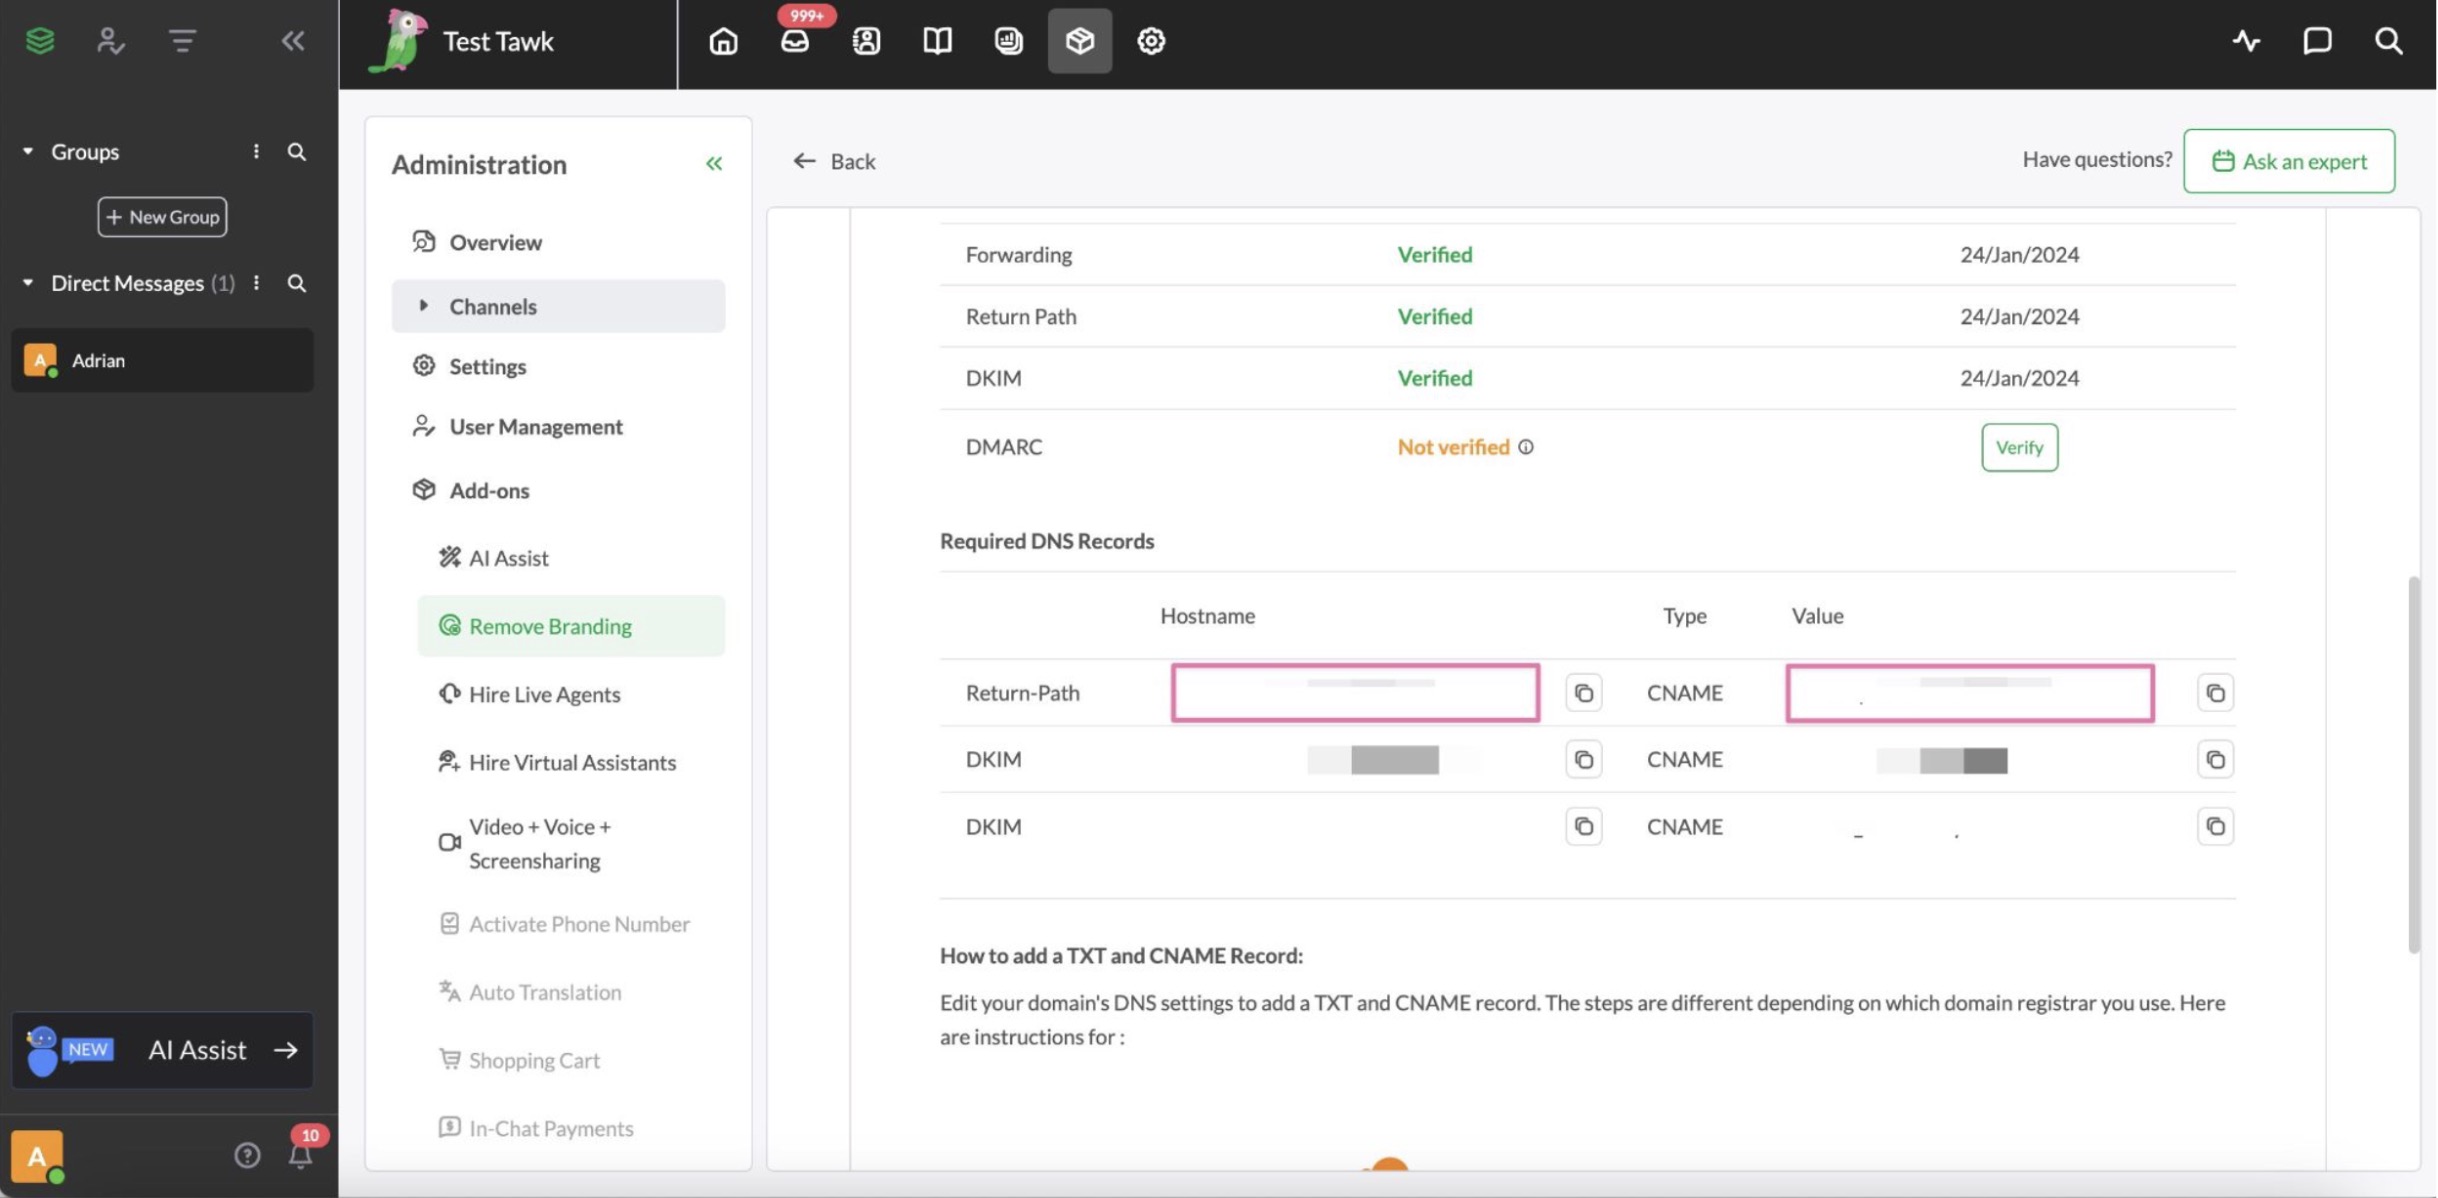
A common error here is adding the entire domain when, depending on your domain manager, you only need to include the subdomain.
For example, you should add "tawk1._domainkey" rather than
"tawk1._domainkey.outlook.com"
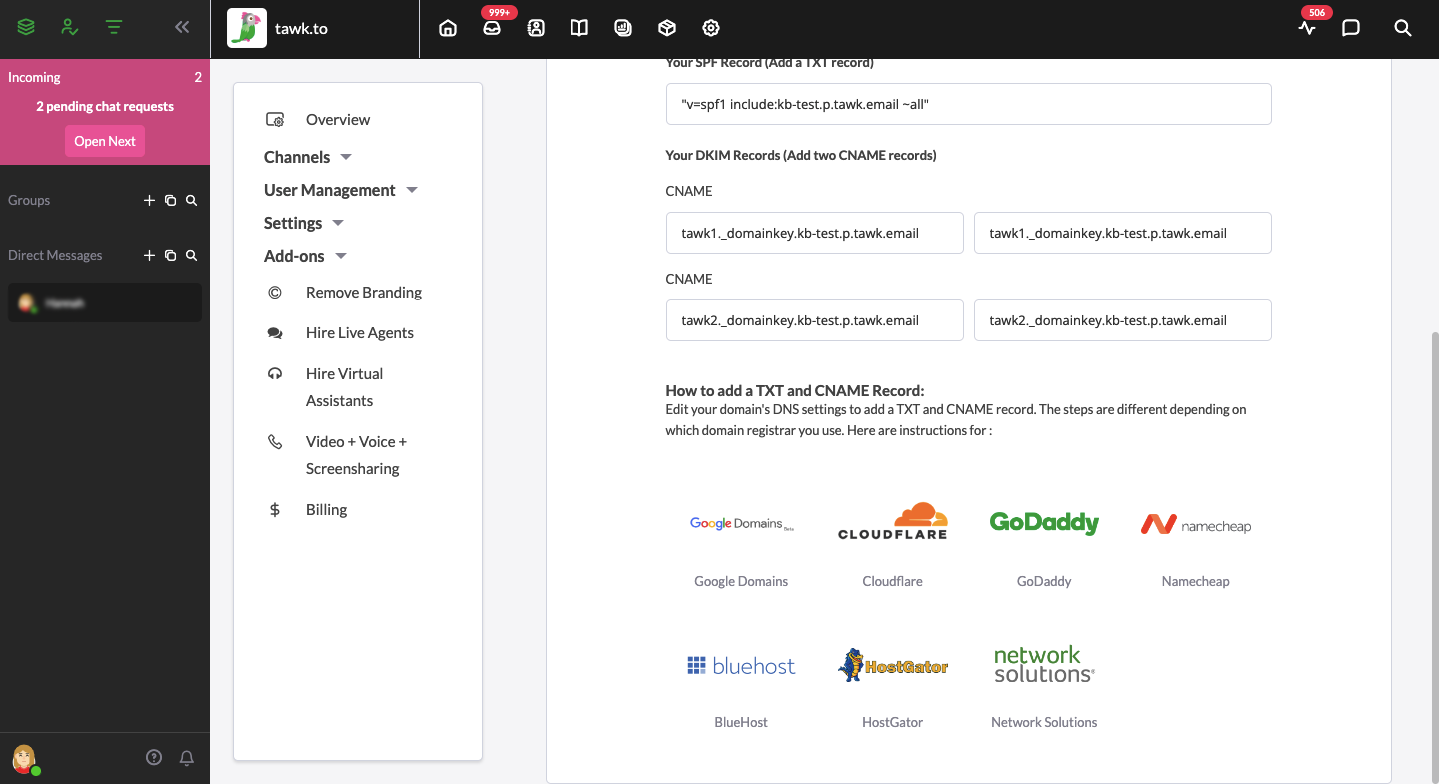
You'll find links to instructions for popular domain registrars at the bottom of the page.
Once you're done with the setup, select Verify next to Return Path.
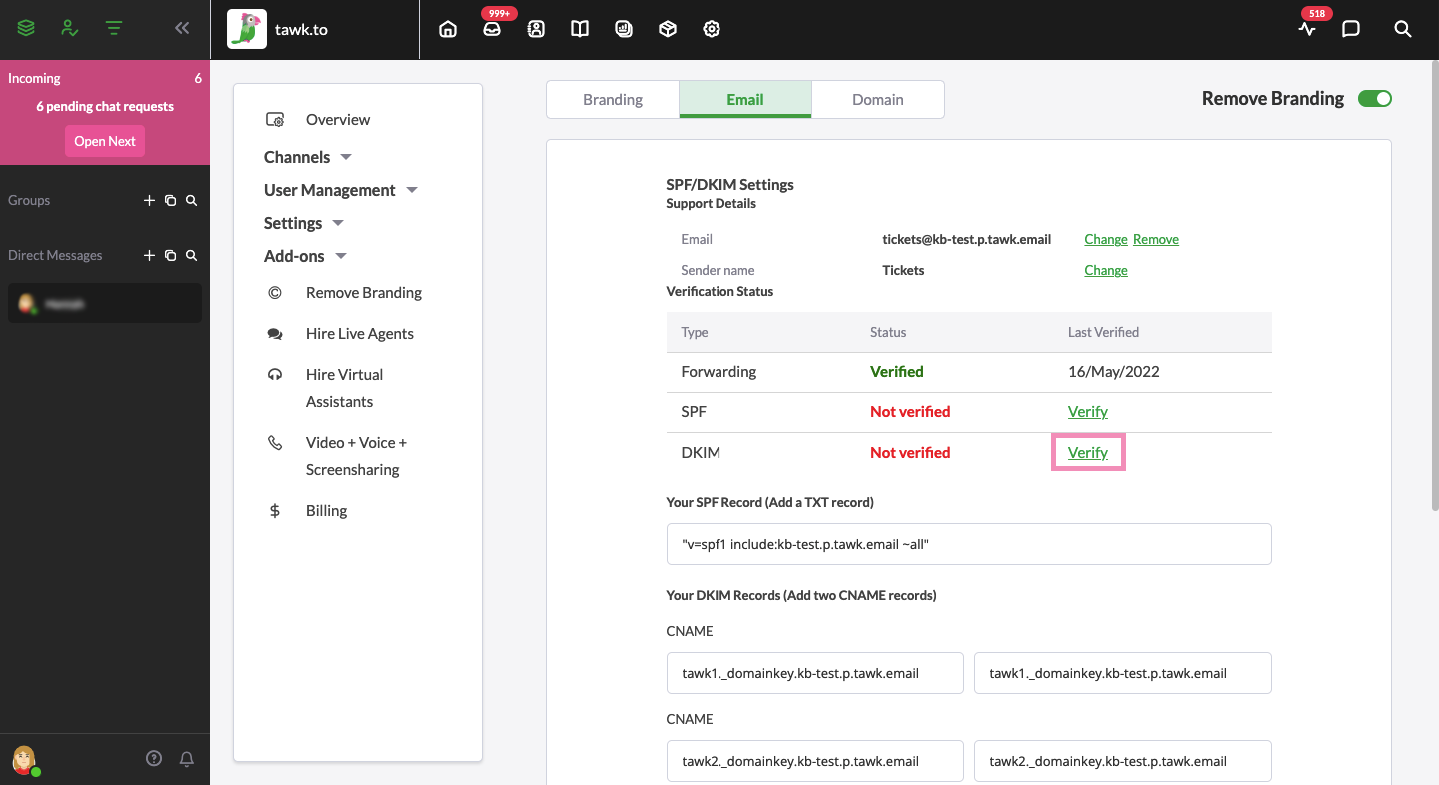
DKIM
DKIM, or Domain Keys Identified Mail, functions as a digital signature for an email. You can see this as "signed by" in your email details.
A public key from the domain and a cryptographic checksum embedded in the email will be compared to check the contents of each email to see if the email has been tampered with somewhere along the way.
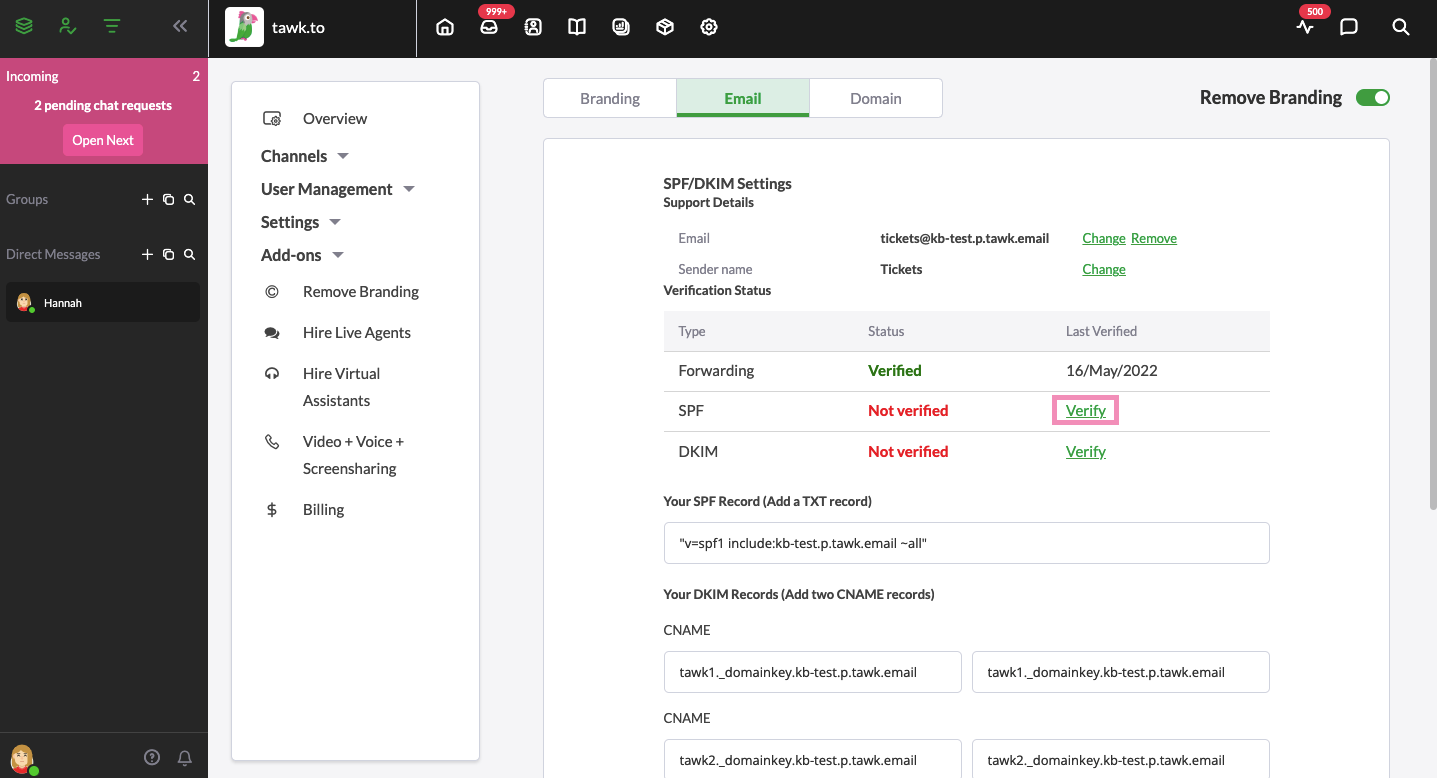
To set up your DKIM, you'll need to add two CNAME records through your domain manager. This process is the same one you did for the Return Path DNS record.
The Hostname and Value are provided in the Required DNS Records section.
Remember, a common error here is adding the entire domain when, depending on your domain manager, you only need to include the subdomain.
For example, you should add "tawk1._domainkey" rather than
"tawk1._domainkey.outlook.com"
Once again, you'll find links to instructions for popular domain registrars at the bottom of the page.
Once you're done with the setup, select Verify next to DKIM.
DMARC
DMARC or Domain-based Message Authentication, Reporting, and Conformance is essential for email security and sender reputation. It is the final step to complete the setup of your custom email address through the Remove Branding add-on.
Learn how to set up DMARC, in this article here: How to Set up a DMARC Record
If you need additional help setting up remove Branding for tickets, schedule a call with a member of our team here.