How to create a ticket
The ticketing system in tawk.to helps you streamline and manage your customer service process. Ticketing allows you to continue conversations with your customers by email after they have left the chat.
There are several ways to create a ticket:
- You can create a ticket during a chat
- You can create a ticket from a previous chat in your inbox
- You can create a ticket from a profile in Contacts
- A visitor can create a ticket by leaving an offline message
- A visitor can create a ticket from your Knowledge Base
Creating a ticket during a chat
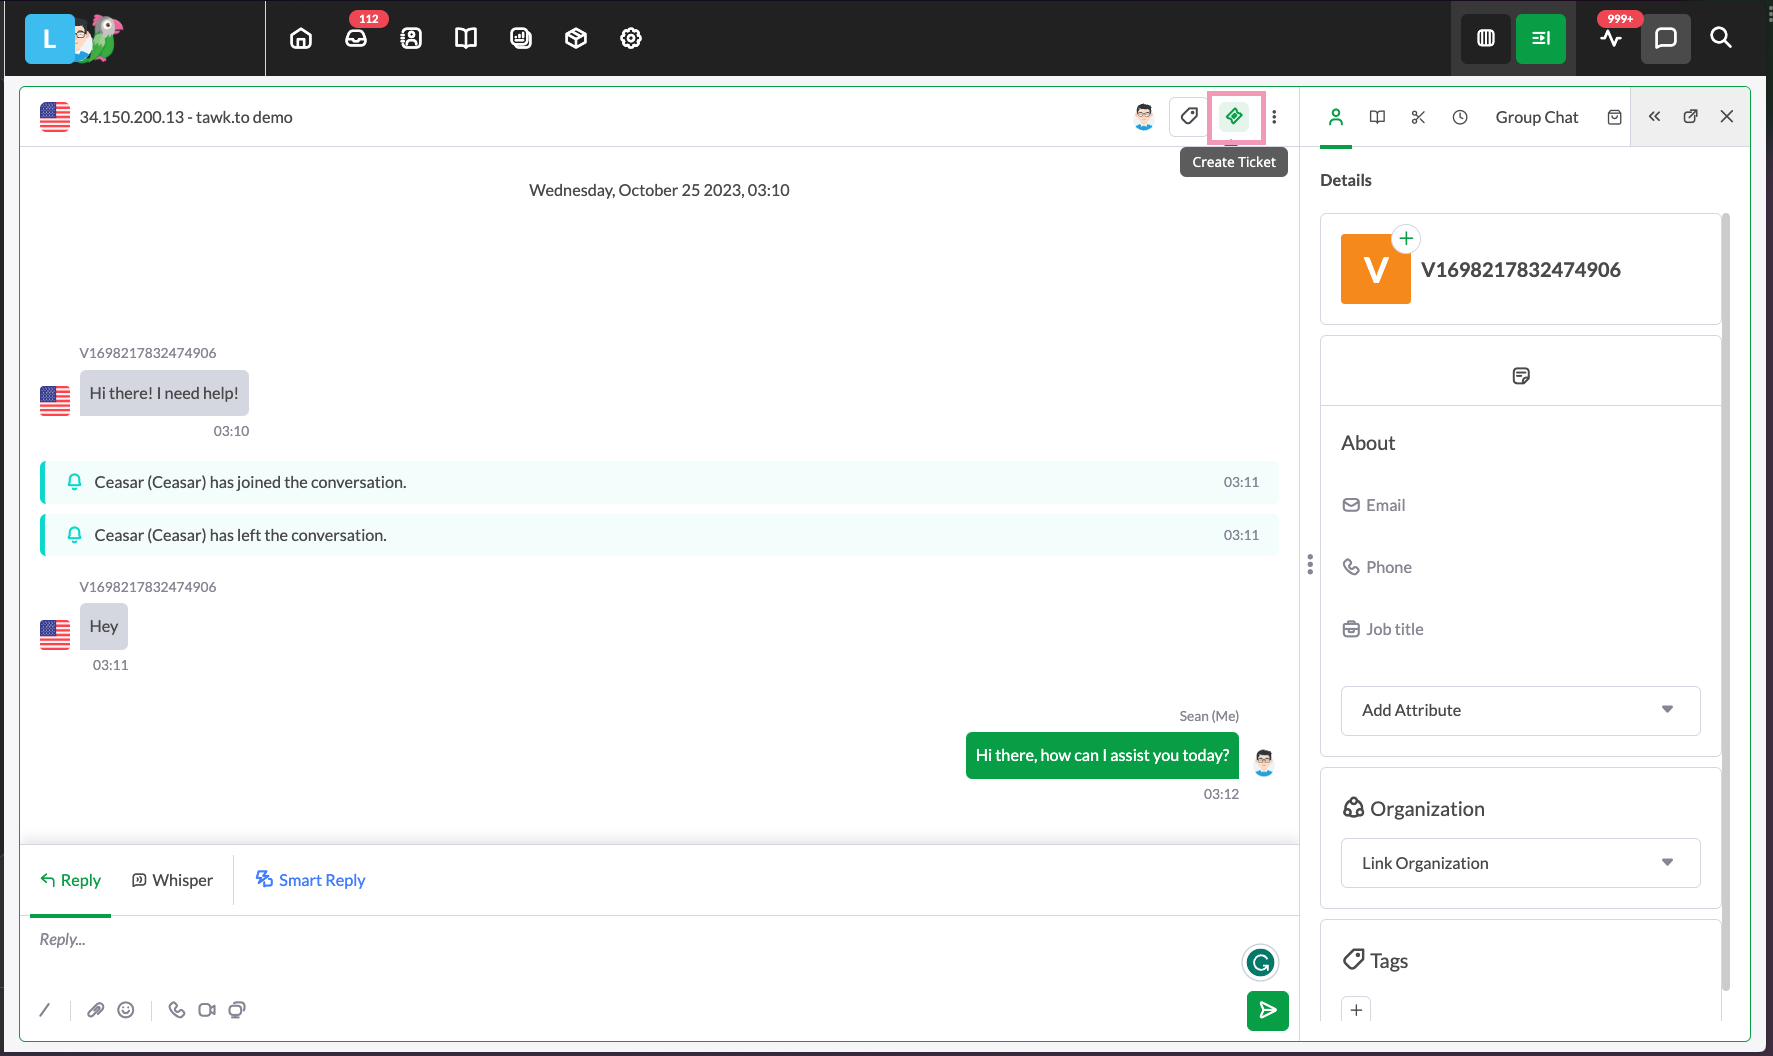
From an active chat, click the Create Ticket icon in the chat header.
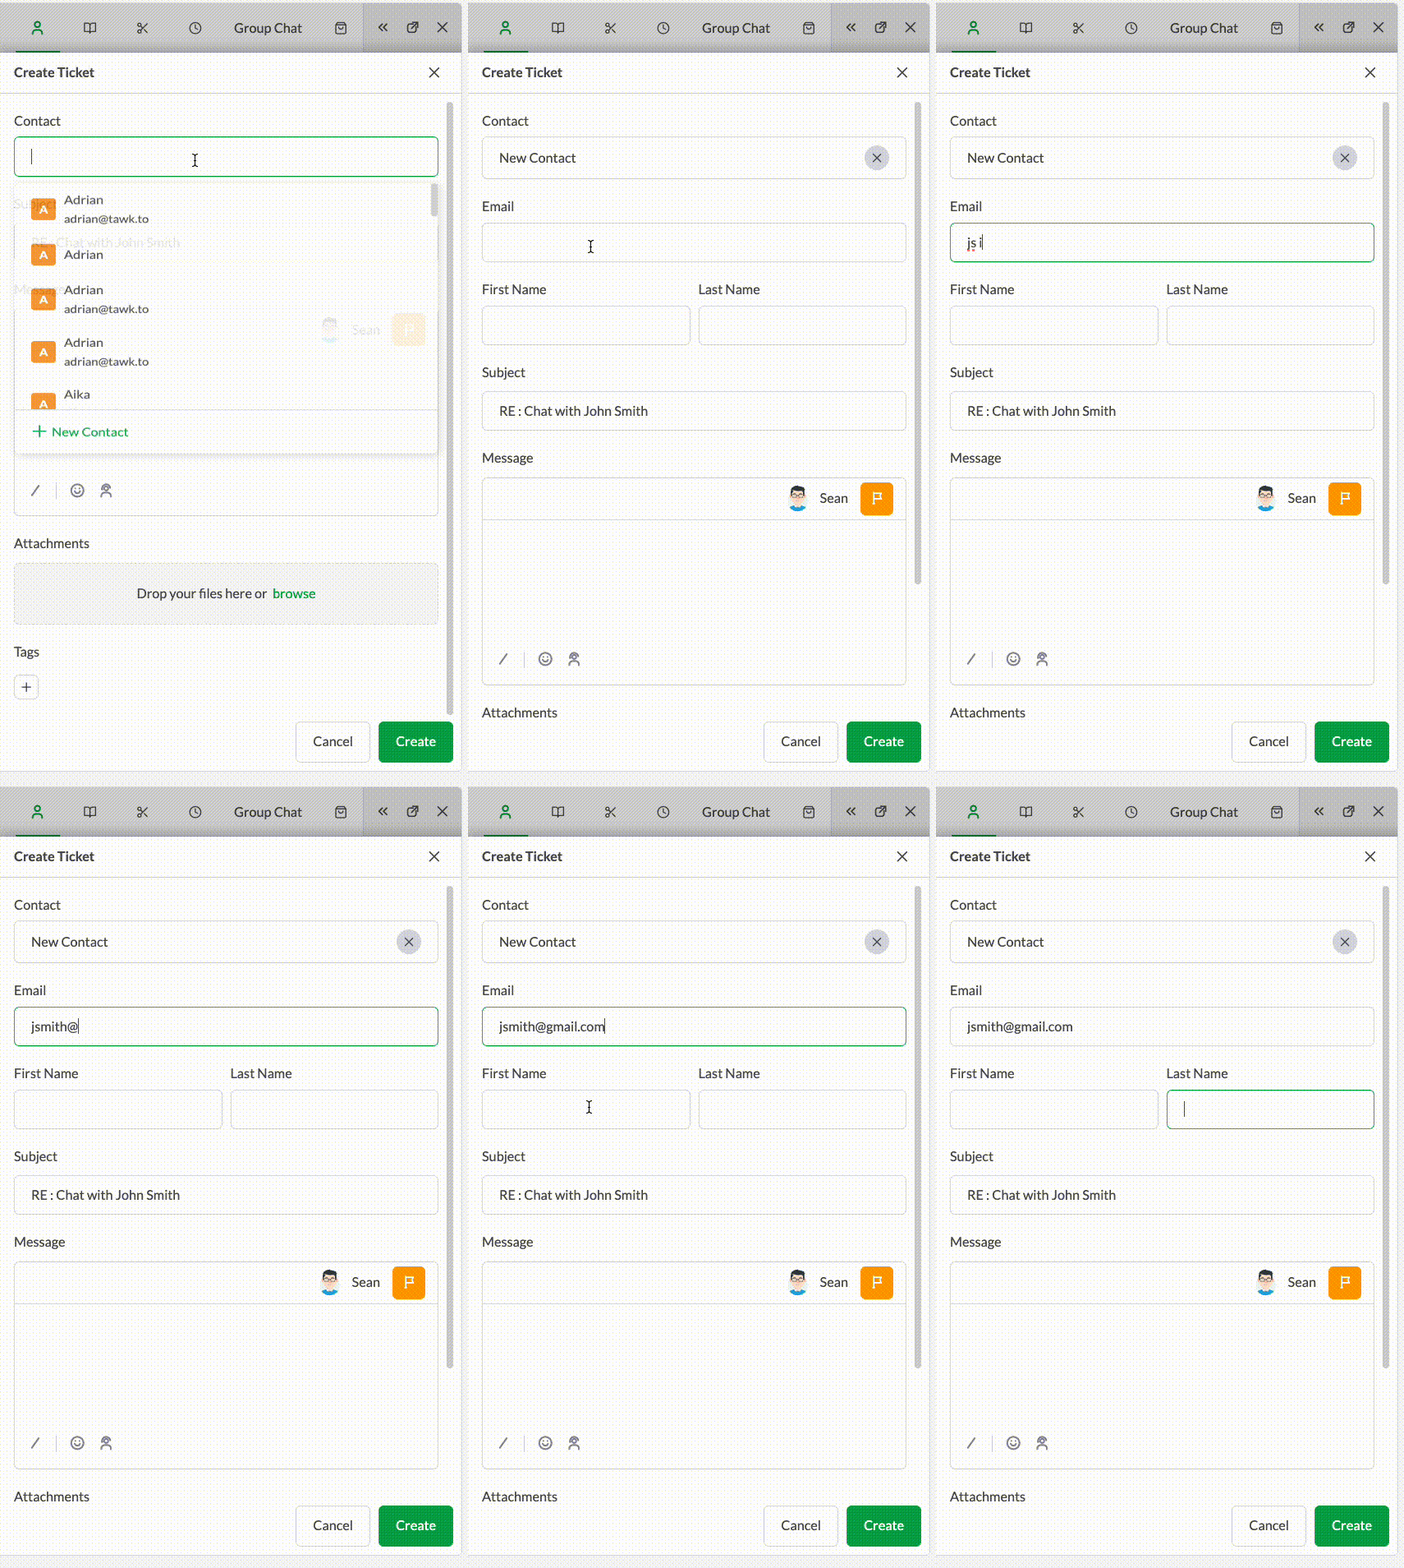
A new window will pop up in the right pane, fill in the recipient’s Name, Email, Subject, and Message and add attachments as needed.
If the visitor has an existing email in the system, the current email will be selected by default.
If you wish to use a different email, click the drop-down button, then, select the New Email option and a text box will appear.
Inside the text box, enter the email address you would like to use.
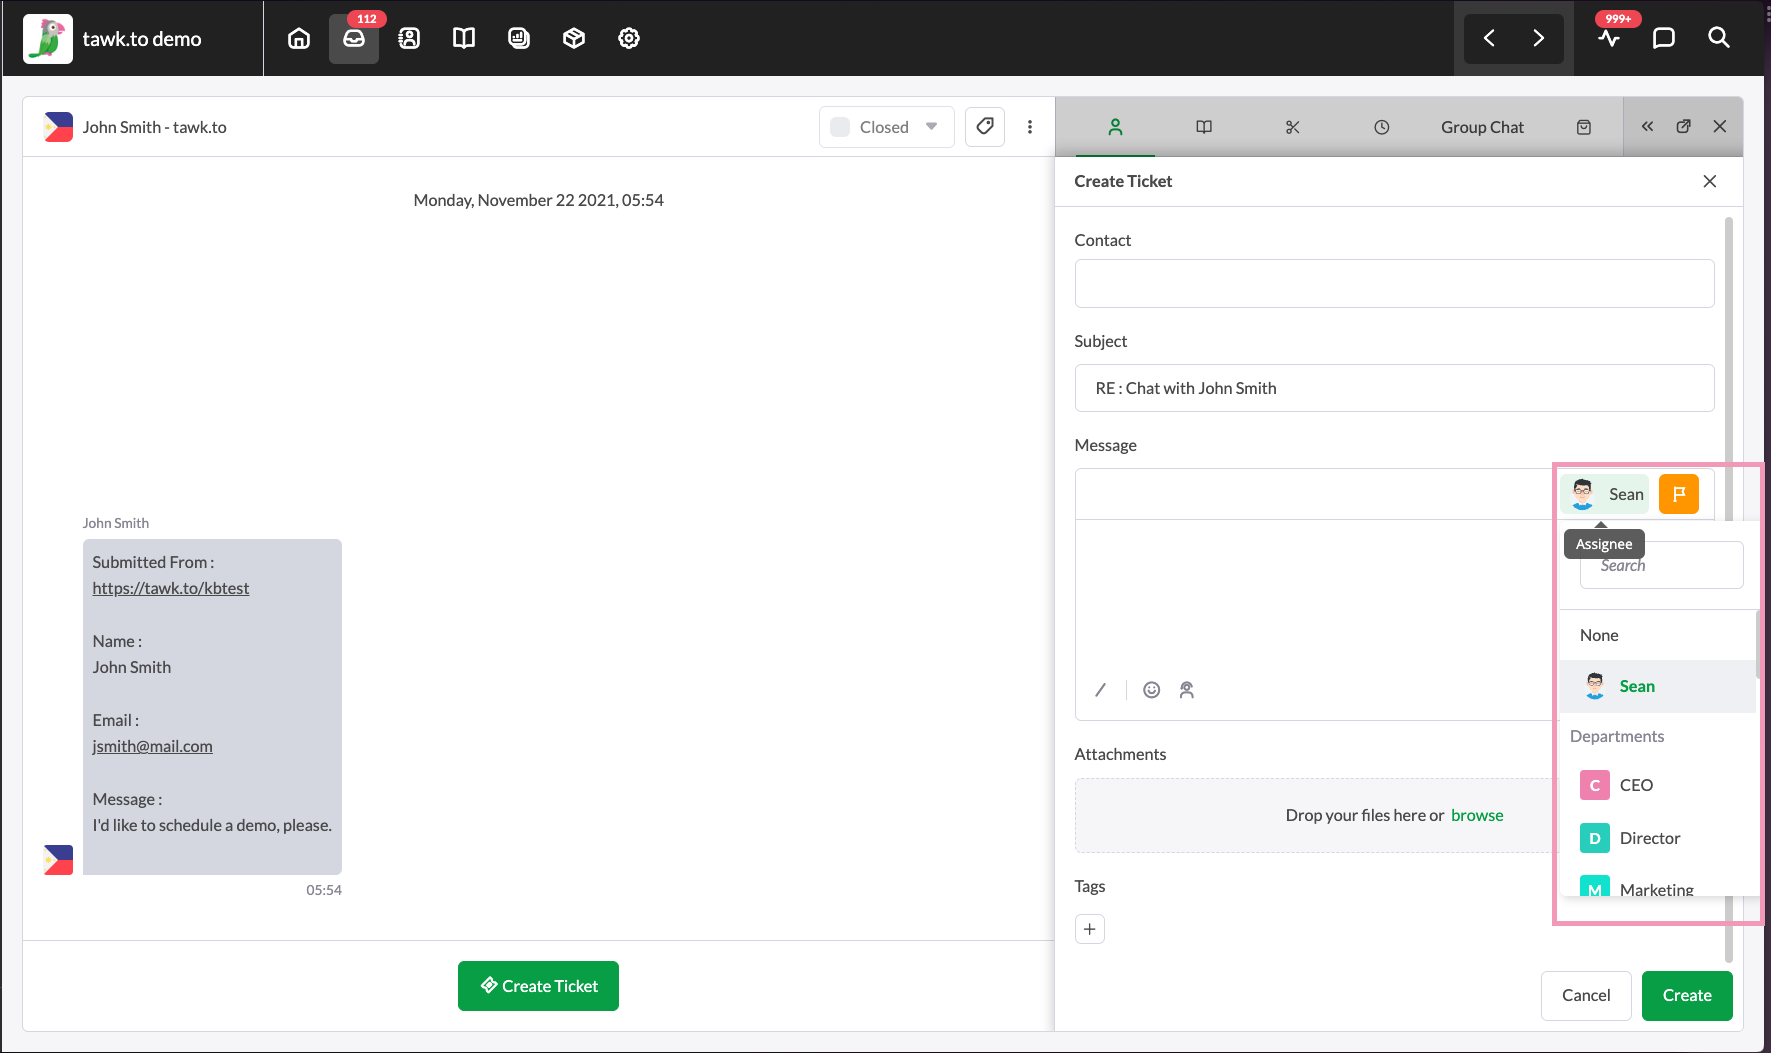
To assign the ticket, click the drop-down menu in the Assign To section and choose an agent or department. Once the ticket is created, the visitor who made the ticket and the assigned agent or all members of the department will receive an email.
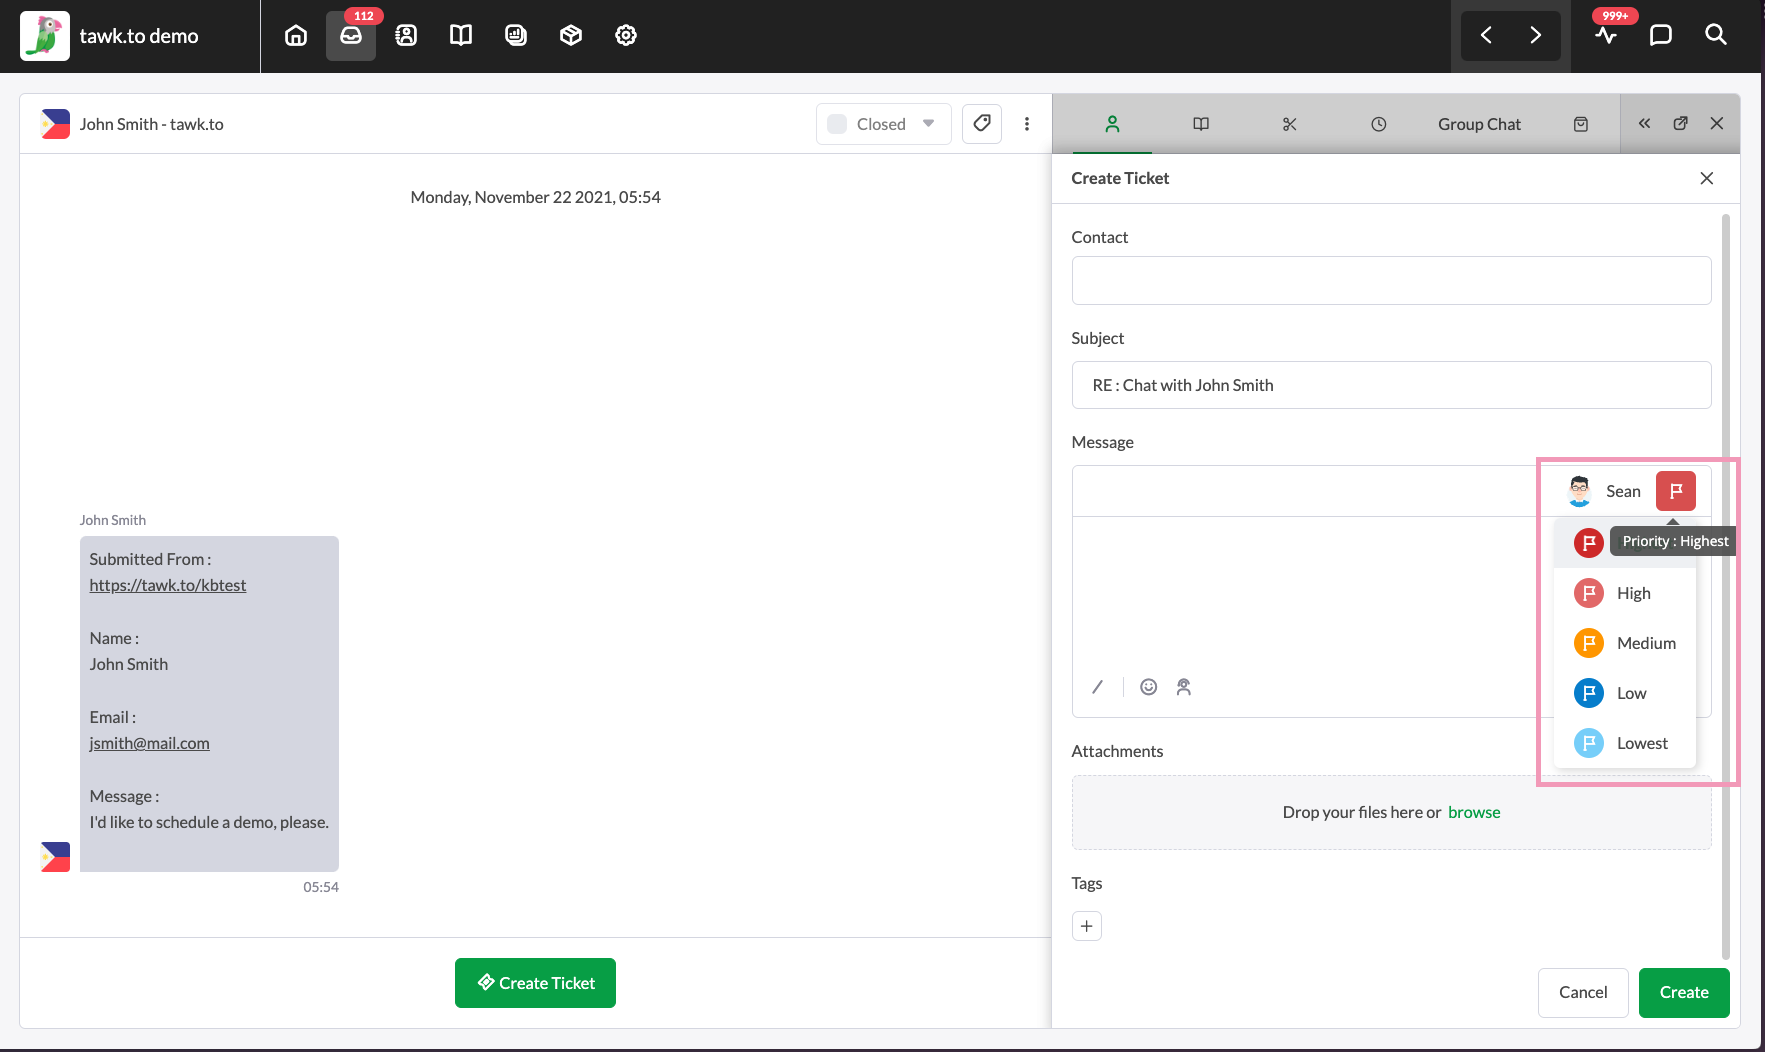
You can also change the priority level of the ticket. In the Priority section, click the drop-down menu and select from the following: Lowest, Low, Medium, High, or Highest.
To add Tags, just type in your tag keywords. Tagging allows you to search chats later and see what questions your visitors ask about each topic.
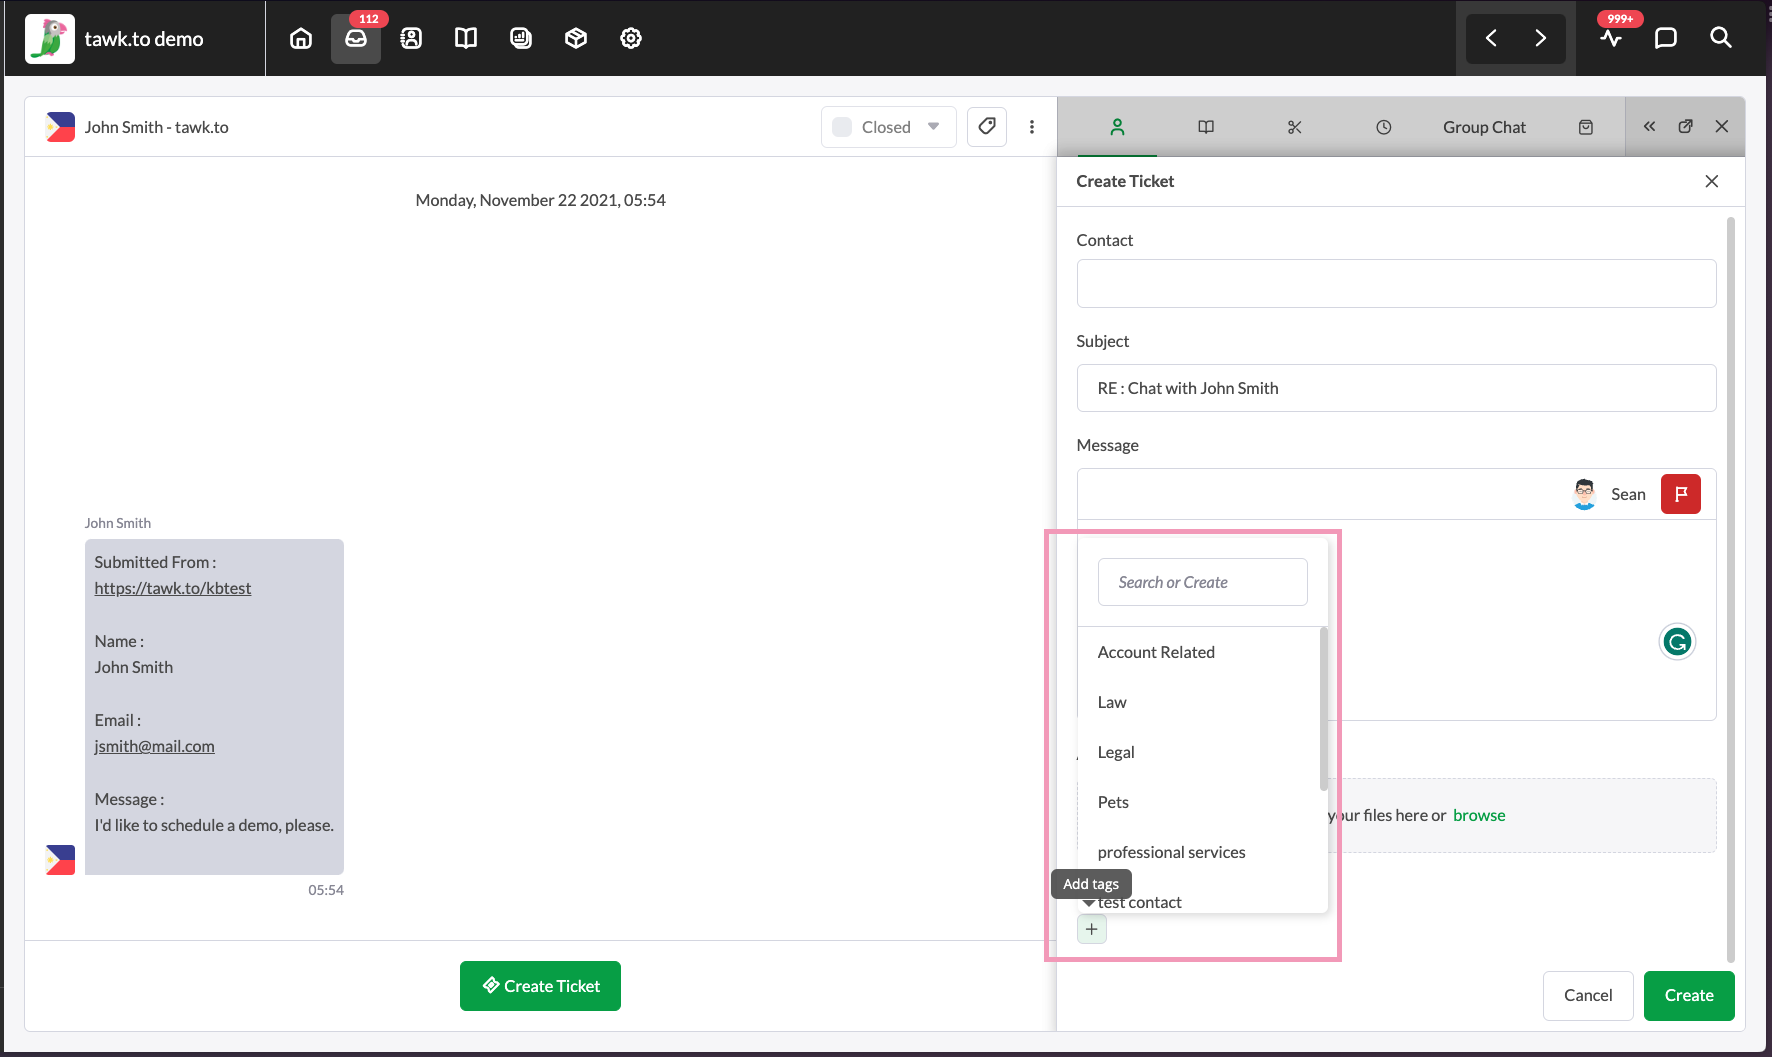
In the new text field that appears, enter one or more Tags. It will autosave the chosen tag.
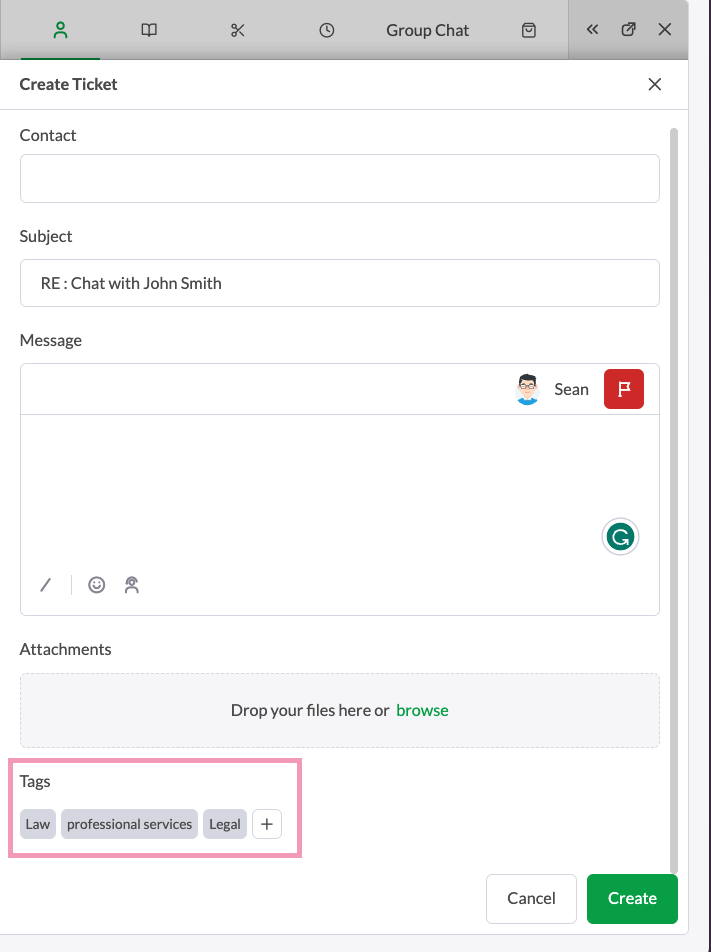
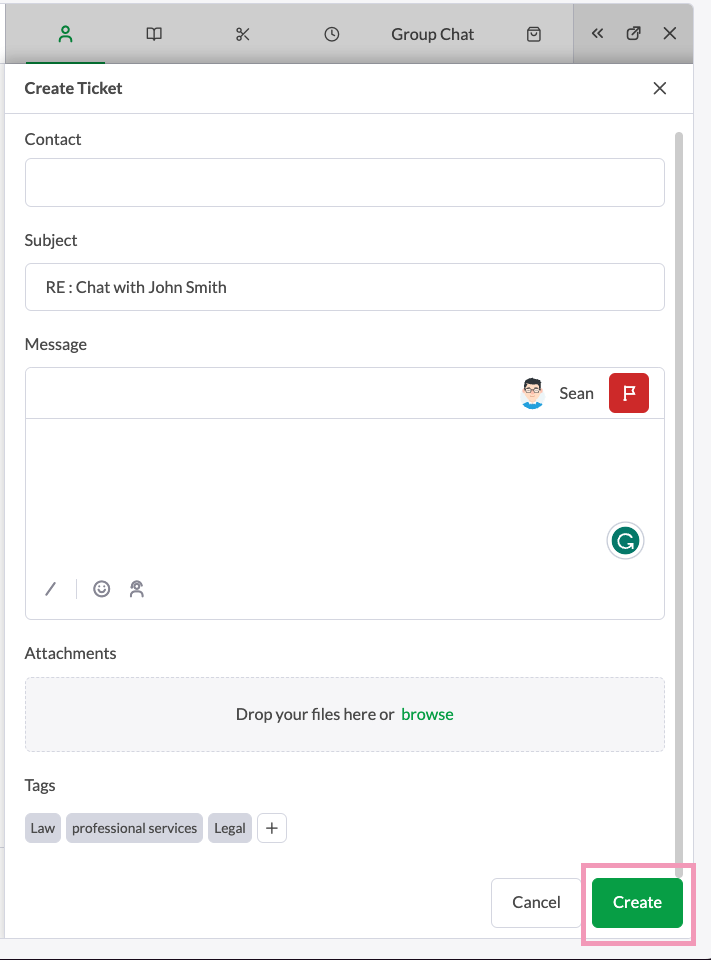
Next, click the green Create button in the lower-right corner of the ticket window to save and send your ticket.
Once created, another window will pop up that will inform you that the ticket was created successfully with the Ticket ID number. You will then have the option to either create a New Ticket or View the created ticket.

Then, you can close the ticket by selecting Close or the X button in the upper right-hand corner.

Creating a ticket from a previous chat
Open your previous messages by selecting the Inbox icon in the upper tab menu.


If you want to view only your chats, select the Mine button in the upper area of the menu.

Select a chat to create a ticket. Then, click the Create Ticket button below to create a ticket.

If you haven’t captured or added the visitor’s name and email in the information or details tab, you will need to enter these details before creating a ticket. Then enter the Subject, and Message for your ticket.

Then, in the Assign To area, click the drop-down menu to select a department or agent. You can also select a Priority level and add Tags to use later for filtering and sorting.

Lastly, click the Create button in the lower-right corner of the ticket window to save and send your ticket.

Creating a ticket from an offline message
If your chat widget is offline and you have set up a Pre-Chat Form, your visitors will be able to leave a message and their contact details so you can get back to them quickly.
To respond to an offline message via ticketing, select the Inbox icon in the upper tab menu and select Chats.

Click the chat you want to open. Then, click the Create Ticket button in the lower area of the chat window to create a ticket. Because the visitor filled out a Pre-Chat Form, their email address will automatically be added to the ticket.

Enter the details in the popup form and click the Create button.

To learn more about Responding to offline messages via Ticketing: Responding to offline messages via Ticketing
Creating a ticket from a contact profile
To create a ticket from a contact profile, select the Contacts icon in the upper tab menu.

Select People in the left menu. Then, select the name of a contact in the list.

Next, click the Ticket icon in the upper-right area of the Contacts pane.

In the new window that appears, select an email and add your subject, message and any attachments.

Then, assign the ticket to an agent or department, set the priority level, and add the tags.

Finally, click the Create button in the lower-right corner of the Ticket area.

Creating a ticket from your knowledge base
Visitors can click the Submit Ticket link in your Knowledge Base menu to submit a question or raise a ticket from a customizable pop-up form.
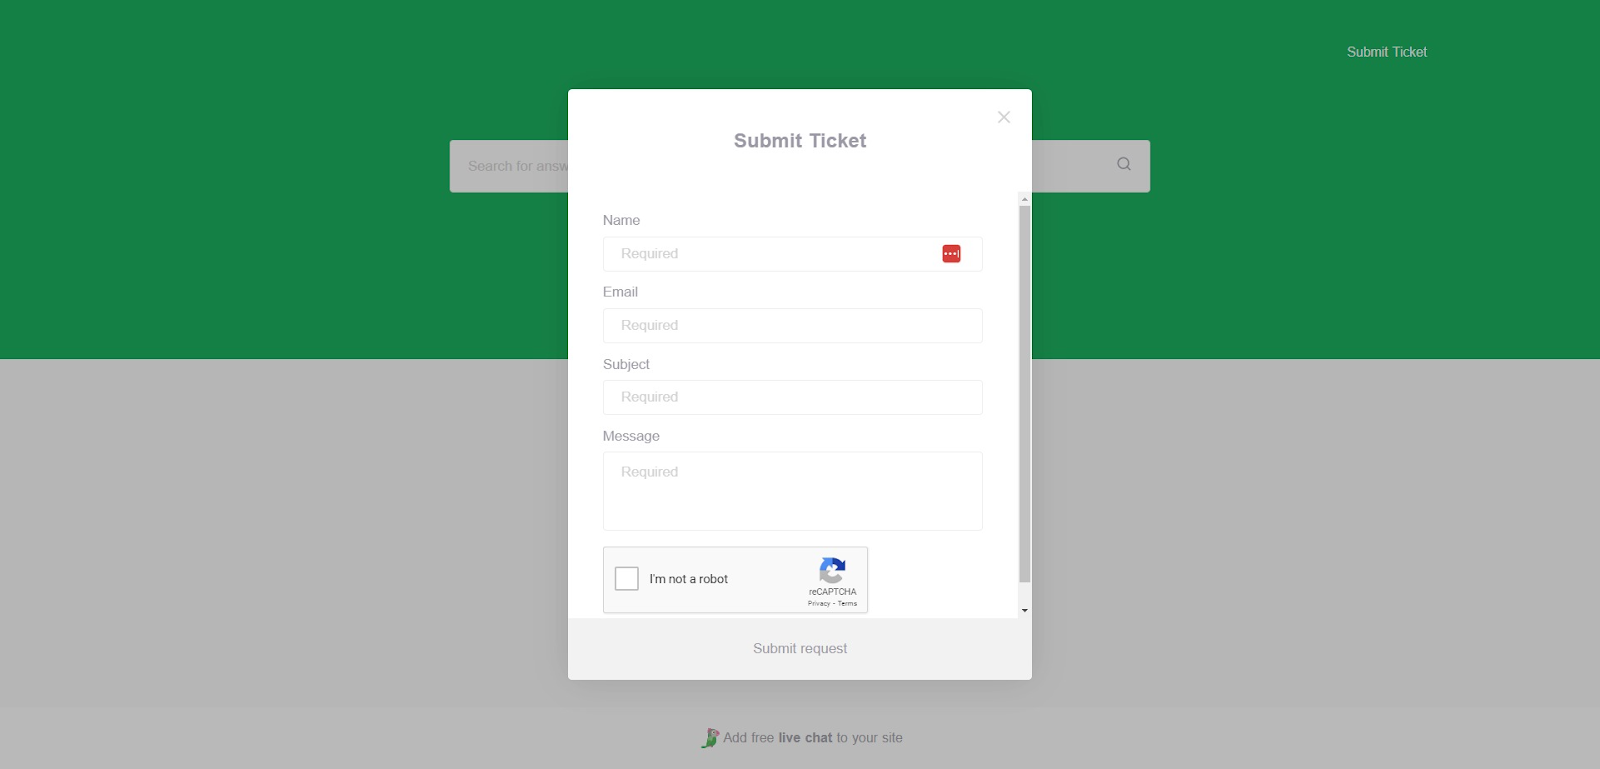
To learn more about customizing the submit ticket feature in your knowledge base: Customizing the Submit Ticket feature in your Knowledge Base
Select the Inbox icon in the upper tab menu and select Tickets.

Click an entry to view the Ticket.

You can now enter your message directly into the text field at the bottom of the screen. Click the Send (Green Arrow) icon to send your response.

The visitor will receive your message through the email registered in the ticket form.
Congratulations! You’ve mastered the skill of creating a ticket.
If you have other questions, don’t hesitate to reach out to our support team or schedule a call.
