Creating and managing shortcuts
Shortcuts are pre-written responses to streamline communication, reduce response times, and maintain consistency in customer interactions. They're helpful for answering common questions, sharing useful resources, and reinforcing your brand voice.
AI Assist uses your shortcuts as a data source to respond to your visitors’ questions exactly how you want it to.
Benefits of using shortcuts
Boost efficiency
Respond to common questions quickly without repeating the same messages.Maintain consistency
Deliver a uniform tone and message across all customer conversations.Simplify onboarding
Help new team members get up to speed faster with ready-to-use responses.Streamline resource sharing
Easily send documents, images, and links to customers directly in the chat window.Streamlined workflow
Automate tasks like tagging chats with relevant topics or routing complex inquiries to the most qualified department on your team.
Integrate with AI Assist
Use shortcuts as a data source for AI Assist to generate automated responses that reflect your predefined messaging.
Components of a shortcut
A shortcut consists of:
Shortcut name
An internal label to identify the shortcut, visible only to you and your team.
Message
This is the message that will be sent to your visitors.
Elements
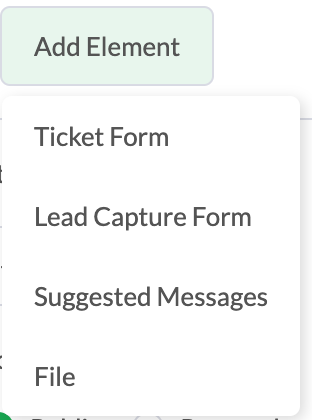
You can send visitors a file, a ticket form, and up to 4 suggested messages.
Actions
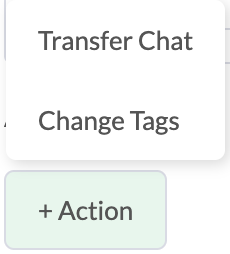
You can set automatic actions to tag the chat or transfer it to other agents or departments.
Access level
Choose whether the shortcut is public (available to all team members) or personal (visible only to you).
Associated questions
These are only visible to you. AI Assist automatically triggers the shortcut when it detects matching keywords or phrases in your visitors’ questions.
Creating a shortcut

3. Click Administration in the left navigation bar.

4. Click Shortcuts under Settings in the left submenu.

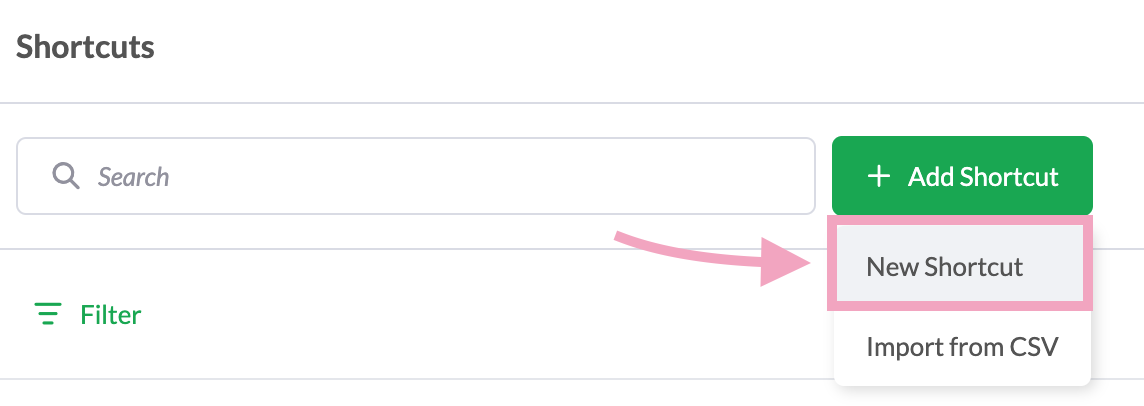
5. Click + Add shortcut and select New Shortcut.
6. Enter a descriptive shortcut name.

7. Enter the message you want to send to your customers.

8. Click Add Element to send a file, ticket form, or up to 4 suggested messages.
9. Click + Action to change tags or transfer the chat to other agents.
10. Click + Add question to add up to 5 related questions to train AI Assist.

11. Click Save.
Formatting shortcut messages
You can format your messages using Markdown syntax:
Bold: *bold text*
Italic: _italic text_
Numbered list: 1. Item
Bullet list: - Item
Quote block: > quote
Code block: `code`
Hyperlink: [text](https://example.com)
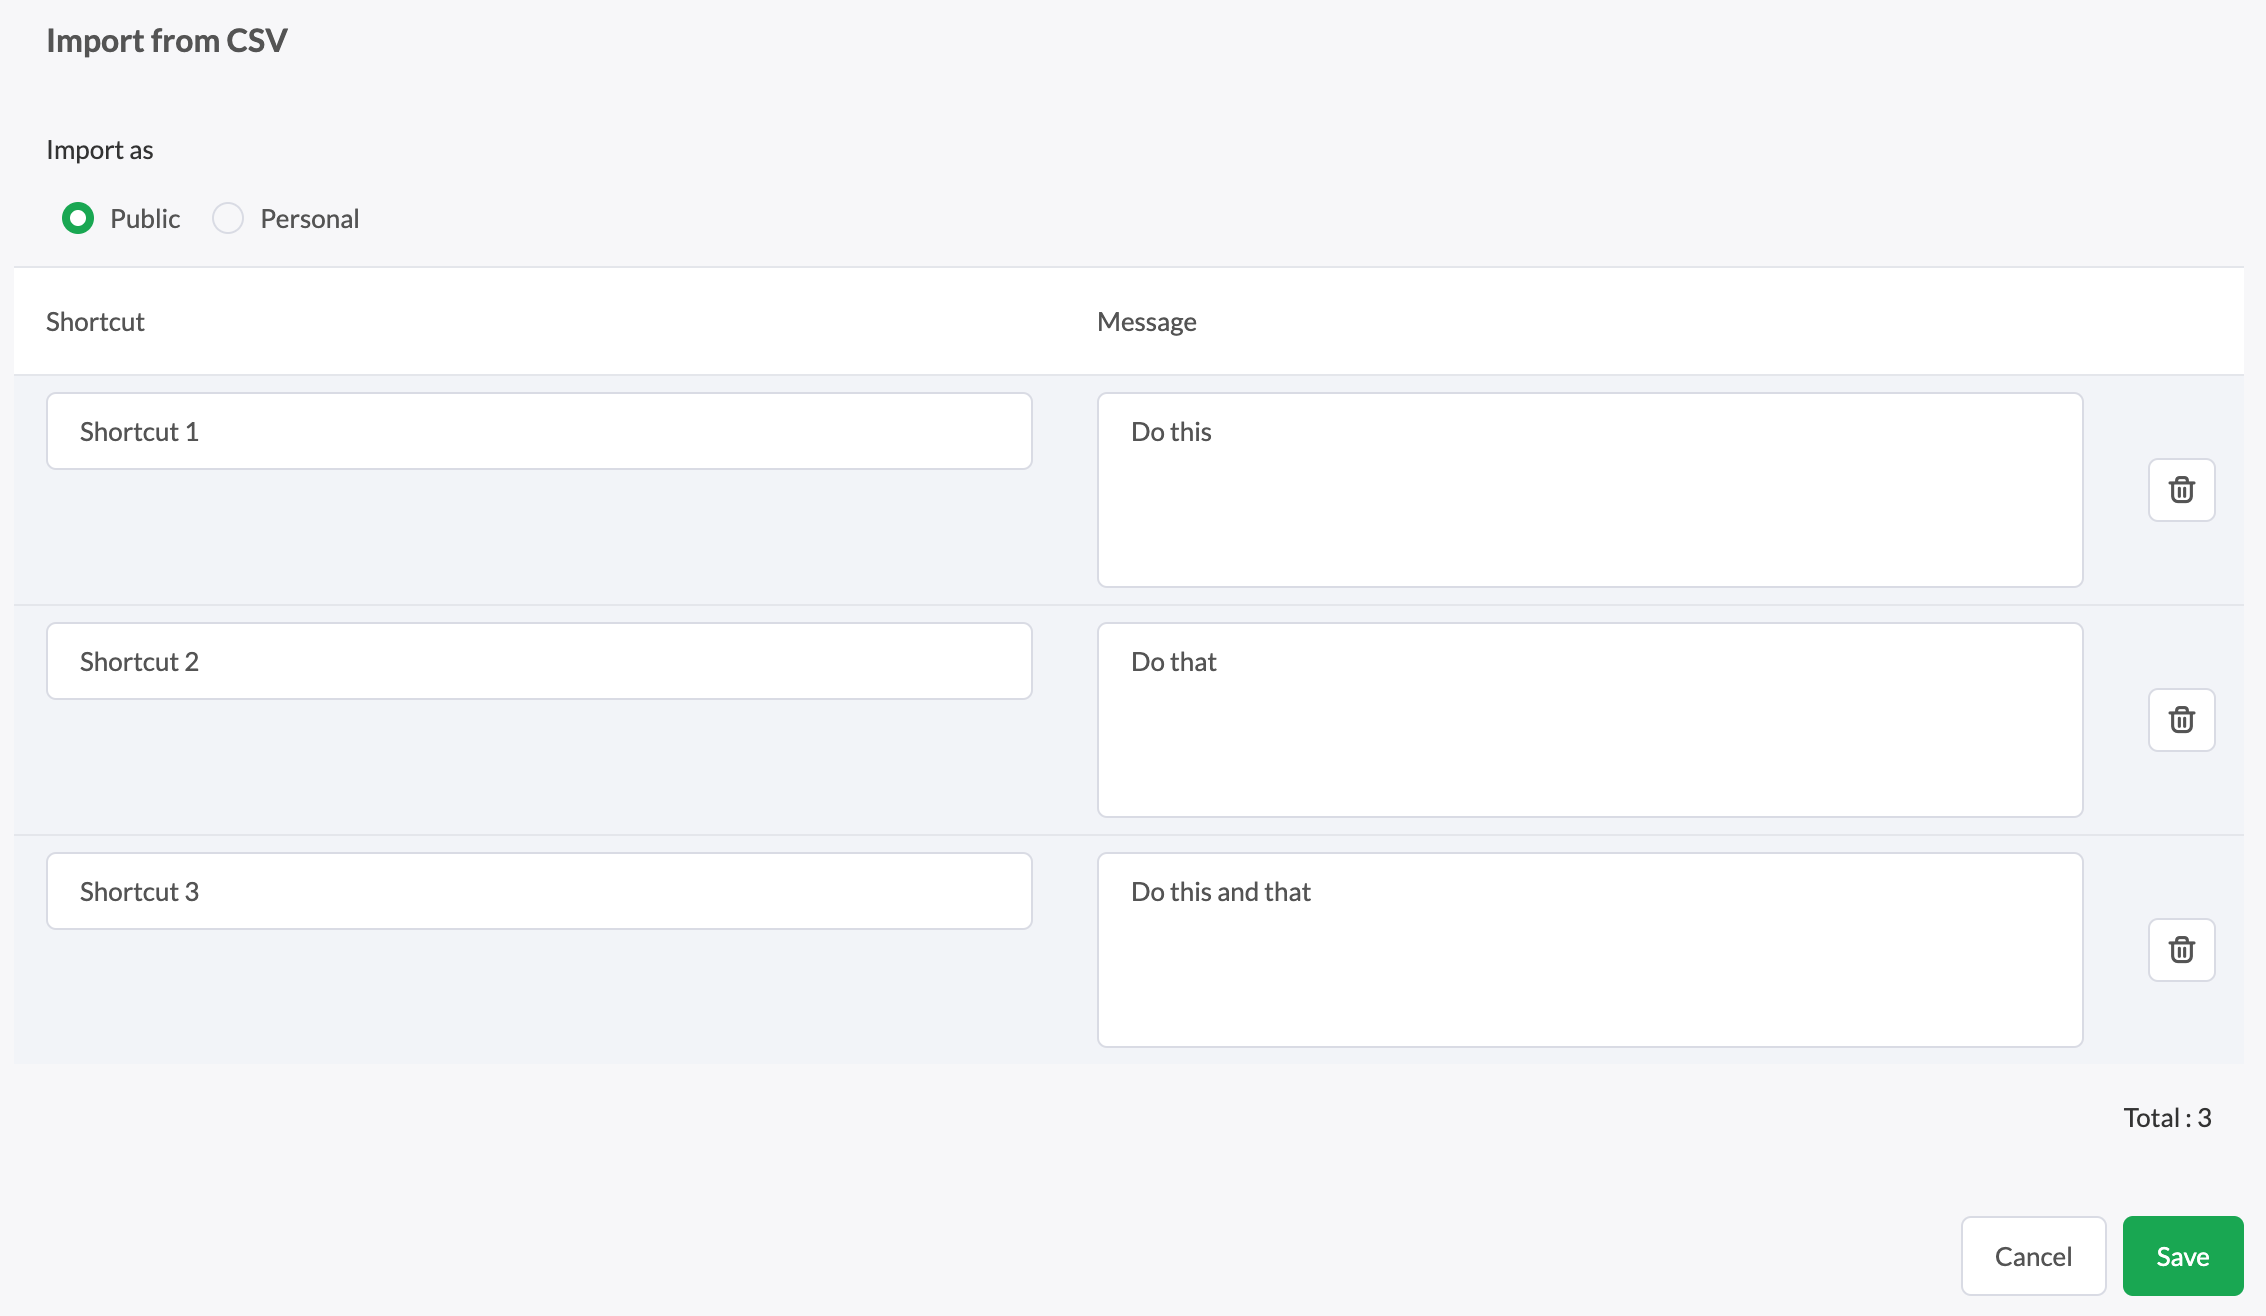
Importing shortcuts via CSV
To import multiple shortcuts:
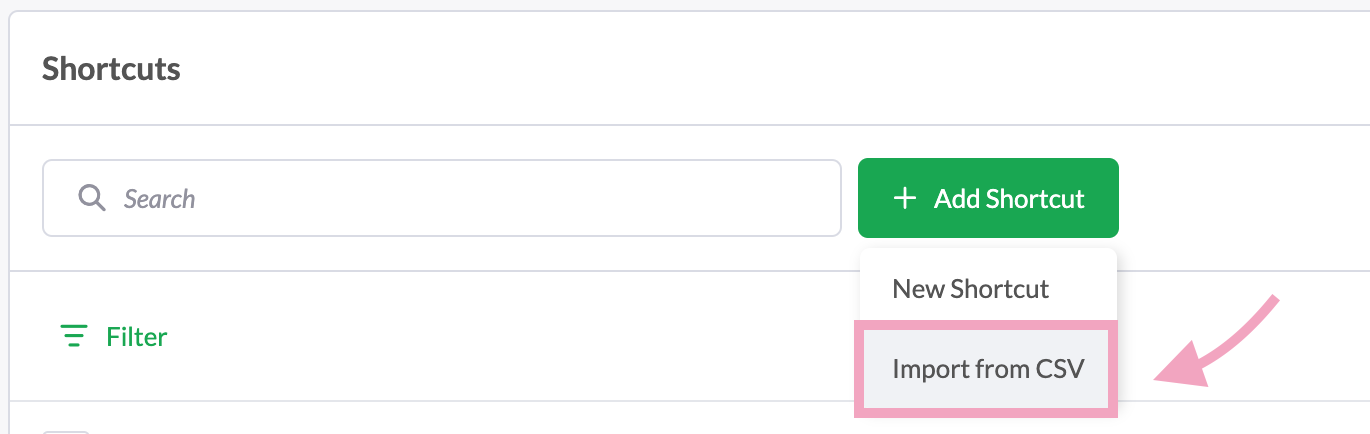
2. Click + Add Shortcut and select Import from CSV.
3. Select your CSV file containing shortcut names and messages.
4. Edit your shortcuts, if needed, and click Save.
For step-by-step instructions on preparing your CSV file, see this guide:
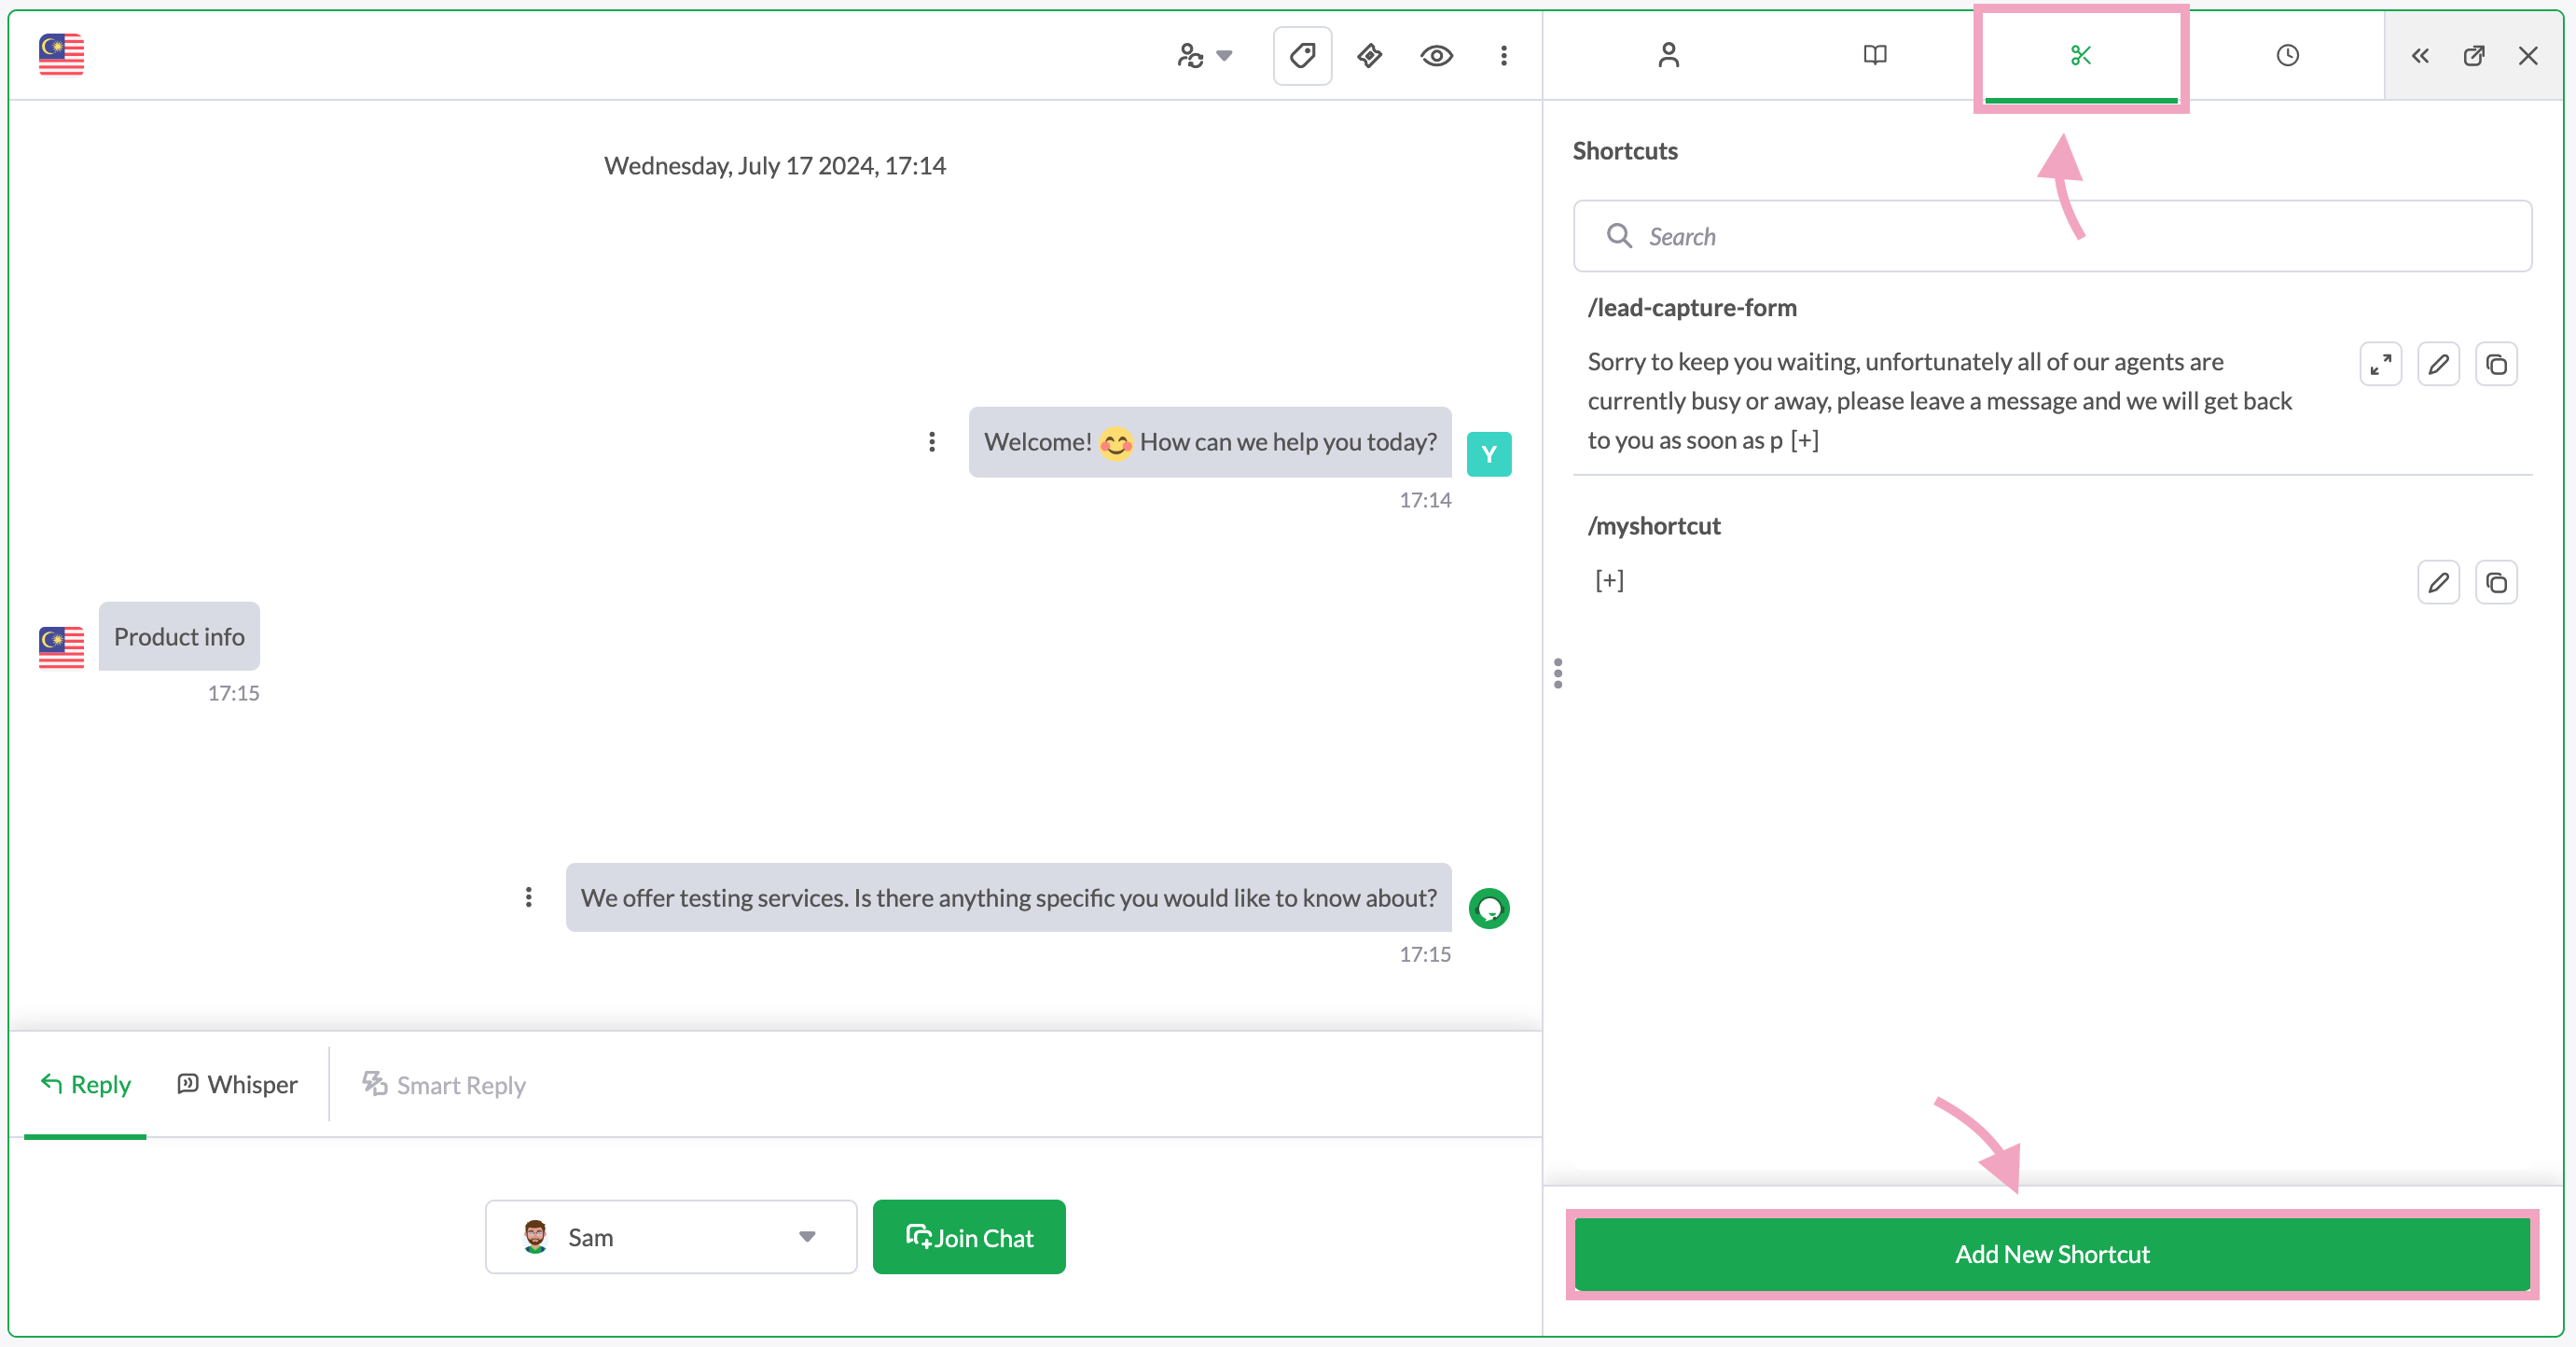
Creating shortcuts in chats
Select the Shortcuts tab on the right of the chat, and click Add New Shortcut.
Adding shortcuts in AI Assist’s Data Source
1. Click Automation in the left navigation bar.

2. Click Data Sources in the left submenu.

3. Click + Add in the upper right corner of the page and select Shortcut or Shortcuts from CSV. Enter and check the required details. Click Save when you’re done.

Adjust your AI agent’s Reply Handling settings for shortcuts
1. In the Automation page, click Agents in the left submenu.

2. Select your AI agent.
3. Click Knowledge in the left menu.

4. Click Shortcuts.

5. Under Reply handling, click the dropdown and choose how your AI agent should use shortcut content:
- Send exactly as written — Sends the shortcut response without changes.- Adapt only if it conflicts with your Instructions — Keeps the shortcut content intact unless updates are needed to follow your AI agent’s Instructions.
- Rewrite in the agent’s voice — Rewrites the shortcut content to match your AI agent’s configured tone and style.

6. Ensure the shortcut’s toggle is enabled.


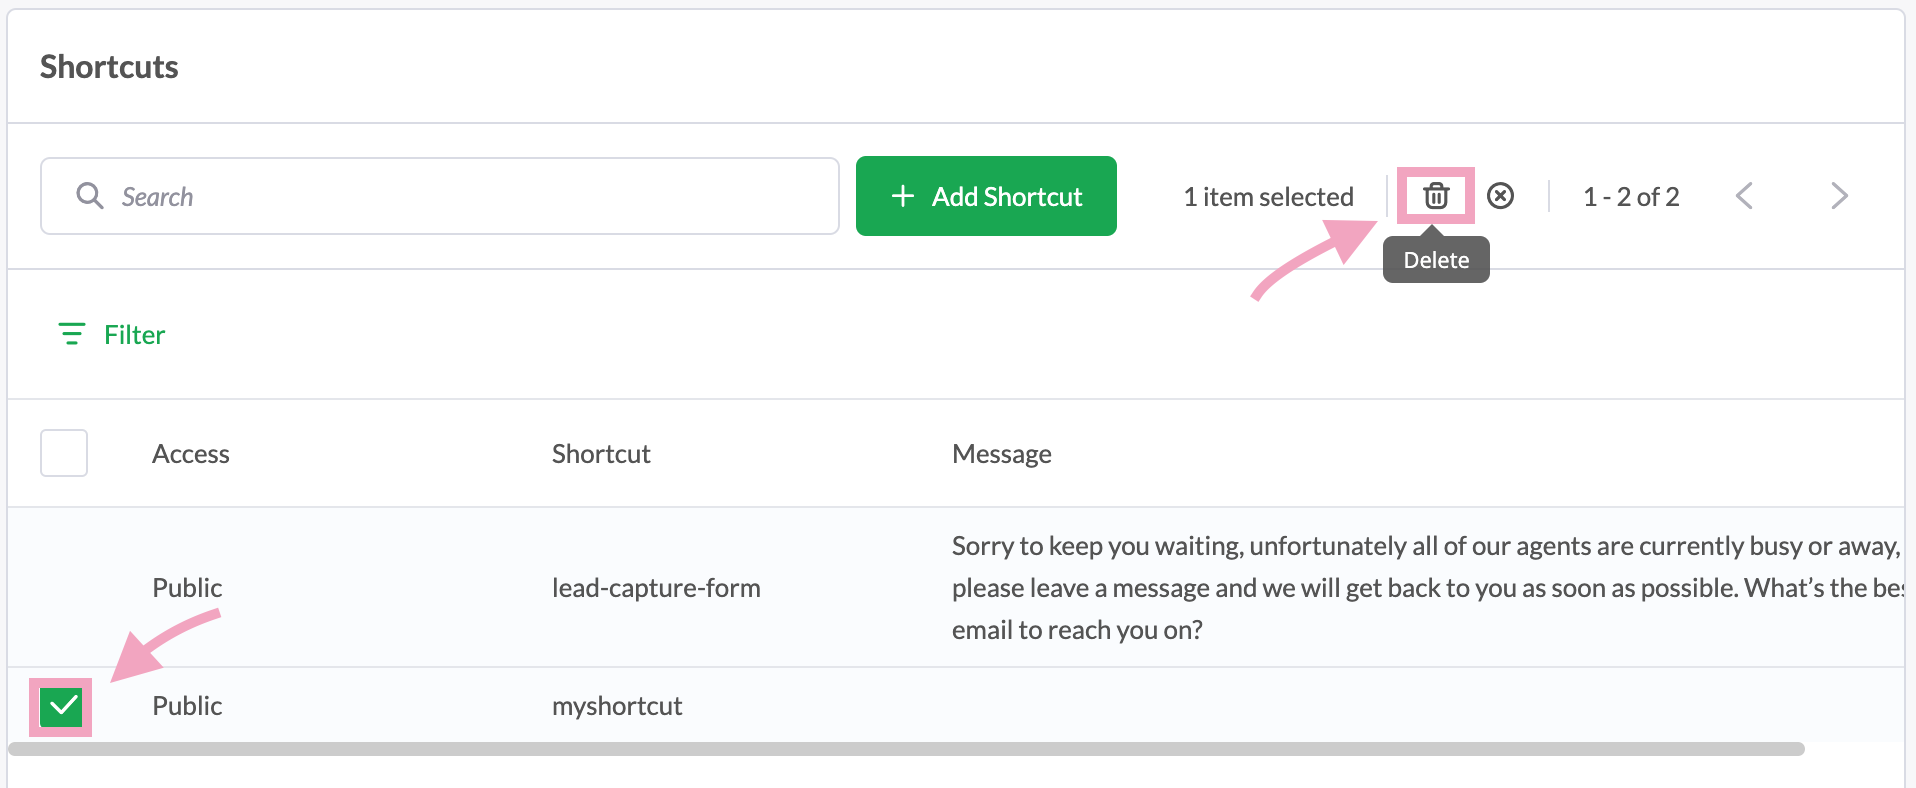
3. Click Administration in the left navigation bar.

4. Click Shortcuts under Settings in the left submenu.

5. Click the shortcut you want to edit.

6. Make the changes and click Save.
7. To delete a shortcut, click the checkbox next to the shortcut and click the “Delete” icon.
Android: See Creating and managing shortcuts on Android
Using shortcuts
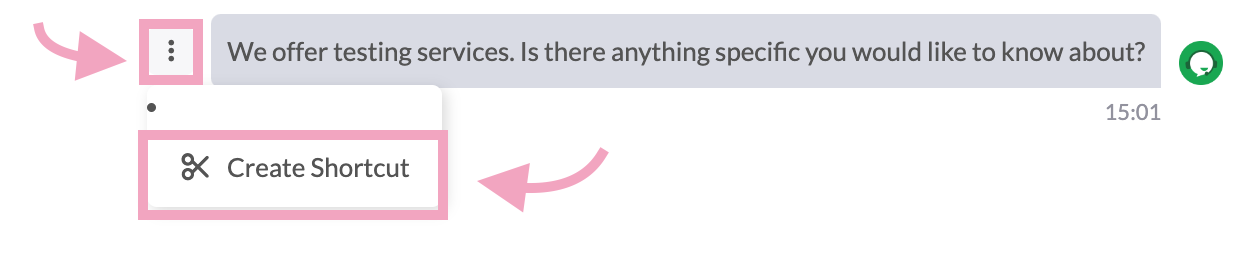
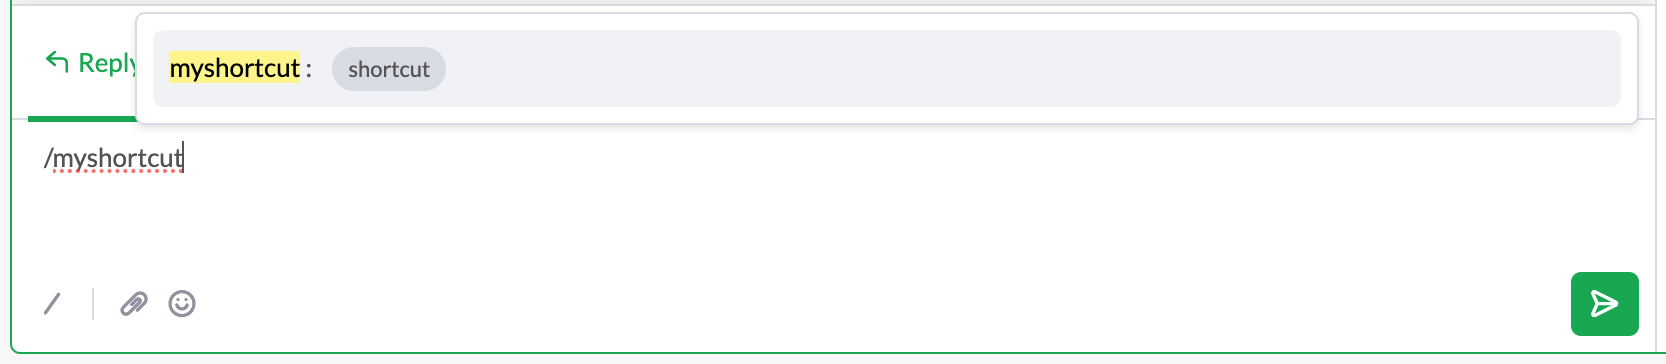
Type “/” followed by the shortcut name to insert a shortcut in chats and tickets.
Example:
/myshortcut
Make sure to test your shortcuts regularly to ensure they work as expected and provide a smooth experience for your customers.
Global shortcuts
Available only to you and accessible across all properties. Learn more here: Creating and managing global shortcutsProfile shortcuts
Limited to your profile page and not used by AI Assist. Learn more here: Managing and creating profile shortcutsAI Assist integration
Define your shortcuts clearly to improve the accuracy of AI Assist’s automated responses. To learn more about AI Assist and its data sources, see these guides:
Understanding AI Assist’s Data Sources
Understanding how AI Assist prioritizes your data sources
Related guides
If you have feedback about this article, or if you need more help:
Click the green live chat icon
Schedule a call with us
Visit our community