Creating and managing group chats
Group chats are used to communicate with other agents associated with you so you can discuss problems, issues, or strategies about a property. With Group chats, you can send messages to more than one agent at a time. These are perfect for announcing news or updates about a property and discussing property-related problems, issues, or strategies.
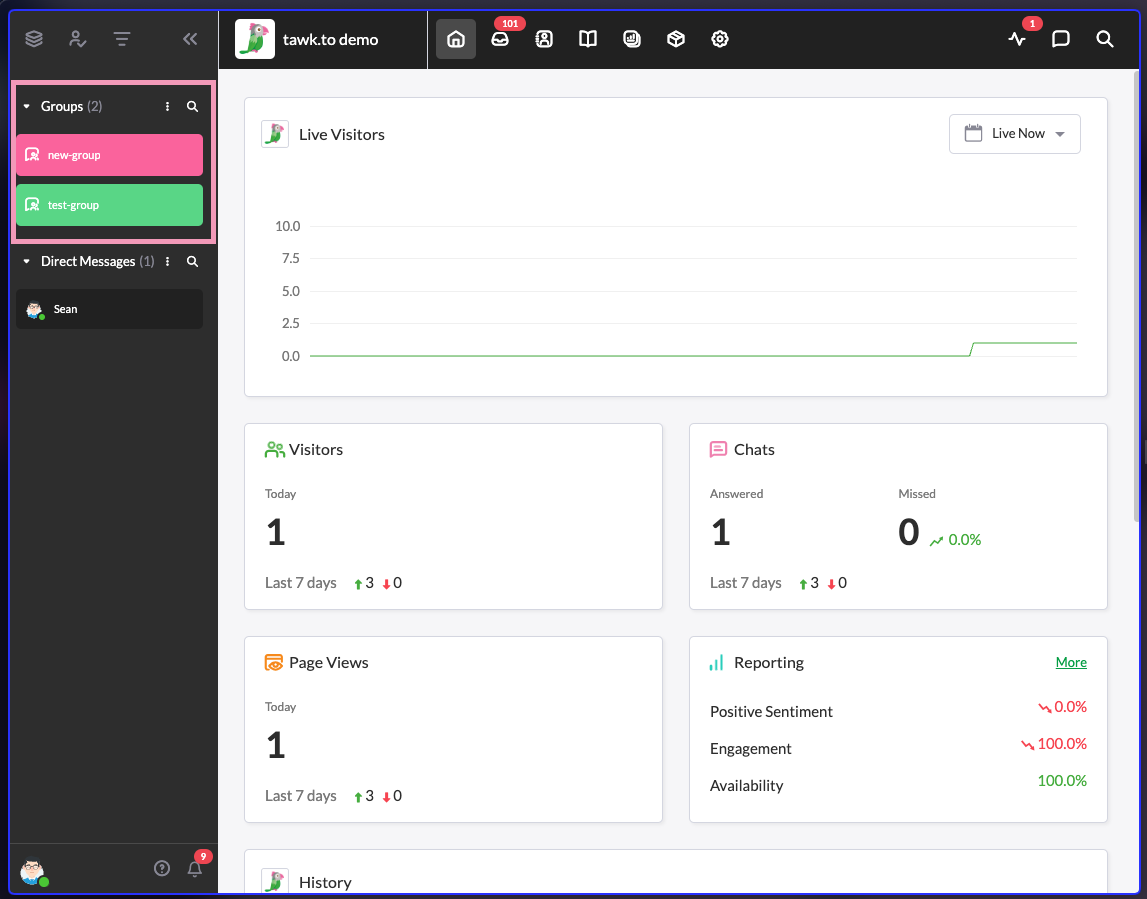
Once you log in to your tawk.to account, look for the Groups section on the left side of the screen.

Create a group chat
To create a group chat, click the more options (three dots) icon next to the heading. Then, select + New Group in the drop-down menu.

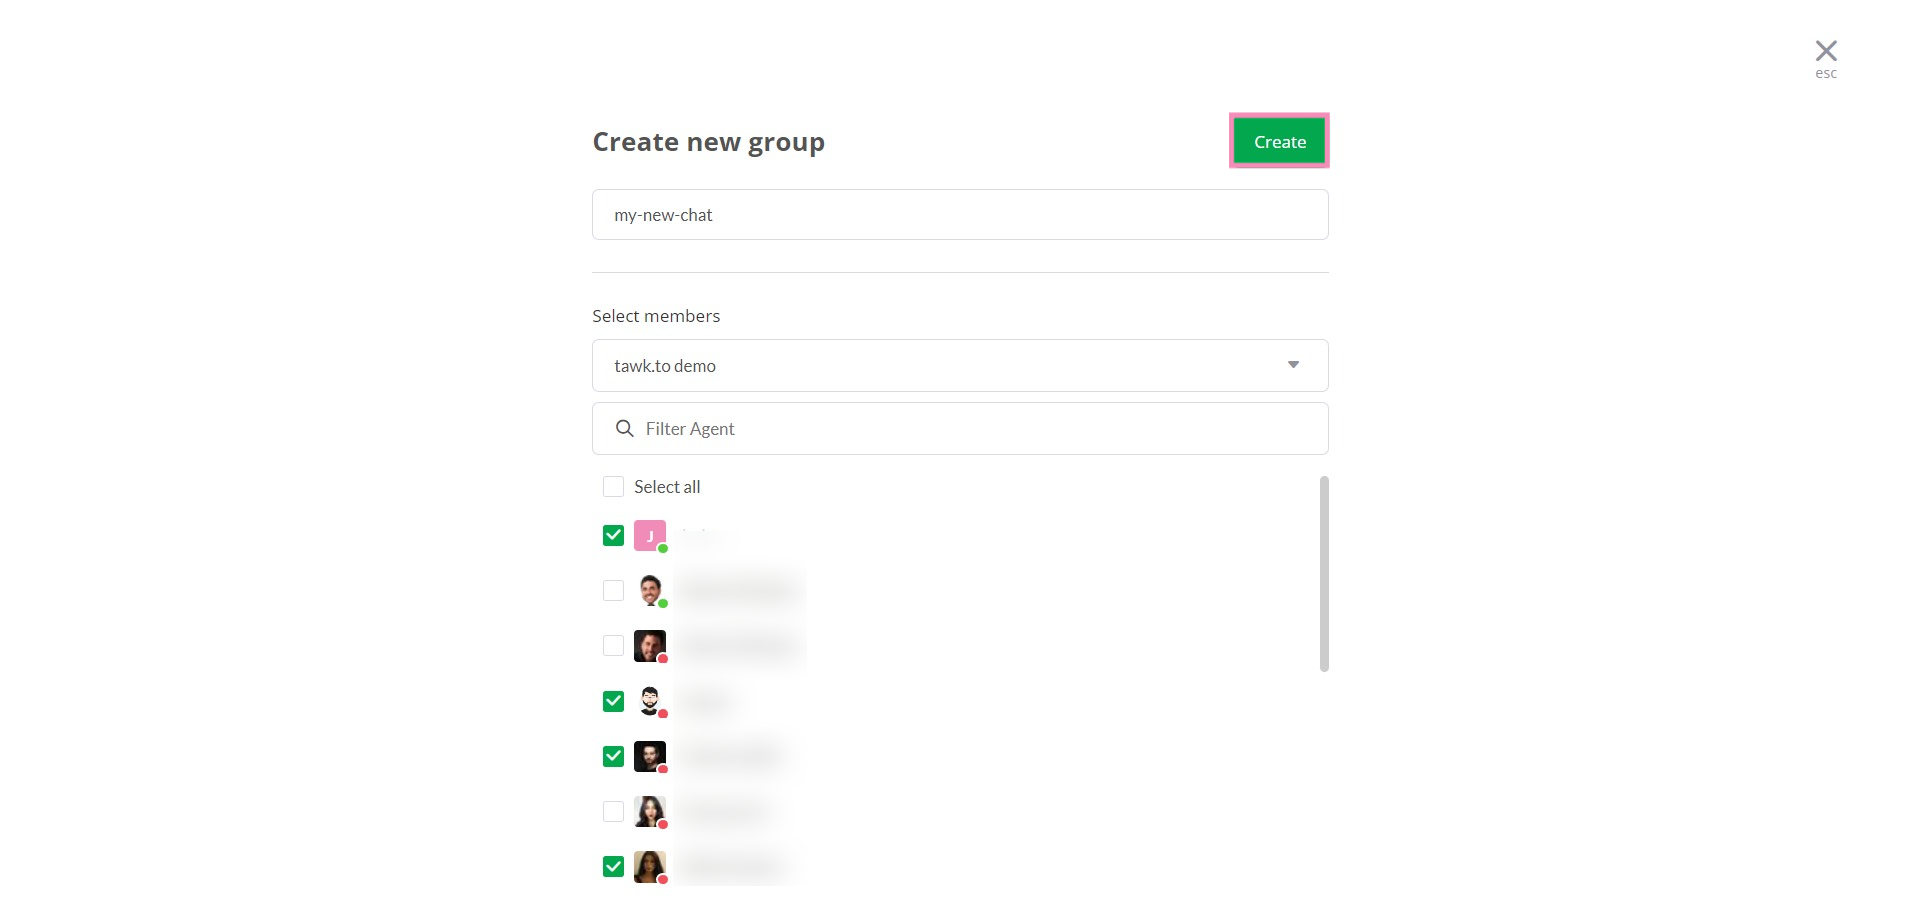
Give your new group a name and use the drop-down menu to select one or more properties to participate in the group chat. The group name can be the title of an announcement or the topic of the conversation that will be held in the chat.
Please note: Names must be lowercase, alphanumeric and can contain hyphens (-) and underscores (_). Names cannot include spaces.
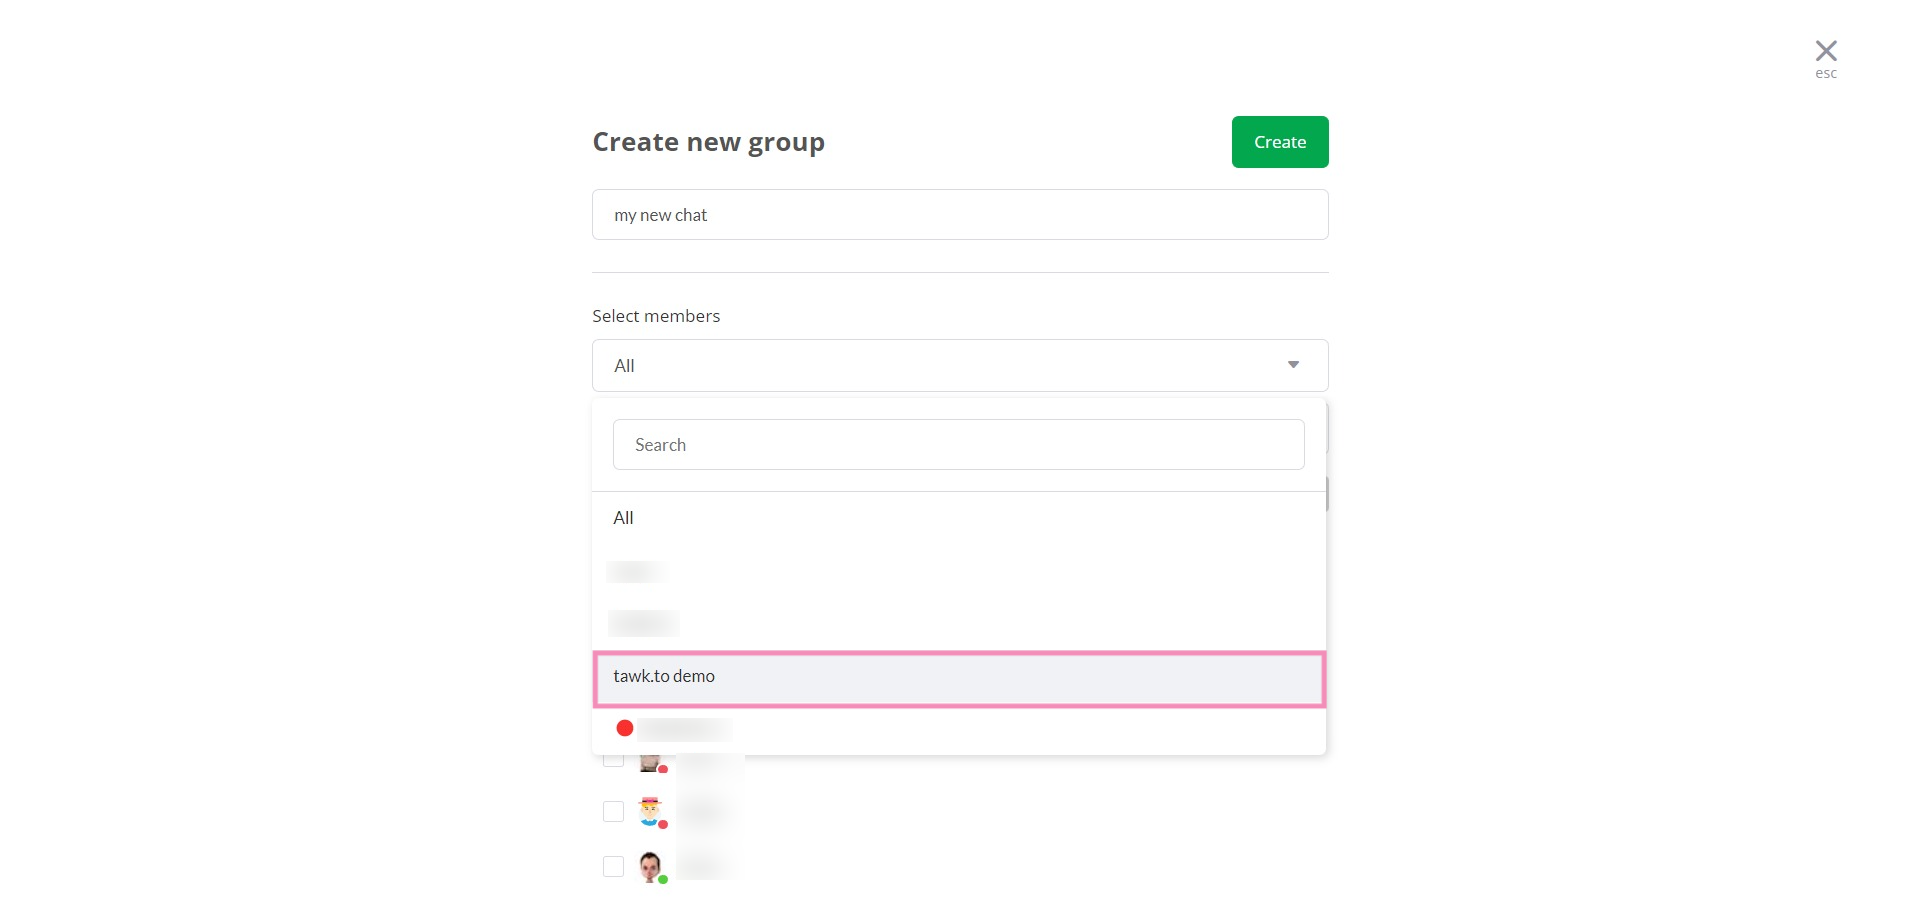
Then, select the names of two or more agents in the list or use the search function to find the agents you’re after.
Click the Create button in the upper right to confirm your selection.
The new group chat window will then open and all invited agents will see a new group message in their dashboards.
On the right, you'll see a list of the group members and the online status for each.
If you need to navigate back to the thread later, simply select the chat in the sidebar under Groups.

Manage group chats
Both admins and agents can create and manage unlimited group chats. You can set up a group chat for each department in your business or each separate business.
All of your group chats can be found in the left sidebar of your dashboard under the Groups heading.
Editing group names and adding members
Any group member can edit the group name, add members to the group chat, and leave the group chat.
Changing the name of a group
Select a group and click the options (three dots) icon in the chat header menu to make any changes to the group details or membership.
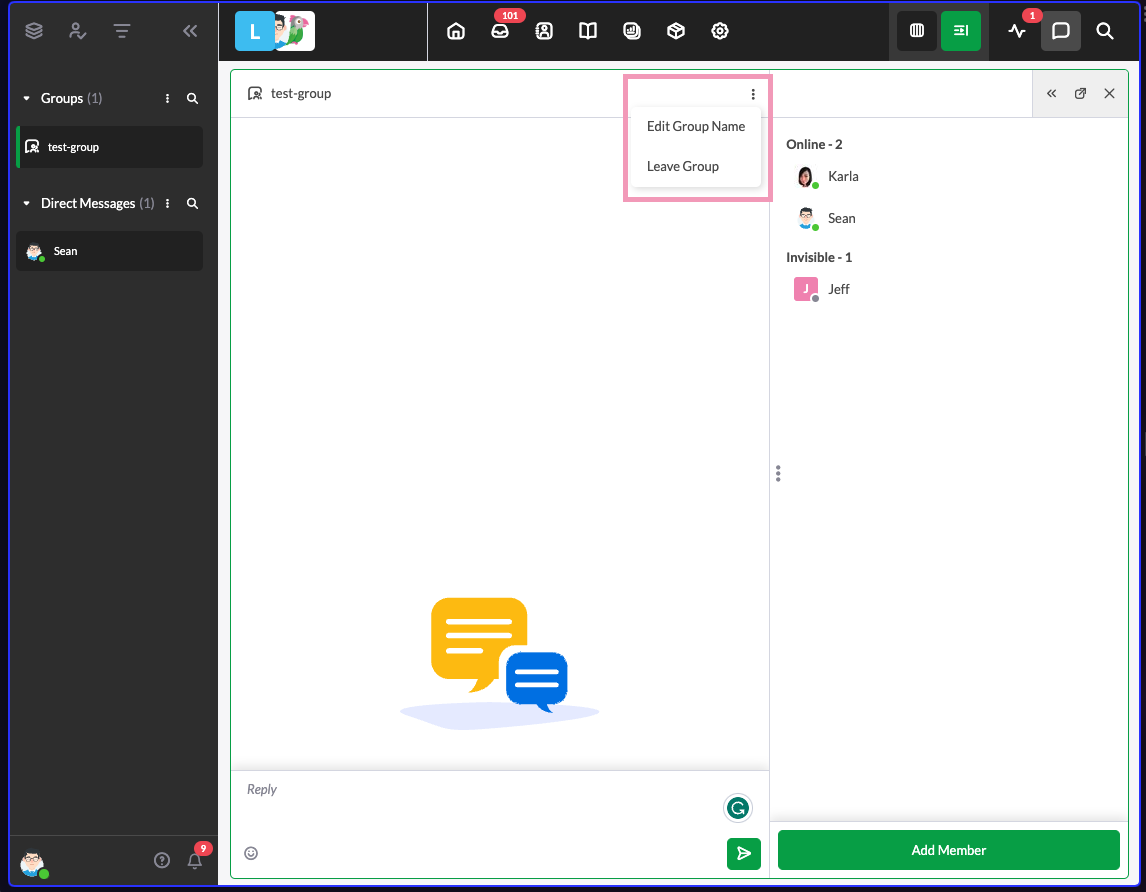
Select the first option to edit the group name. Then, enter a new name and click the Save icon

Leaving a group
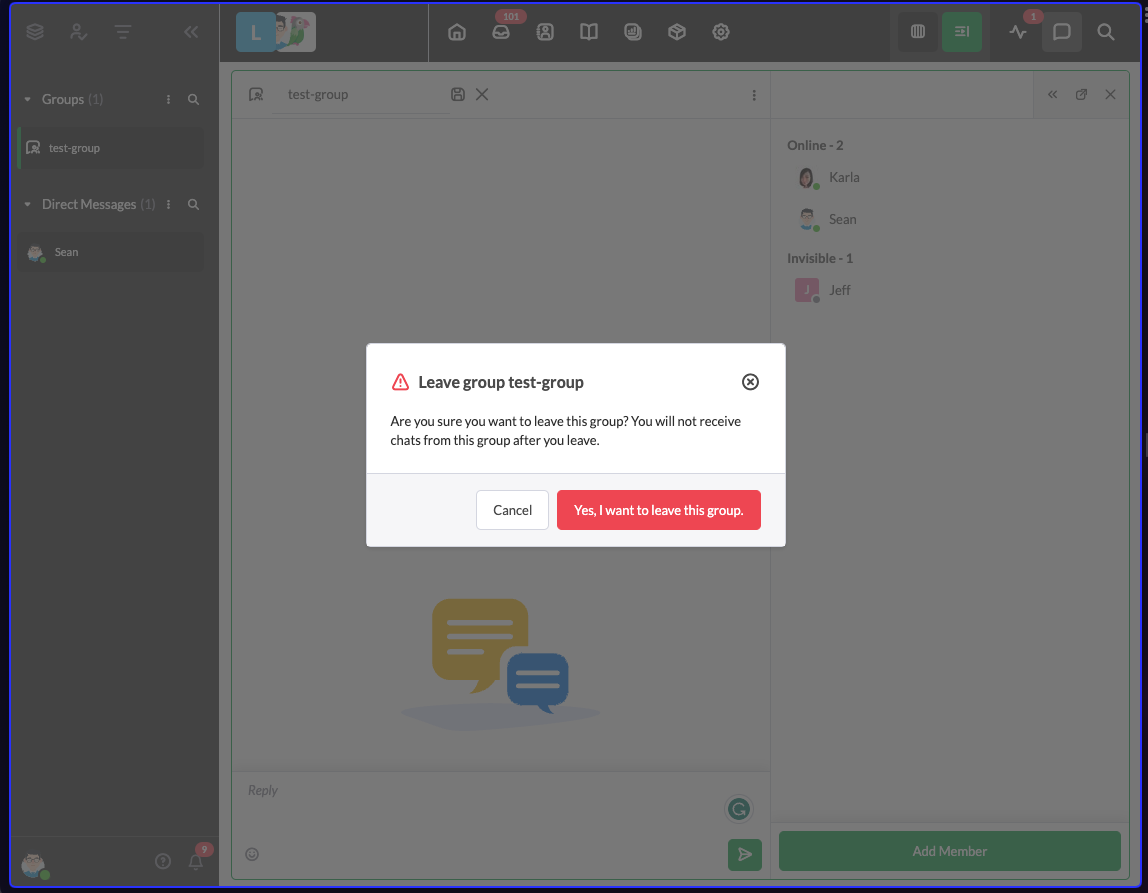
You cannot delete a group chat. However, you can leave a group by clicking the options (three dots) icon in the chat header menu. Once the purpose of the group chat has been served, each member can leave the group chat, effectively deleting the group chat.
Click the options icon and select Leave Group. Then, confirm your decision in the popup that appears.
Once you leave a group, you will not have access to the group chat again unless a member invites you to rejoin the group.
Close a group chat
To close a group chat, click the X in the upper-right corner of the page. This will close the chat window and allow you to continue working in other parts of the dashboard.
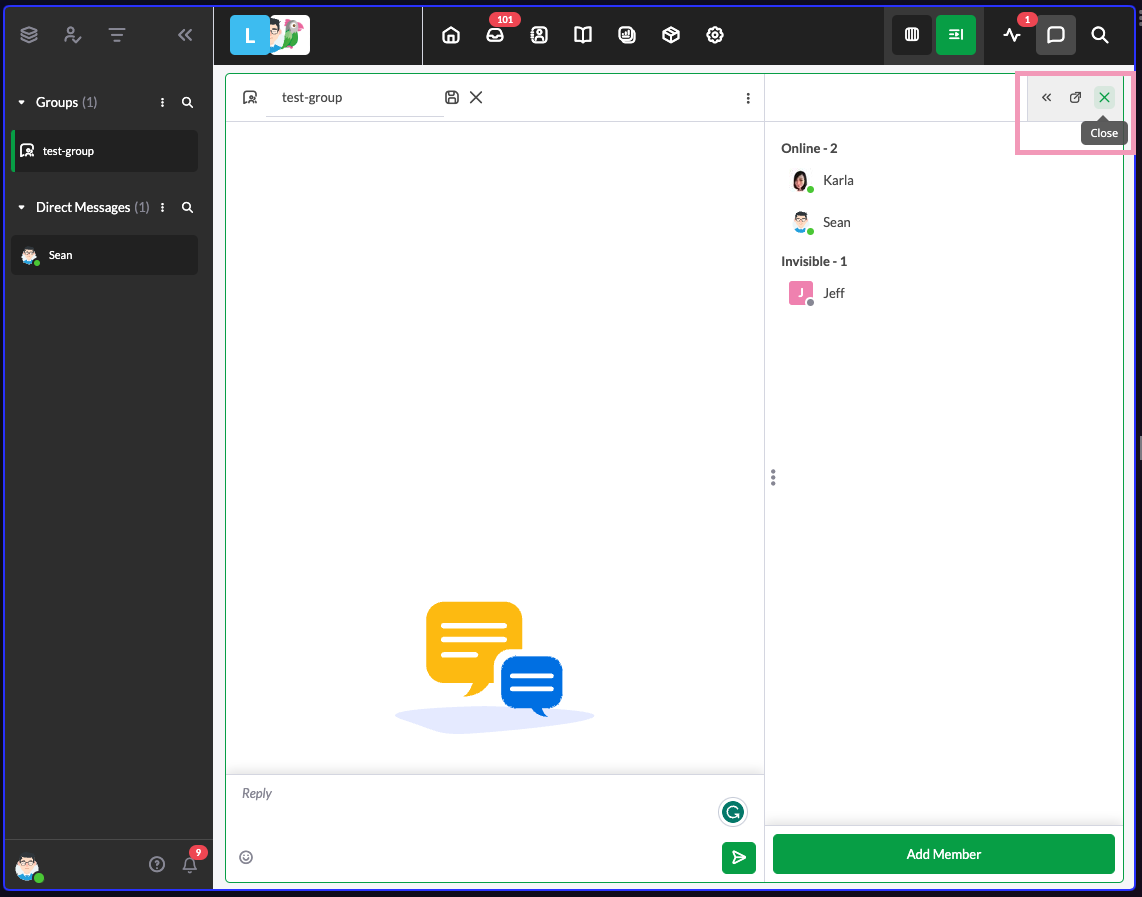
Add another member
To add another team member to your group chat, click the Add Member button in the lower right.
While there is no limit to the number of property members you can invite to a group chat, you can only add up to 100 agents when you first create the group.

Please note: If you remove an agent from a property, they will still appear in your group chats and/or direct messages. You will need to ask them to remove themselves from the group chat or you and your team will have to create a new group chat.
Popout chat feature
To navigate the chat in a smaller window, click the Popout conversation icon in the header menu of the open group chat panel.
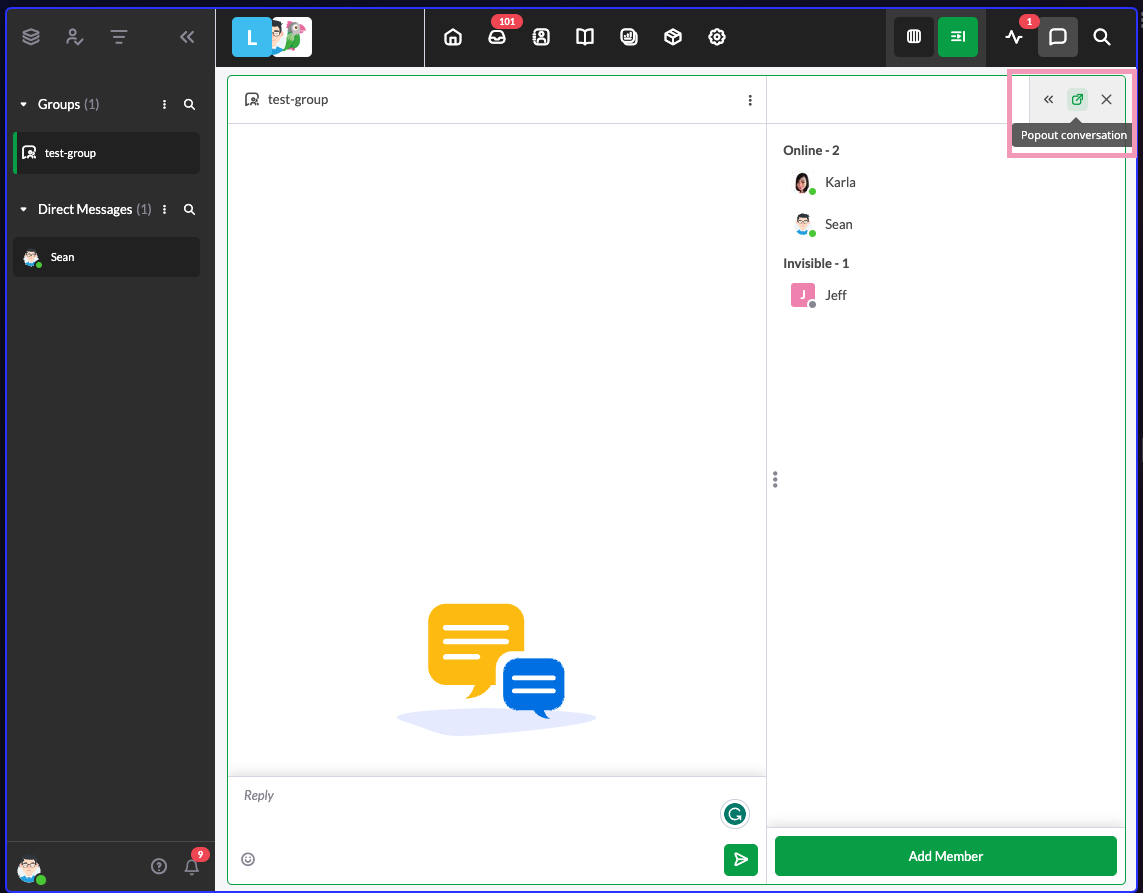
The group chat will exit the full-screen mode.
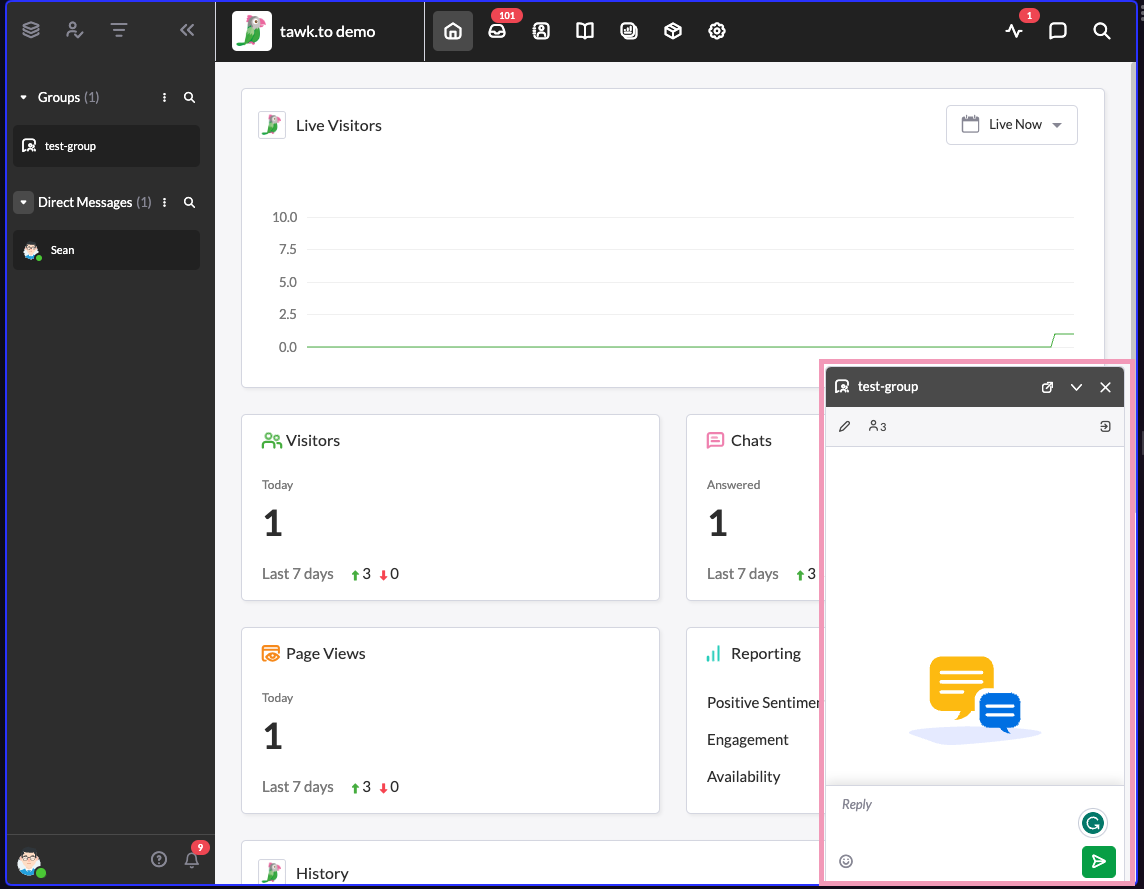
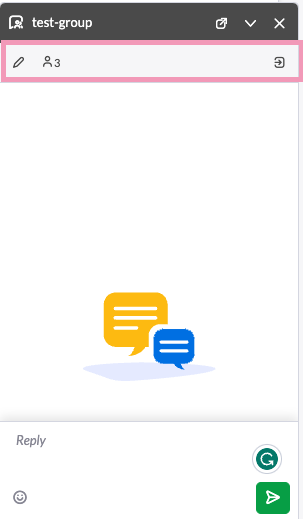
In the header menu of the popout chat window, you’ll find options to manage the group chat:
- Click the Edit Group Name (pencil) icon to update the name
- Click the Members icon to view members, and see who’s online, and add new members
- Click the Leave group (right arrow) icon on the right side to leave the group.
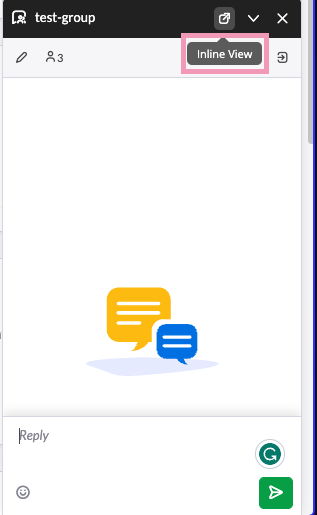
Beside the group name, you can click the inline chat view button to restore the chat to full-screen view
Managing multiple group chats
Both admins and agents can create and manage unlimited group chats. You can set up a group chat for each department in your business or each separate business.
With multiple group chats, you can talk to several groups of people at once via the tawk.to dashboard. You’ll be able to communicate effectively with your teams and streamline your workflow to better serve your customers.
Monitoring group chats
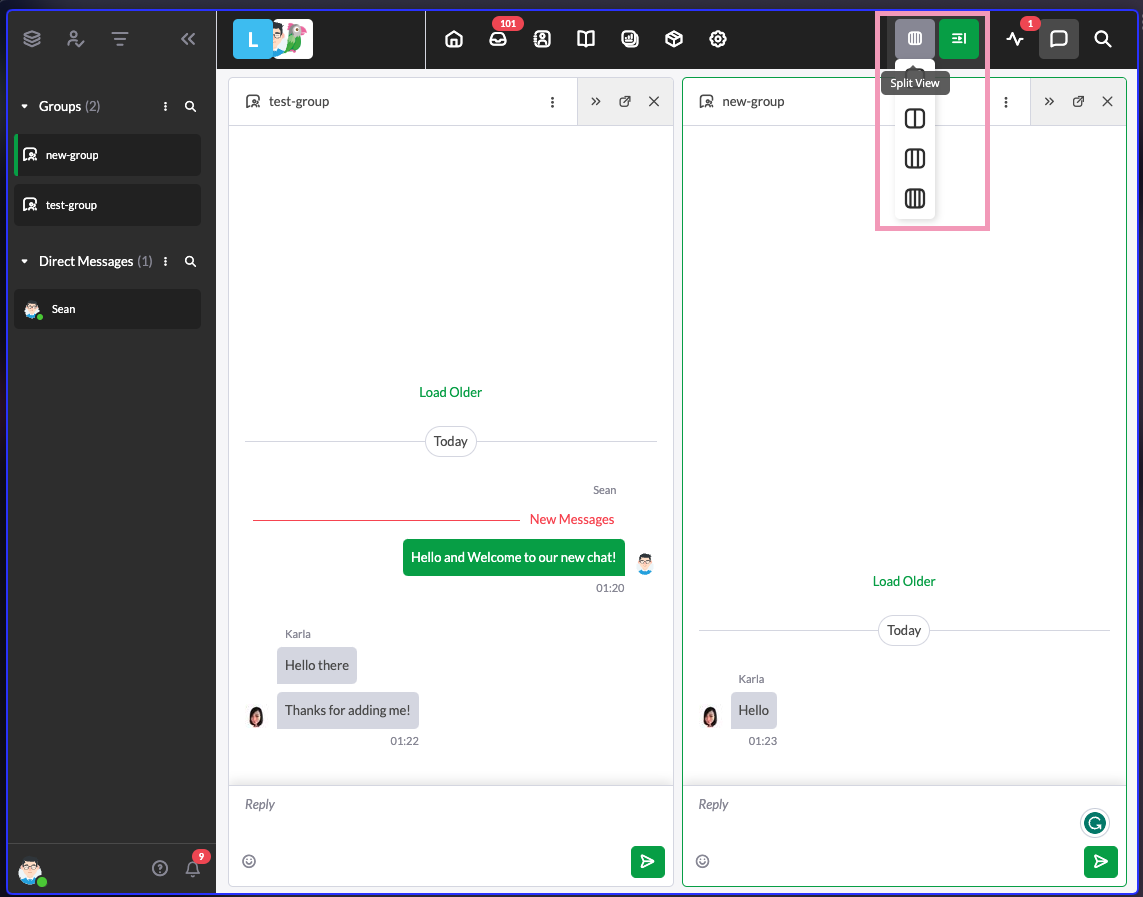
Colors in the group list alert you to new events:
- Green — a group chat you’re currently viewing.
- Pink — a new message has been sent in the group chat
To view more than one group chat at the same time, select the number of chats displayed in your dashboard by adjusting the slider above the chats.
Need help creating and managing group chats? Reach out to our support team or schedule a call.
- Click the green live chat icon
- Schedule a call with us
- Visit our community