Changing the greetings on your widget
[Desktop]
When a visitor interacts with the widget on your site it can be in one of three states: Online, Away, or Offline.
You can customize your message for each widget state by making changes to the Heading and Text Area cards in your widget.
You can also add a Pre-Chat Form to collect visitor details before a chat.
NOTE: The instructions below can only be completed from a browser or the tawk.to desktop apps. They cannot be completed in the tawk.to mobile app.
Make your way to the ⚙️Administration panel by selecting the gear icon in the upper tab menu.Then, under Channels, select Chat Widget.

Clicking Edit Content under the Widget Content heading will open a new window that allows complete customization of all the content displayed as part of your widget, including changing the language.

Select a view under Widget State.
The widget on the right side of the screen shows how the widget will appear to visitors if you save the changes you've made while editing the widget content.
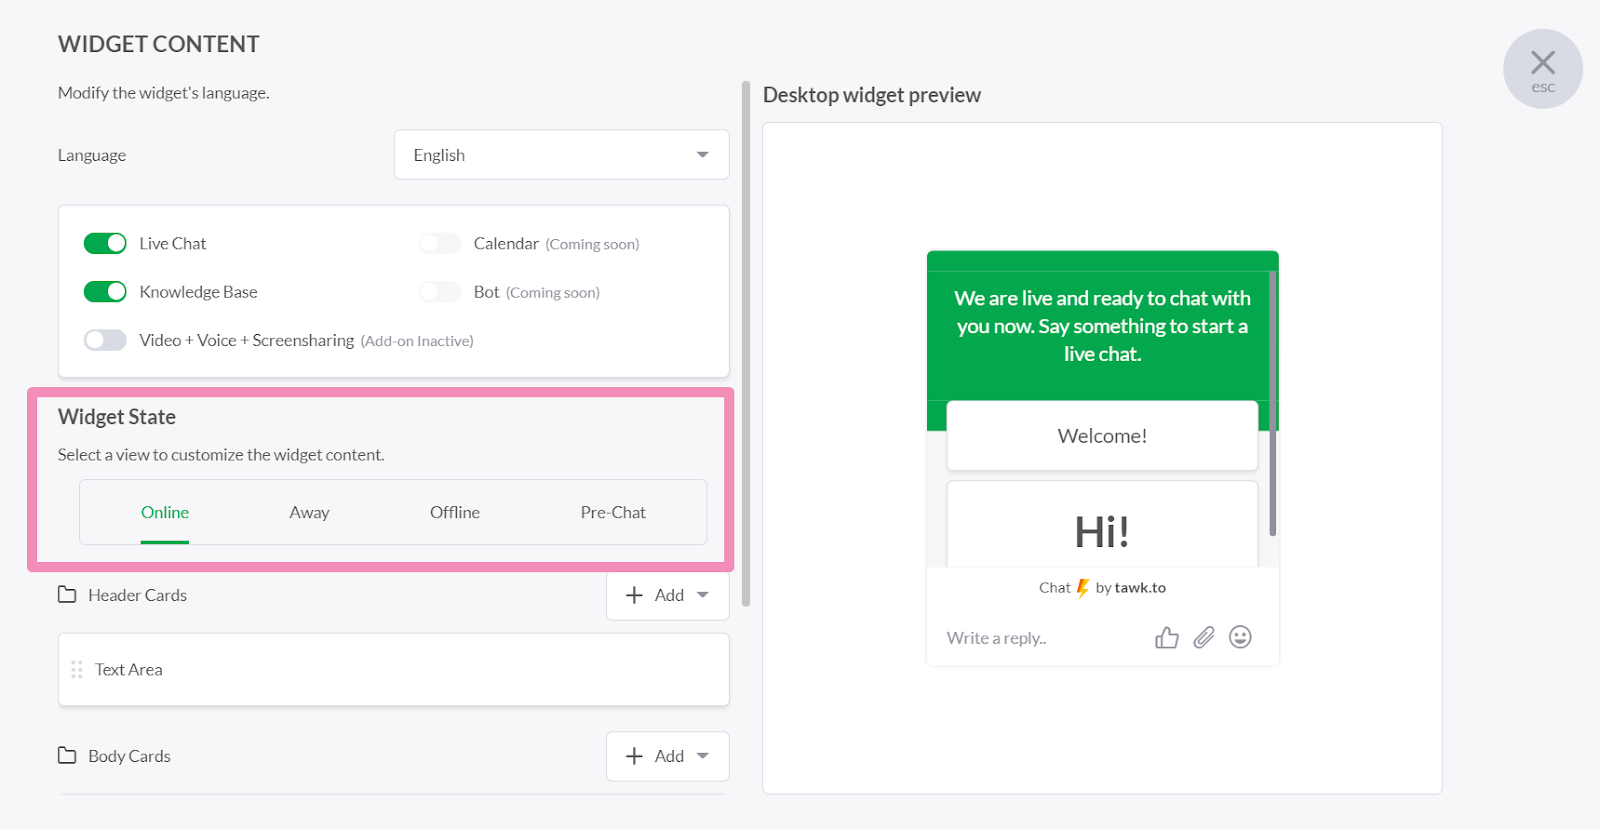
Your chat widget updates automatically after saving. No need to update the widget code in your page’s HTML.
When Online
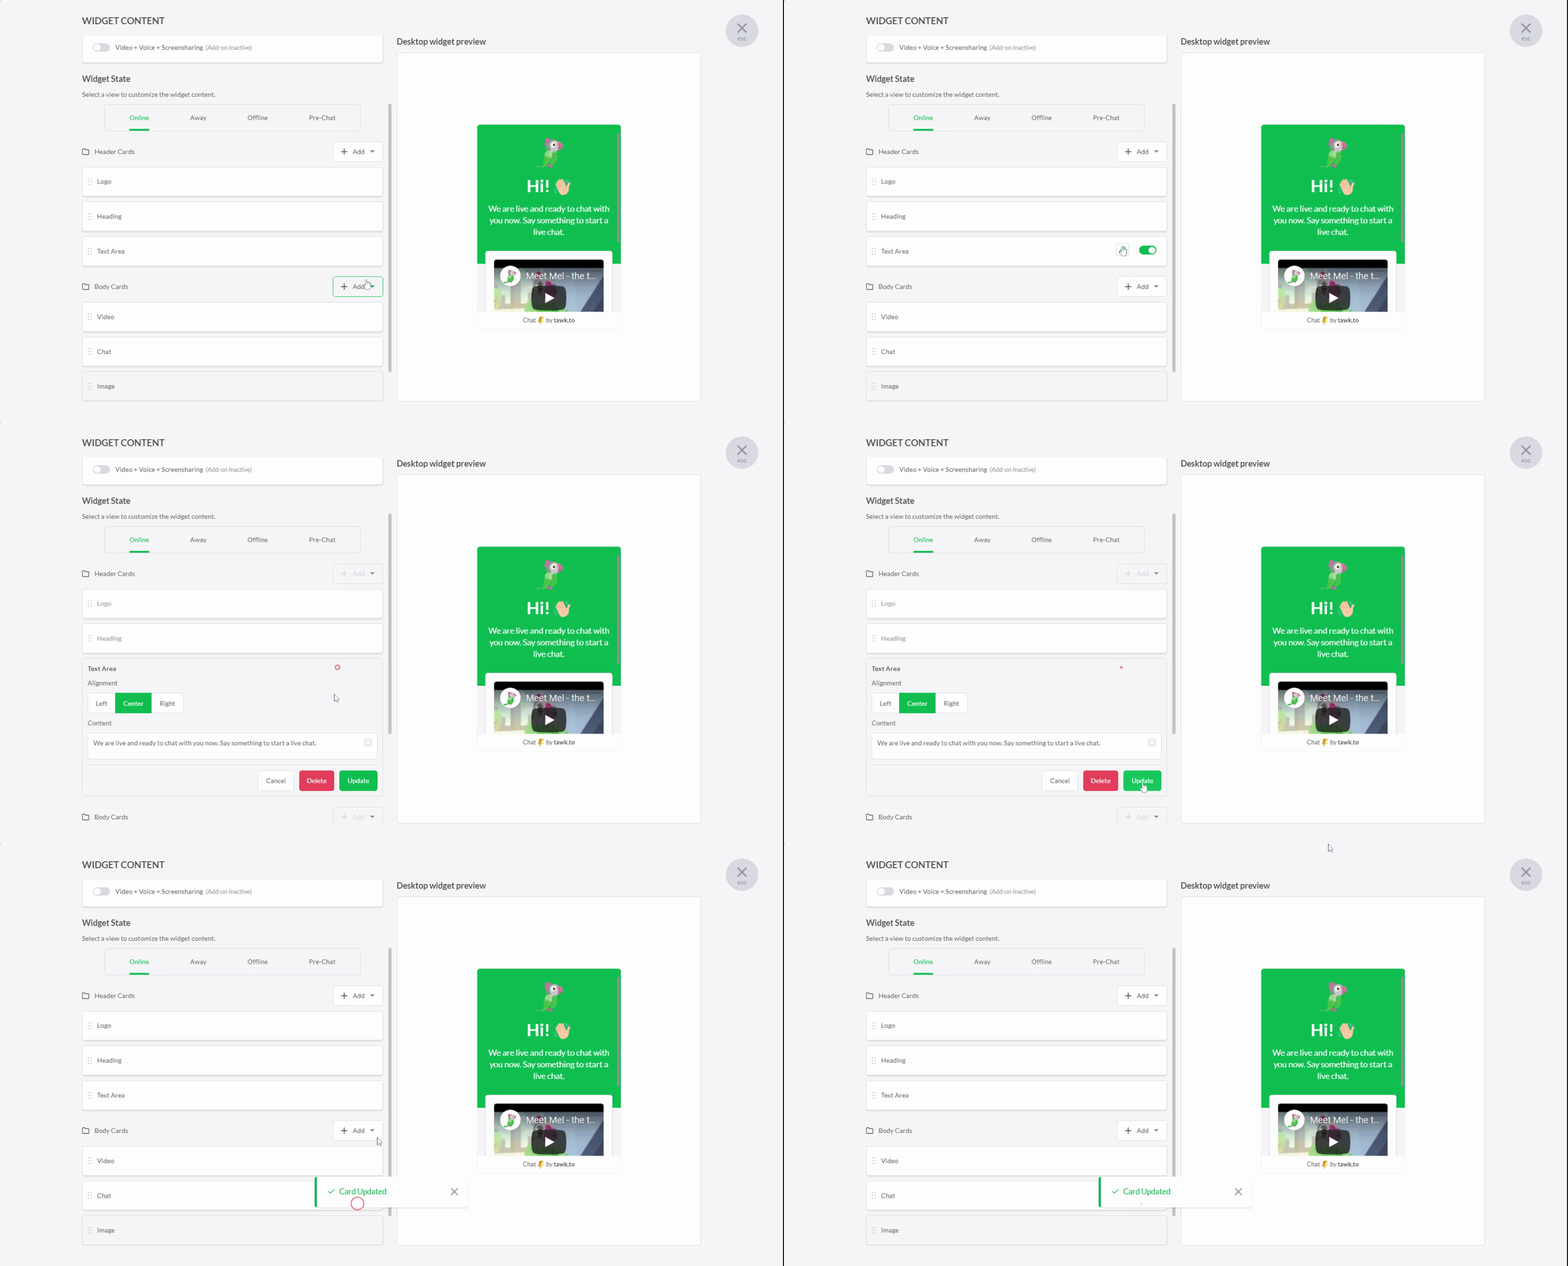
Each Text Area card can be rewritten and customized to your liking. Just hover over the card you want to change and click the pencil icon at the end of the block.
When you have the message you want, click the green Update button to save your changes.
Learn more about editing the widget cards here: How to modify your widget content
When Away
Having your widget in Away mode lets your visitors know your agents may not be available to respond to their query.
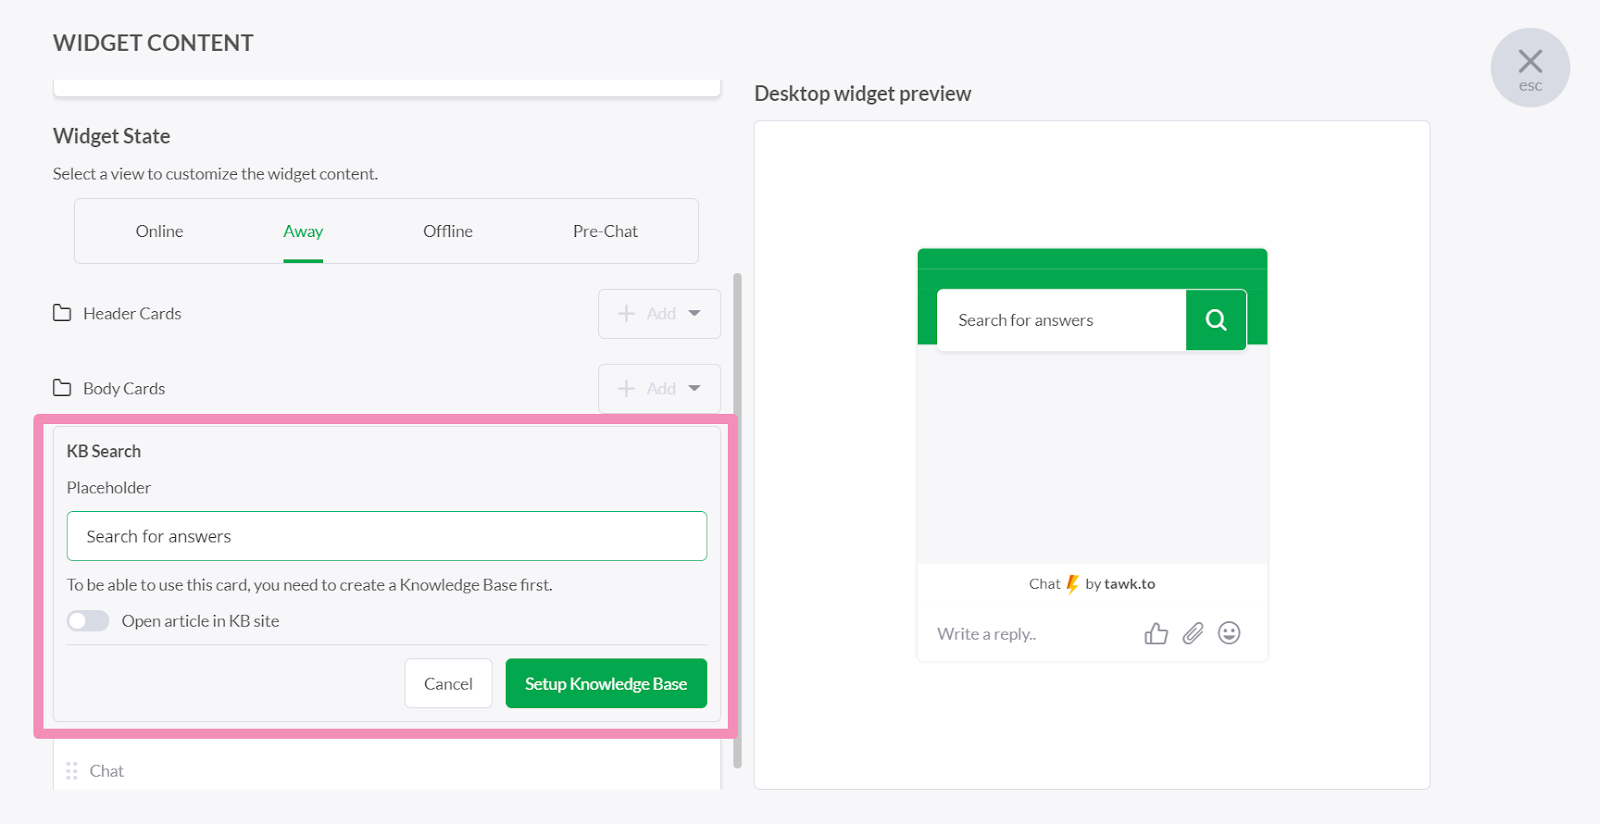
Select the Away view and hover over the Text Area block for the card you want to modify. Click the pencil icon at the end of the block to get started. Then add any additional cards you want to share with your visitors.
For example, you can add a Knowledge Base Search bar in your widget or a link to your FAQs so visitors can find their own answers when an agent is not available.
Note:
- The Away Form will only show when the Pre-Chat Form is not enabled
- When the Pre-Chat Form is enabled, it will just show the Away status message and the Pre-Chat Form.
- You can only change the text status when the rectangular chat icon is selected
When Offline
When the widget is in Offline mode, it will act as a form and ask visitors for contact information so you can get back to them at a suitable time. The content at the top of the widget can be customized just as in Online and Away modes by clicking the pencil icons in each card block you wish to modify.
You can also make changes to the form fields. Click in each field to customize the text.
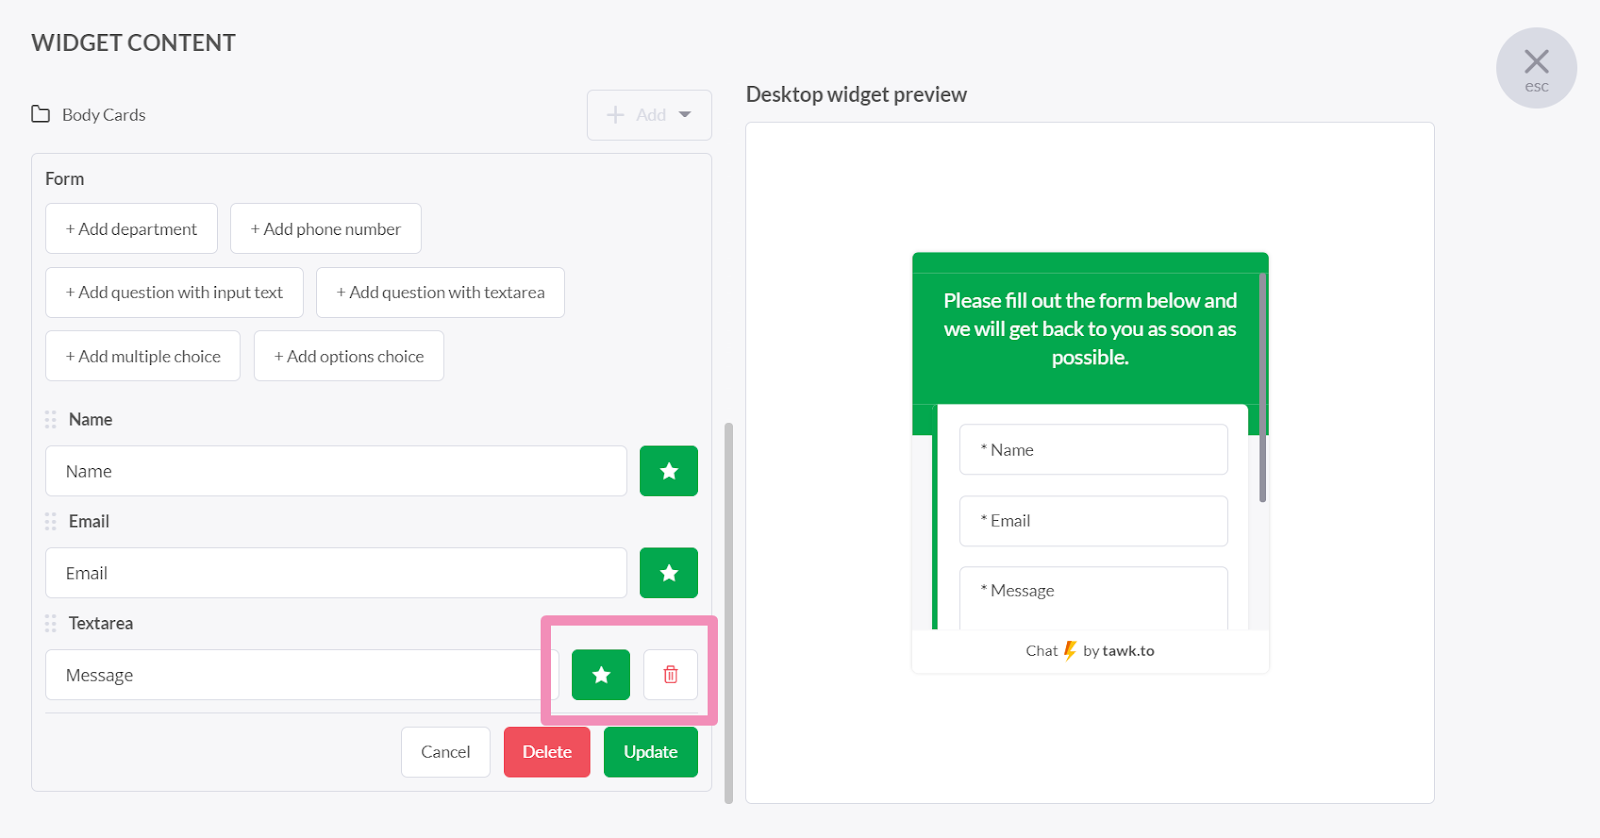
Required questions are marked with an asterisk. If the asterisk is present, the field is considered mandatory and the visitor can not leave a message for you without filling it out. If there is no asterisk, the field is optional. Add or remove an asterisk by clicking on the star icon to the right of the field in the Content Editor.
To add more fields to the Offline Form, click one of the buttons above the form in the editor. If you need to remove an optional field, just click on the trash can icon to the right of the text field.
Pre-Chat Form
The Pre-Chat Form is optional. You’ll see a toggle switch in the options under the widget states to enable or disable the form.
Pre-Chat Forms are used to gather more information from visitors before allowing them to enter the chat. They can also be handy to help qualify your visitors. Just be aware that enabling a Pre-Chat Form is likely to decrease the number of chats you receive from visitors on your site.
The Pre-Chat Form, just like the Offline Form, can be customized.
Any information entered in the Pre-Chat Form will be displayed at the top of the chat once the answers have been submitted so the agent answering the chat will be able to begin the conversation with some insight about the person they’re assisting.
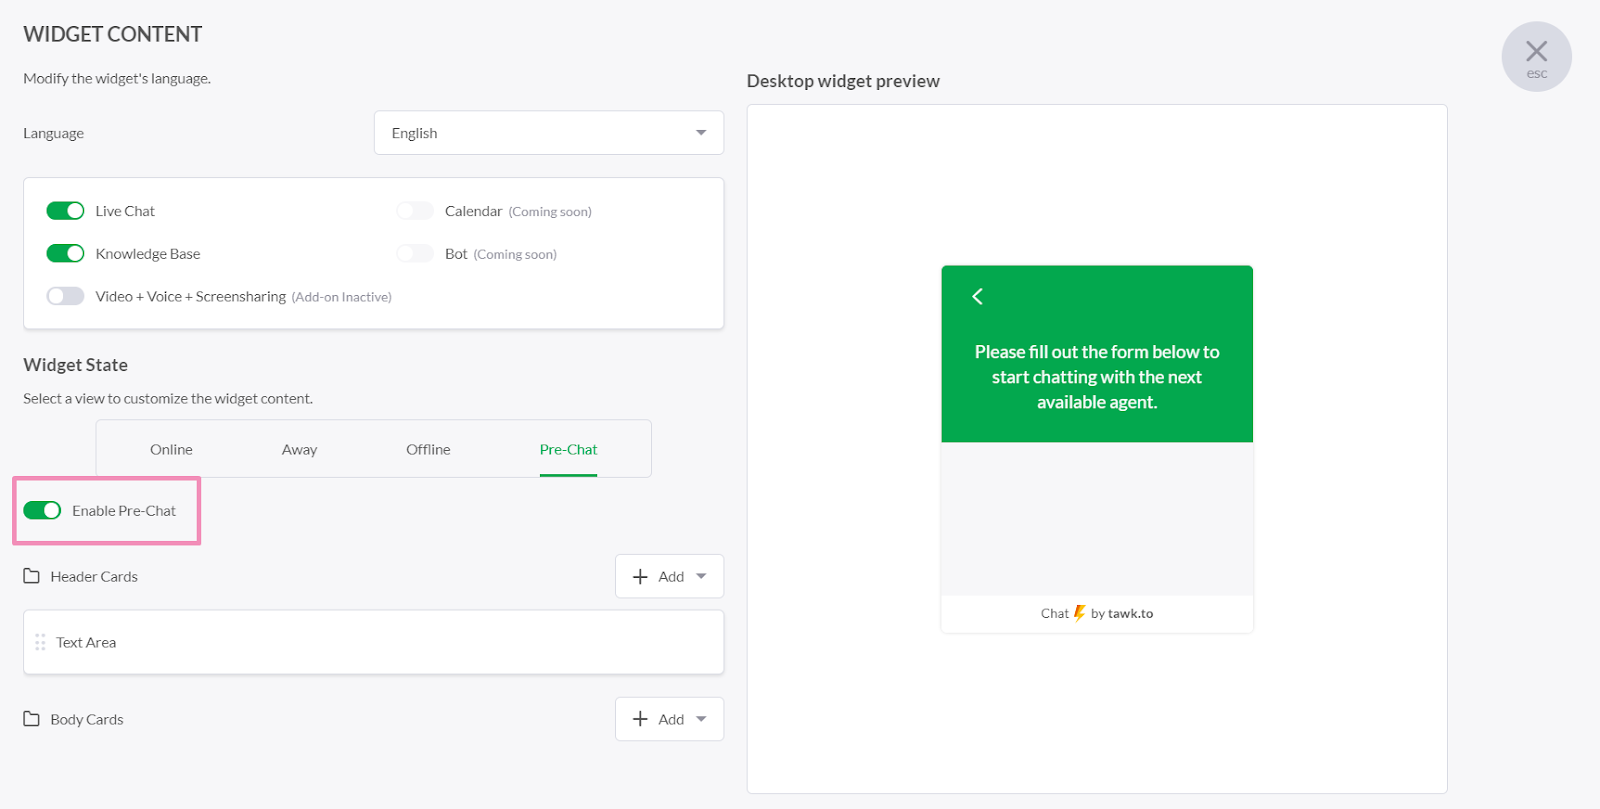
Learn more about enabling and setting up a Pre-Chat Form here: Using the Pre-Chat Form.
Need help changing the greetings on your widget? Reach out to our support team or schedule a call.
