Managing your inbox on iOS
[Mobile]
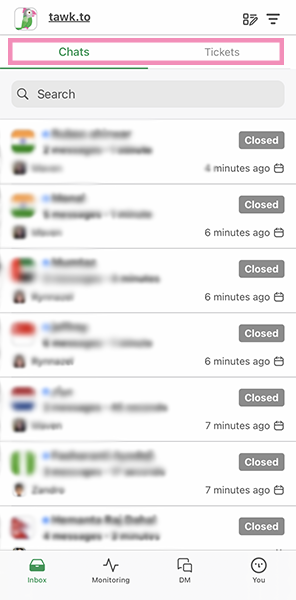
At the top of the screen you will find Chat and Tickets. Select a tab to view and sort all chats or tickets for your selected property by status, assigned type and date.
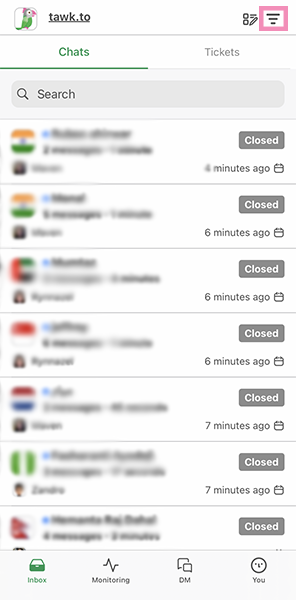
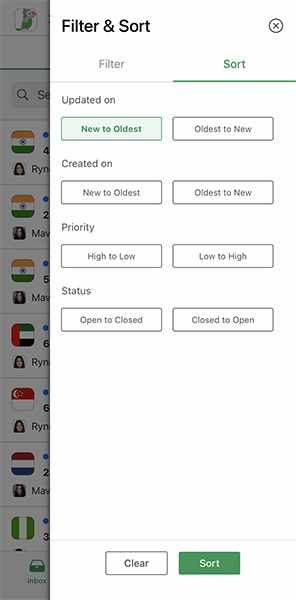
If you are looking for a specific chat or ticket, use the Filter & Sort feature in the upper-right corner. The icon appears as an inverted triangle with three lines.
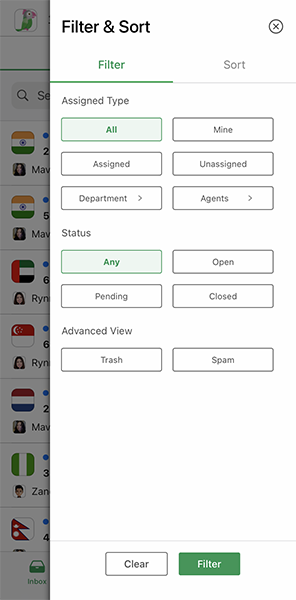
Tap Filter & Sort to see two separate tabs for filtering and sorting.
Filter
The Filter has three options: Assigned Type, Status, and Advanced View.
Assigned Type
All: View all chats/tickets regardless of the agent or department assigned.
Mine: Display only your own chats/tickets.
Assigned: Chats/tickets already assigned to a team member.
Unassigned: Chats/tickets with no assigned agent or department.
Departments: Chats/tickets assigned to a specific department.
Agents: View chats/tickets for a selected agent.
Status
Any: All open, pending, and closed chats/tickets.
Open: Missed chats still waiting for an answer.
Pending: Answered chats/tickets which remain unresolved.
Closed: These are all resolved chat/tickets.
Advanced View
You will find two options under Advanced View: Trash for deleted chats/tickets and Spam for spam messages/tickets.
Sort
You can sort messages and tickets according to date of creation, most recent update, update status or priority.
How to delete a chat
To delete a chat, tap the button next to Filter & Sort in the upper-right corner. It appears as an icon with two checkboxes and a pen.
Tap the icon and select the chats you would like to delete.
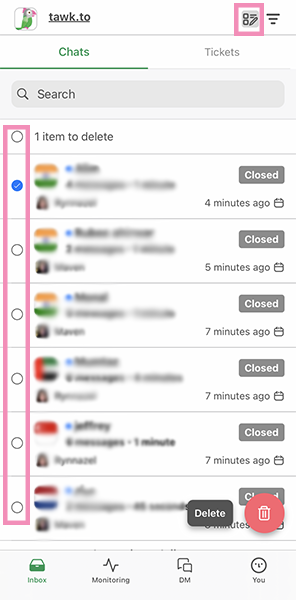
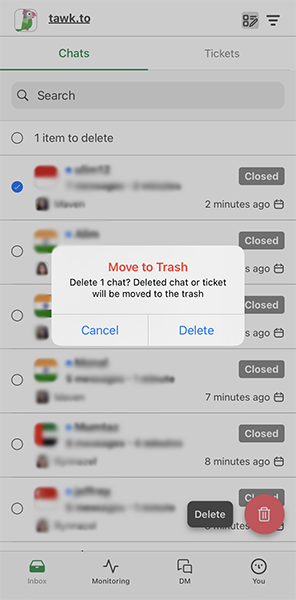
After marking the chats, tap the Delete icon in the lower-right corner.
A confirmation message will pop up. Tap Delete to confirm.
How to create a ticket
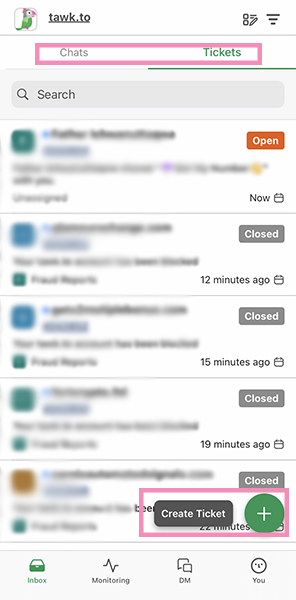
To create a ticket, tap the Tickets tab in the upper right next to Chats.
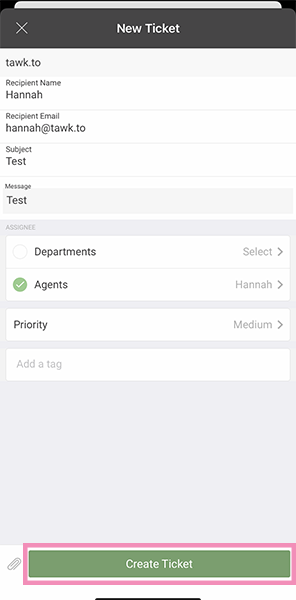
In the lower right, tap the green plus (+) sign. A New Ticket Form will appear.
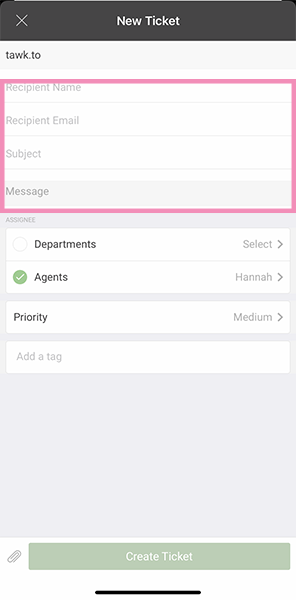
Fill in the necessary details including the Recipient Name, Recipient Email, Subject and Message.
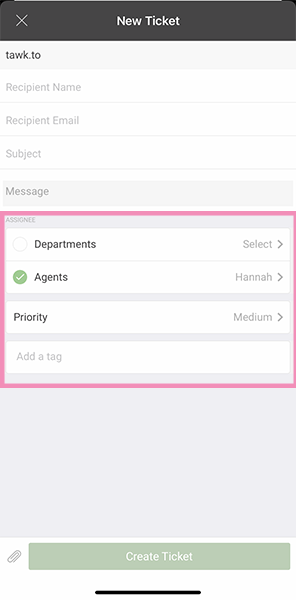
In the Assignee area, you can select the Departments, Agents, and Priority and add Tags.
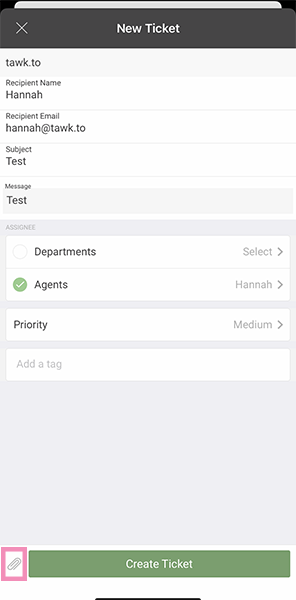
If you need to add Attachments, tap the paper clip icon in the lower-left corner next to Create Ticket.
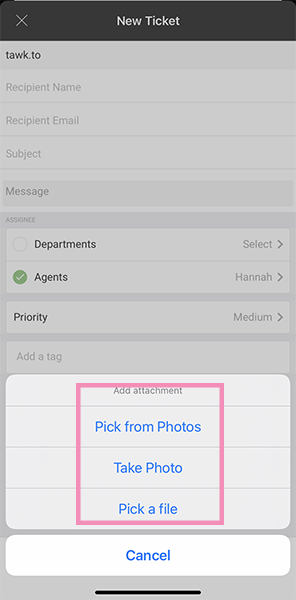
It will give you options to Pick from Photos, Take Photo, or Pick a File.
After you have entered the information for the ticket, tap Create Ticket.
How to edit a ticket
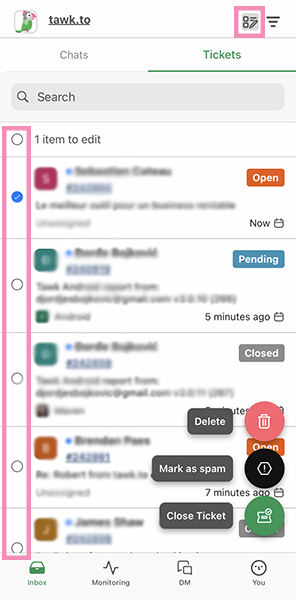
To edit a ticket, tap the checkbox and pen icon in the upper-right corner next to Filter & Sort.
Select one or more tickets by tapping the circles in the left column. Three buttons will appear in the lower right of the screen: Delete, Spam and Close Ticket. Choose one of the three options.
After the pop-up message appears, tap the confirmation button.
Well done! You have mastered managing your Inbox.
To learn more about tawk.to’s built-in ticketing system, read this article: Creating and responding to tickets
Learn more about Inbox: Getting started with the Inbox
Learn about how to Send Direct and Group messages on Android: Sending Direct and Group messages on Android
If you have other questions, don’t hesitate to reach out to our support team or schedule a call.
