Setting up a custom API integration with AI Assist
The instructions below are for desktops and laptops only.
tawk.to’s AI Assist supports custom API integrations that allow your AI agent to perform backend lookups and actions automatically — similar to what a human agent would do.
For example, your AI agent can:
- Search your product catalog
- Check order or payment status
- Look up billing details
- Retrieve past purchases
This allows customers to get answers instantly without waiting for a human agent.
API integrations are configured per property. If you use multiple AI agents, you can enable or disable each integration individually for every agent.
This guide covers:
- What you need before getting started
- How to configure the integration in tawk.to
- How to test the integration
- A technical reference for developers building the API
Note: Integrations are only available with the Growth, Business, and Enterprise plans.
Before you start
- An API endpoint
A URL that AI Assist can send requests to and receive data from.
- An OpenAPI schema
A file that describes your API’s endpoints, parameters, and responses so AI Assist knows how to use it.
- Authentication credentials (if required)
For example: API key, username and password, or other authentication methods supported by your API.
Using Shopify, WooCommerce, or BigCommerce?
Instead of a custom API integration, you can use tawk.to’s native integrations. See these guides for step-by-step instructions:
How to integrate AI Assist with Shopify
How to integrate AI Assist with WooCommerce
How to integrate AI Assist with BigCommerce
For other platforms
If you're using other platforms, such as:
- Wix
- Squarespace
- Magento
- PrestaShop
- A SaaS product with its own API
- A custom backend system
If your platform does not expose a direct API, your developer may need to create a proxy service. Common tools used for this include:
- Google Apps Script
- Cloudflare Workers
- A Node.js server
If you’re not comfortable building this yourself, share this guide with a developer. The Technical reference for developers section below explains exactly what they need to implement.

2. Click Automation on the left navigation bar.

3. Click Integrations in the left submenu.

4. Click OpenAPI Server under Custom Tool.


5. This opens the OpenAPI Server Overview page. Click Install in the upper right corner.

6. In the setup form, enter the following details:
- Schema File URL
This must be a publicly accessible URL pointing directly to a YAML or JSON OpenAPI schema file.
You can host your schema using services such as:
- GitHub (use the Raw file URL)
- GitHub Gist
- Amazon S3
- Any web hosting service
You can also select Paste Schema and paste your schema in JASON.
- API base URL:
This is the root URL of your API. The endpoints defined in your schema will be accessed relative to this URL.
Example:
If your API base URL is:
https://script.google.com/macros/s/ABC123
and your schema defines the endpoint:
/exec
AI Assist will call:
https://script.google.com/macros/s/ABC123/exec

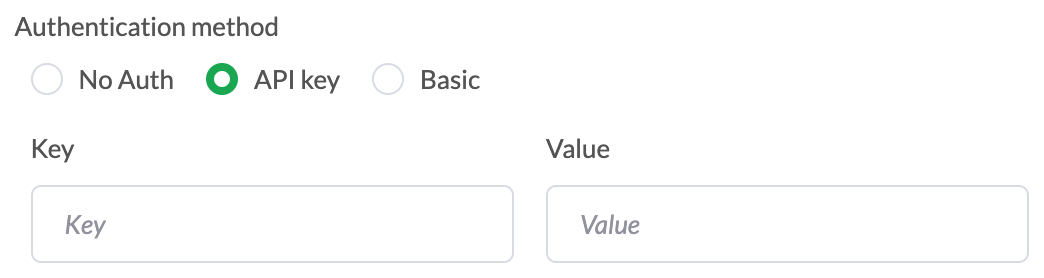
7. Choose the Authentication method required by your API.
- No Auth — if your API doesn’t require authentication.
- API key — enter the Key and Value. (e.g., key: “x-api-key”, value: “your-secret-key”)

8. Click Save.
9. After saving, click Agents in the left submenu.

10. Select your AI agent. Then, click Tools in the left menu and ensure the integration is enabled under Status.

Configure your Base Prompt (optional)
Example:
“If the customer asks about order status, use the trackOrder API tool call.”
For detailed steps on configuring your Base Prompt, see this guide:
Modifying the Base Prompt
Test your integration
Test the API directly
Use a tool such as Postman or a browser to call your API endpoint and confirm that it returns the expected responses.
Test using the AI Assist preview
In the AI Assist settings page, use the chatbot preview panel to simulate customer questions. Example tests:
- Product search: “Show me leather bags”
Expected behavior: triggers a product search API call.
- Order tracking: “Where is my order #12345?”
Expected behavior: triggers an order tracking API call.
- Unrelated question: “What’s the weather today?”
Expected behavior: should not trigger an API call.
Test edge cases
Make sure your API handles situations such as:
- No products found
- Order not found
- API delays or timeouts
- API errors
Troubleshooting
AI Assist never calls the API
Possible causes:
- The integration Status toggle is turned off
- The schema descriptions are too vague
- The Base Prompt instructions do not reference the correct tool
- Go to Integration/API and confirm the integration is enabled for your agent.
- Review your schema descriptions and make sure they clearly explain when the API should be used.
- Add a Base Prompt instruction if necessary to guide AI Assist.
AI Assist says the request didn’t work
In the chat, AI Assist may respond with a message such as: “I couldn't retrieve that information.”
This usually means the API call was attempted but did not return usable data.
- The API returned no matching results
- The request parameters were incorrect
- An authentication issue
- An API error or timeout
- Test the API endpoint directly using Postman or a browser.
- Verify that the same parameters return valid results.
- Check that authentication credentials and the API Base URL are correct.
Schema file will not load
Possible causes:
- The schema file is not publicly accessible
- The schema is not valid OpenAPI 3.0 format
How to fix it:
- Open the schema URL in a browser to confirm it is accessible.
- Validate the schema using editor.swagger.io.
AI responses contain incorrect or generated information
This may happen if AI Assist generates information not present in the API response.
To reduce this behavior, add the following instruction to your Base Prompt:
“Only share information returned by the API.”
Not sure if AI Assist is calling the API
Currently, API tool calls are not displayed in the preview panel’s data source breakdown. If you need confirmation that the API is being called, contact us via live chat. Our team can review the request logs.
Things to remember
- AI Assist uses the descriptions in your schema to determine when and how to call your API. Clear descriptions improve reliability.
- Each API request is independent. AI Assist does not directly access previous API responses. However, AI Assist can reference messages already sent in the conversation.
- API responses take priority over other data sources. If API data is available, AI Assist will prioritize it when generating replies.
- Long conversations may be truncated, which may prevent AI Assist from referencing earlier messages.
Schema updates
While the API Base URL can be edited at any time, the Schema File URL cannot be viewed or edited.
The schema is stored as a snapshot. If you update the schema file at the source URL, the integration will not automatically update.
To apply schema changes:
- Delete the existing integration.
- Add the integration again using the updated schema.
Best practices
- Test your API for accuracy, latency, and security.
- Follow best practices for authentication and encryption.
- Configure escalation paths so the AI agent can transfer the conversation to a human when needed. See these guides to learn more:
Using Base Prompt instructions for escalation
How to train AI Assist to transfer chats to human agents
Technical reference for developers
Building the API endpoint
Your API endpoint must:
- Accept HTTP requests (GET or POST)
- Return JSON responses
- Be publicly accessible
The response structure is flexible, but it should be clear and descriptive.
Example: Product search response
Example: Order tracking response
Write error messages as if they may be shown to the customer.
Example:
AI Assist may use these messages when generating responses.
The schema must follow OpenAPI 3.0 format (YAML or JSON).
Recommended tools:
- Swagger Editor – to write and preview your schema
- Swagger Validator – to validate it
Writing good schema descriptions
The description fields in your schema help AI Assist understand when to call your API and how to use it. Think of these descriptions as instructions for the AI agent, not developer documentation.
Your descriptions should explain:
- When to use the endpoint
Example: “Use when the customer asks about products, inventory, or wants to browse items.”
- What parameters to send
Explain where values come from and how they should be formatted. Example:
“Extract the keyword from the customer’s message.”
- How to interpret the response
Example:
- “If stock is 0, tell the customer the item is out of stock.”
- “If a tracking URL is present, always include it in the response.”
- “The action to perform”
- “Search keyword”
The more specific your descriptions are, the more accurately AI Assist can trigger the correct API call with the correct parameters.
Related guides
Modifying the Base Prompt
How to integrate AI Assist with Shopify
How to integrate AI Assist with WooCommerce
How to integrate AI Assist with BigCommerce
How to integrate AI Assist with Picqer
Understanding AI Assist's Data Sources
Deploying multiple AI Agents across support channels
Using Base Prompt instructions for escalation
How to train AI Assist to transfer chats to human agents
If you have feedback about this article, or if you need more help:
Click the green live chat icon
Schedule a call with us
Visit our community