Adding the tawk.to widget to OpenCart 4
The instructions below are for desktops and laptops only.
In this guide, we’ll walk you through adding the free tawk.to live chat widget to your OpenCart 4 store using the official module from the OpenCart Marketplace.
Install the tawk.to widget in OpenCart 4
Follow these steps:
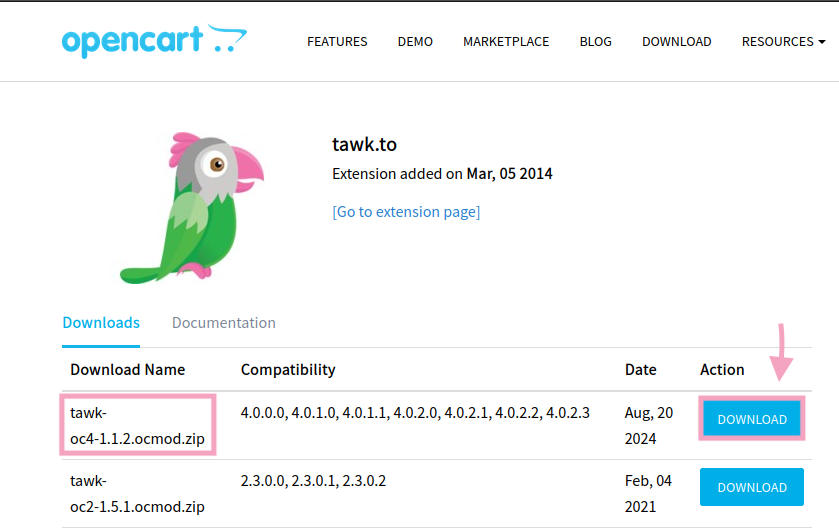
1. Go to the OpenCart Marketplace and search for “tawk.to”. Then, download the module for OpenCart 4 (the file name starts with tawk-oc4).
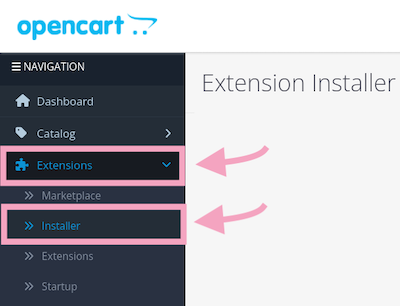
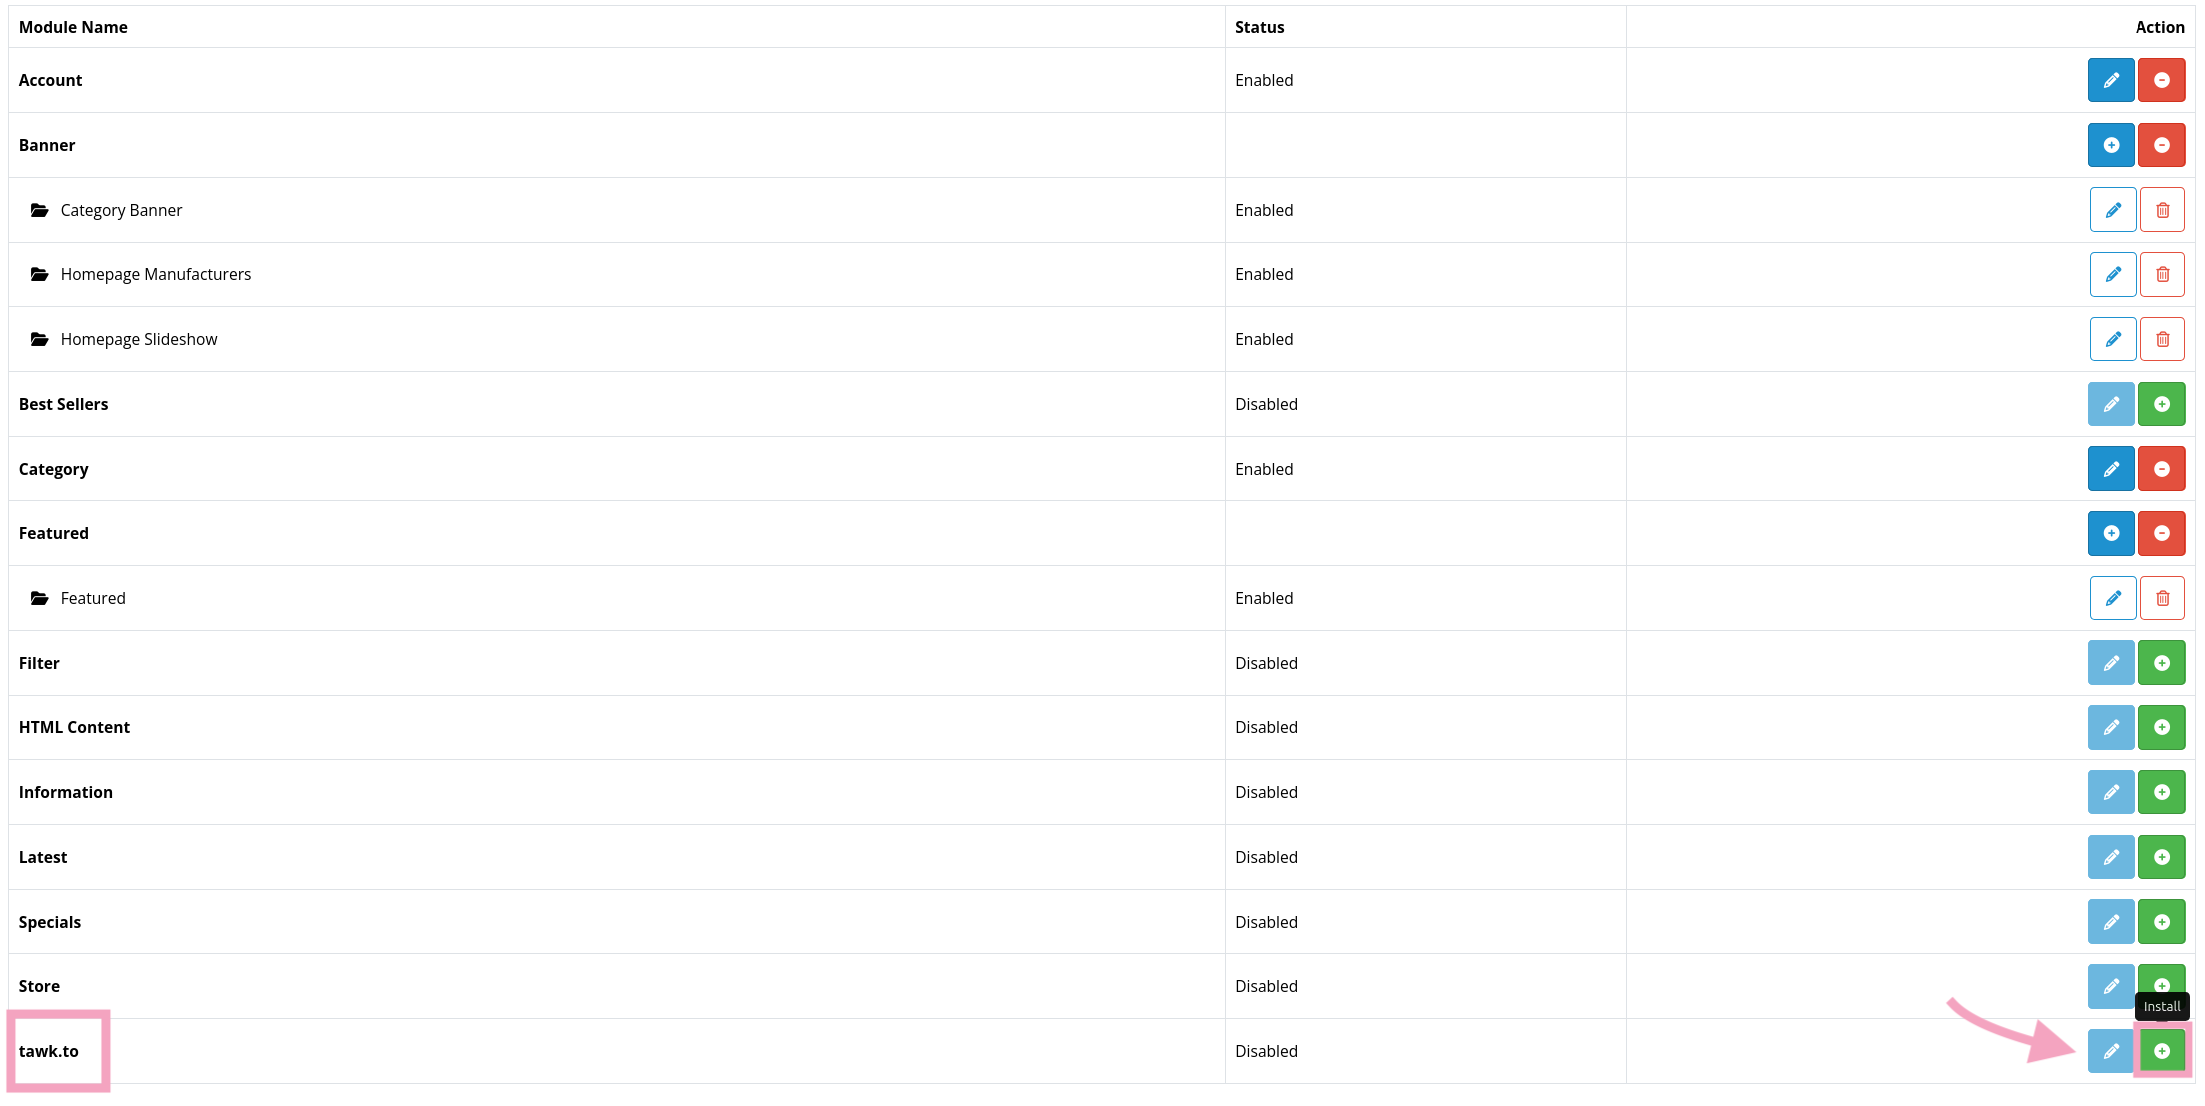
2. Go to Extensions > Installer.
3. Upload the .ocmod.zip file you downloaded.
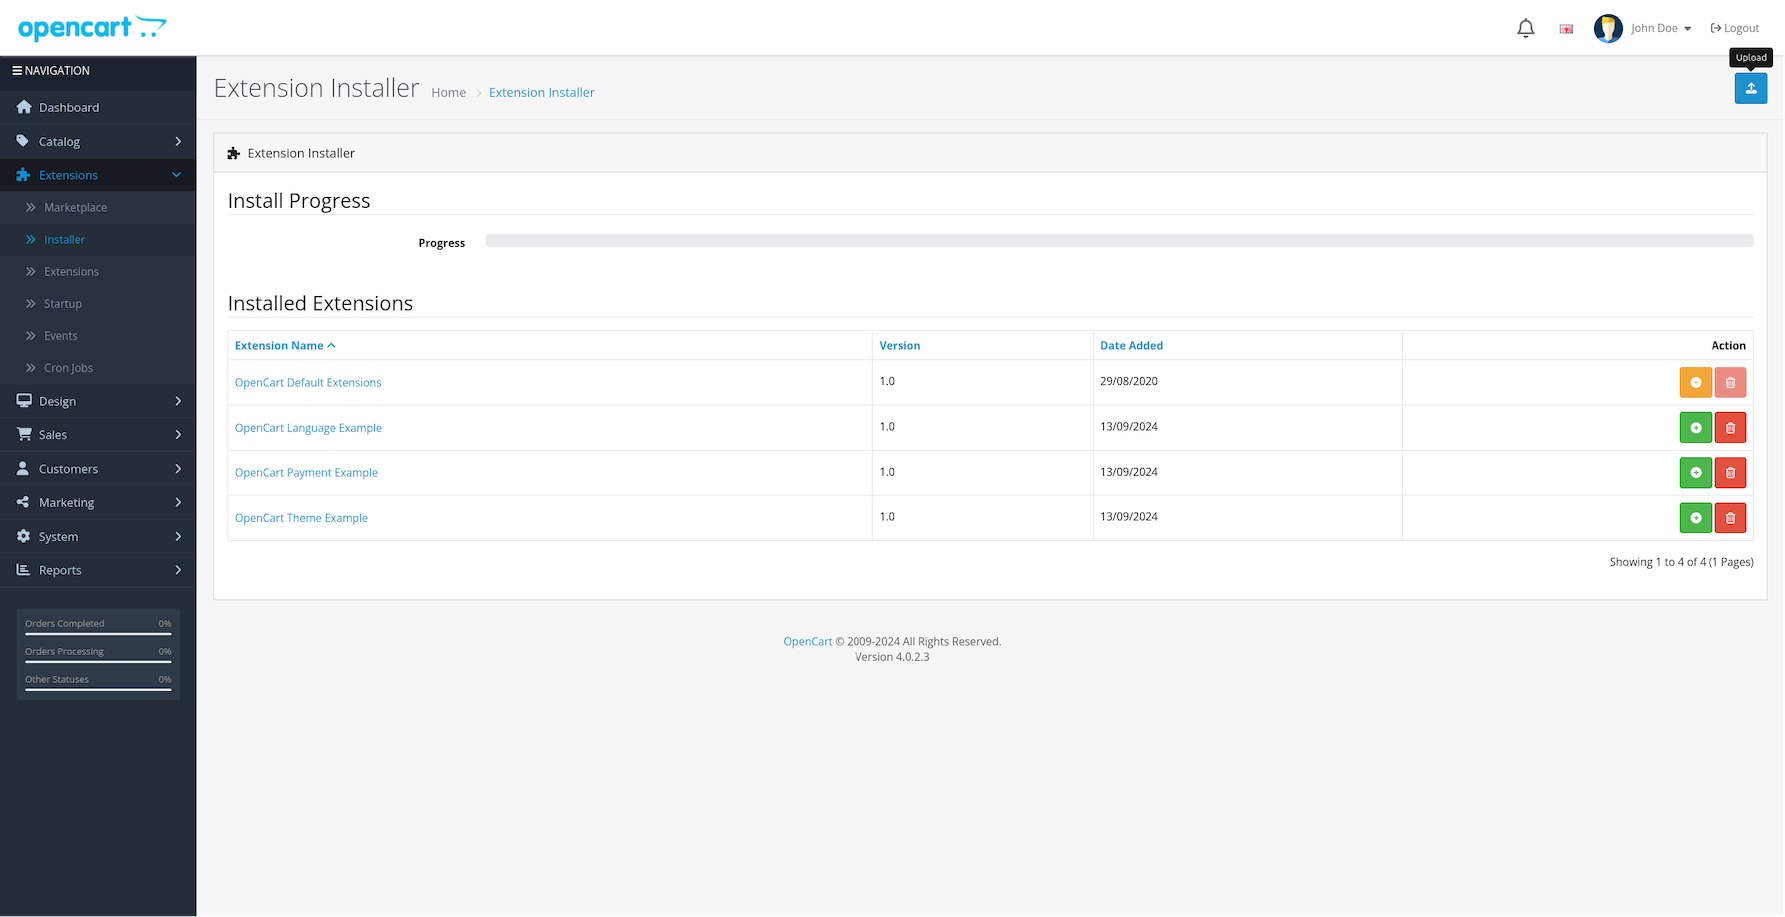
4. Click the green Install button to install the Tawk.to Live Chat extension.
Note: In OpenCart 4, uploading a file does not install it automatically. You must complete this installation step.

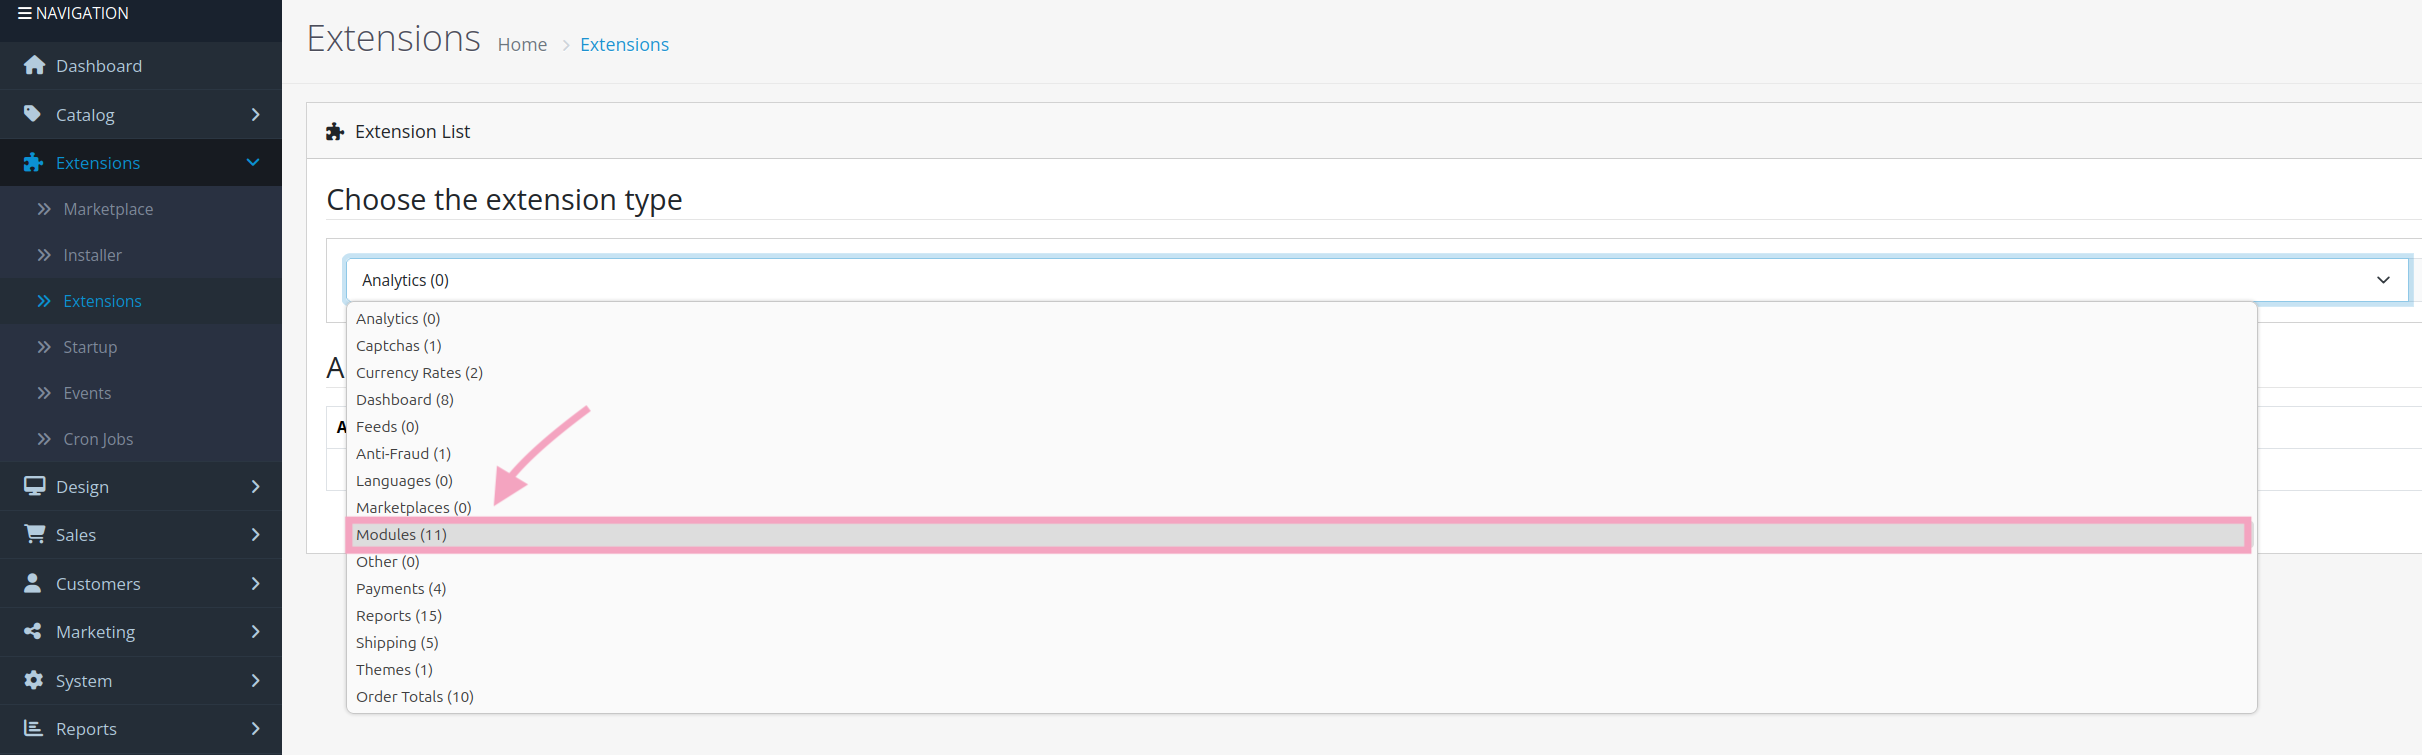
6. Click the green Install button next to tawk.to.
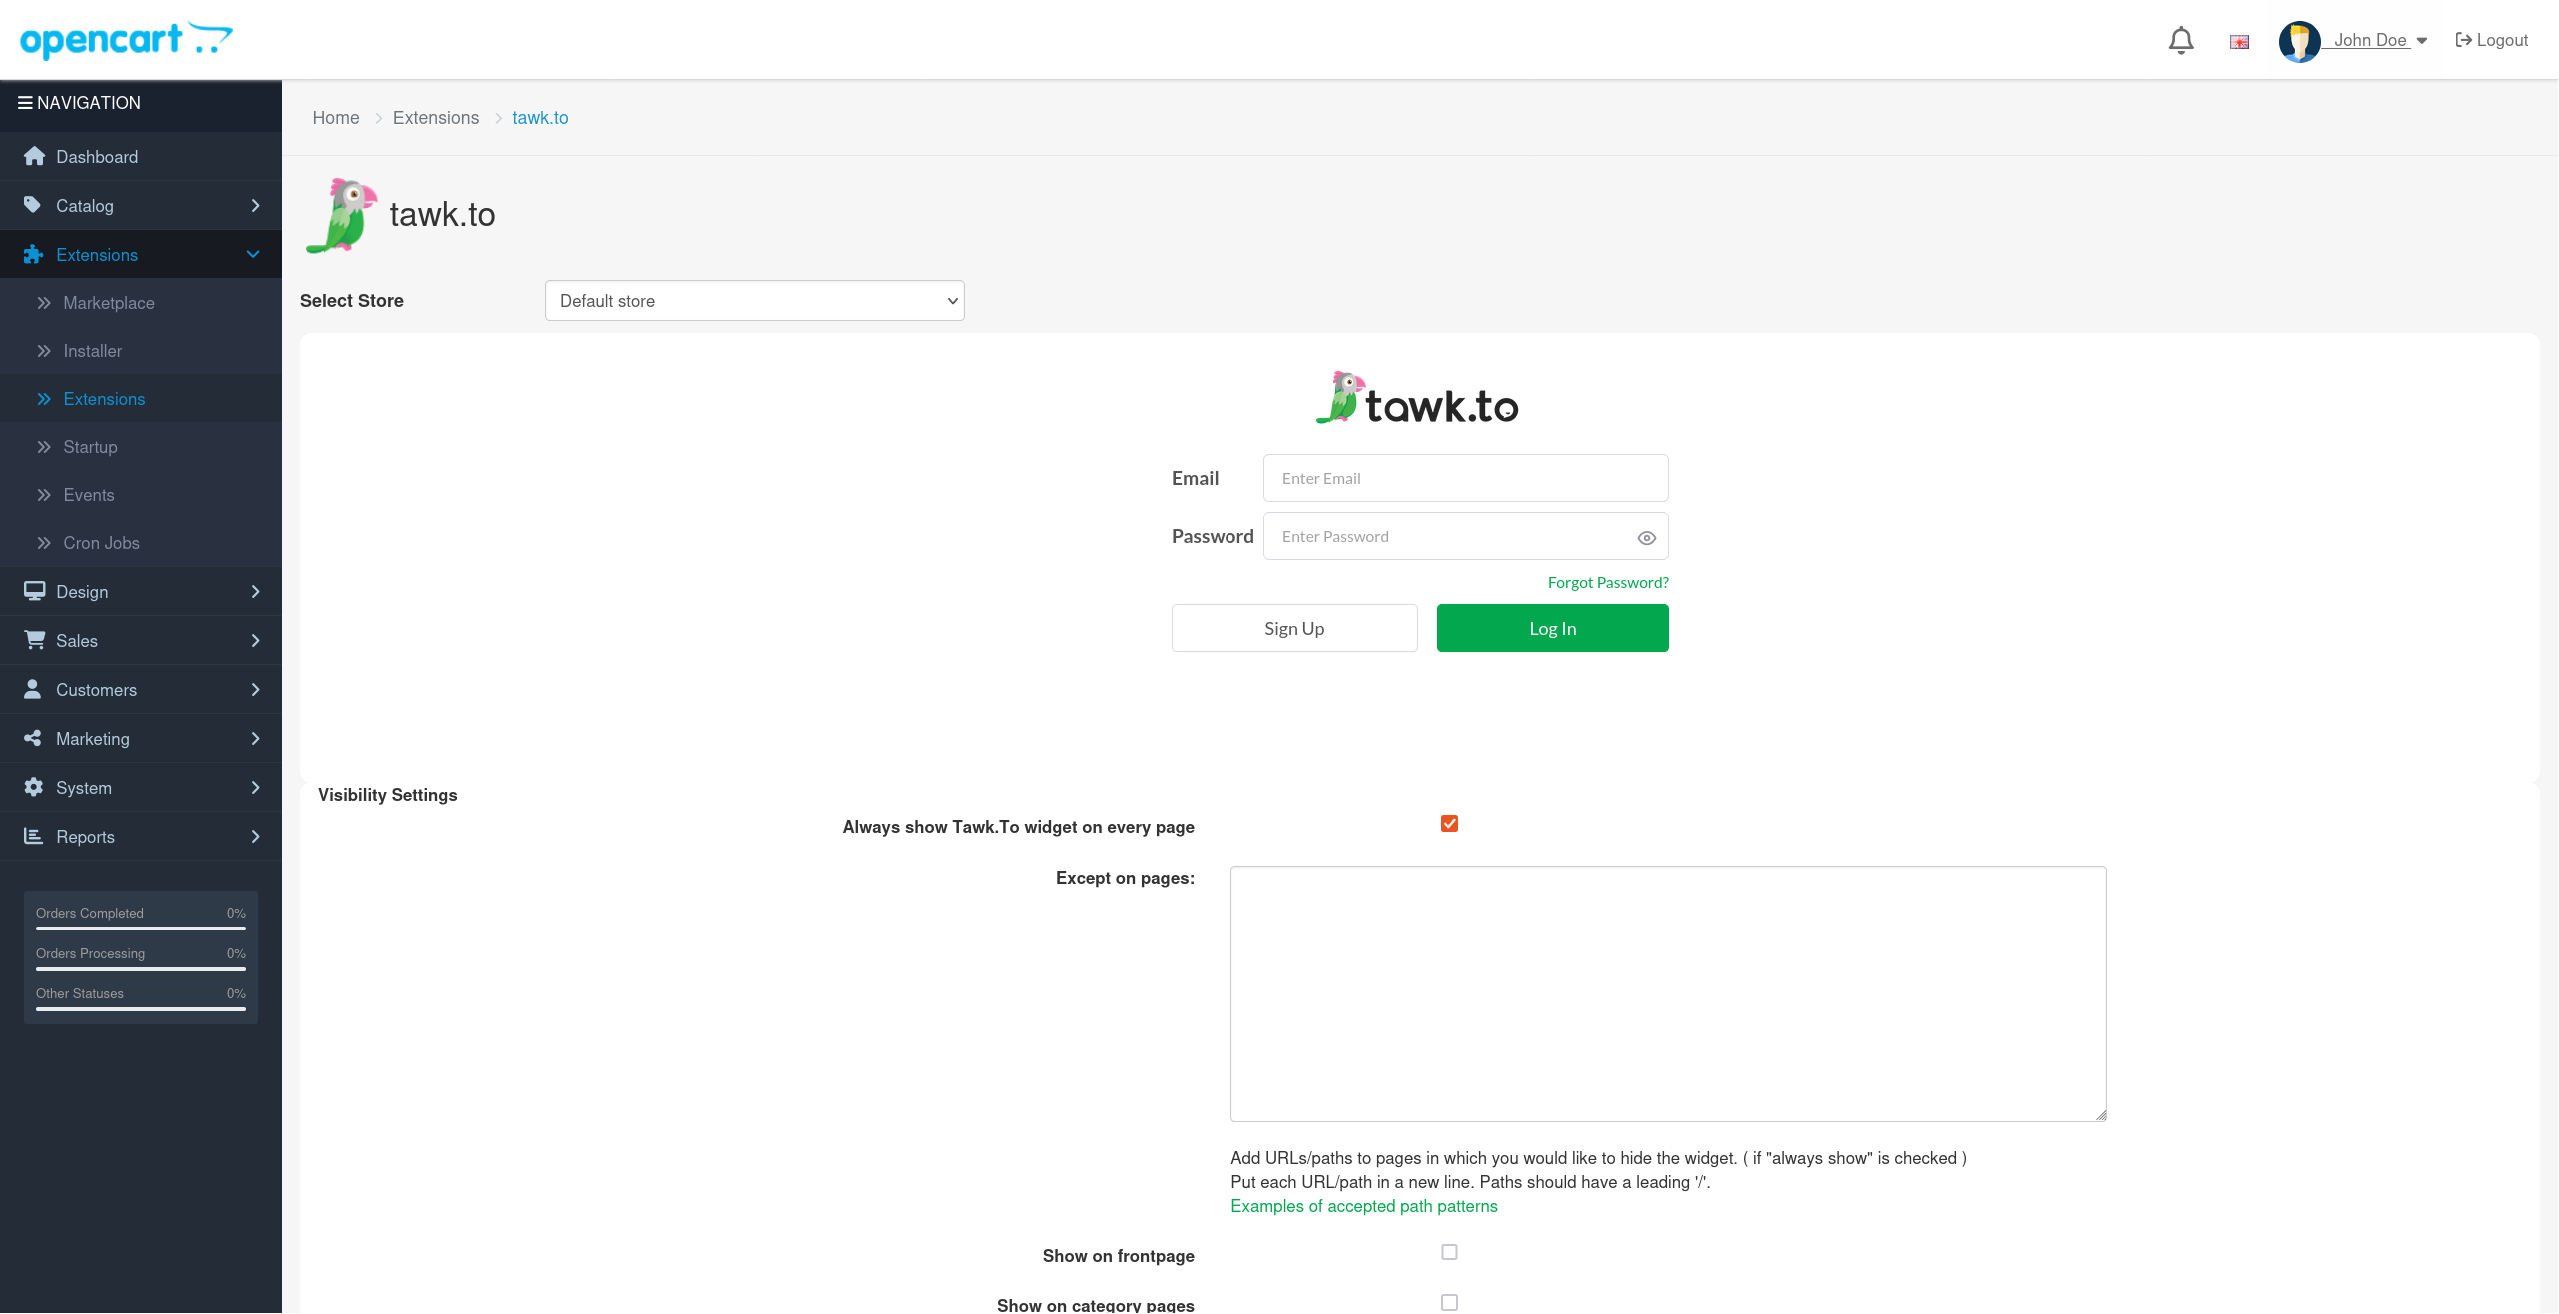
7. After installing, click the blue Edit button.

8. Sign in with your tawk.to credentials.
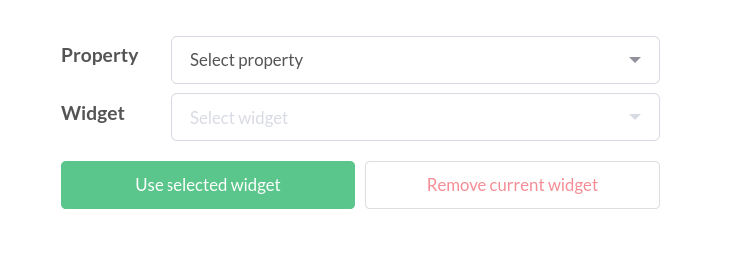
9. Select the Property and Widget you want to use. Then, click Use selected widget.
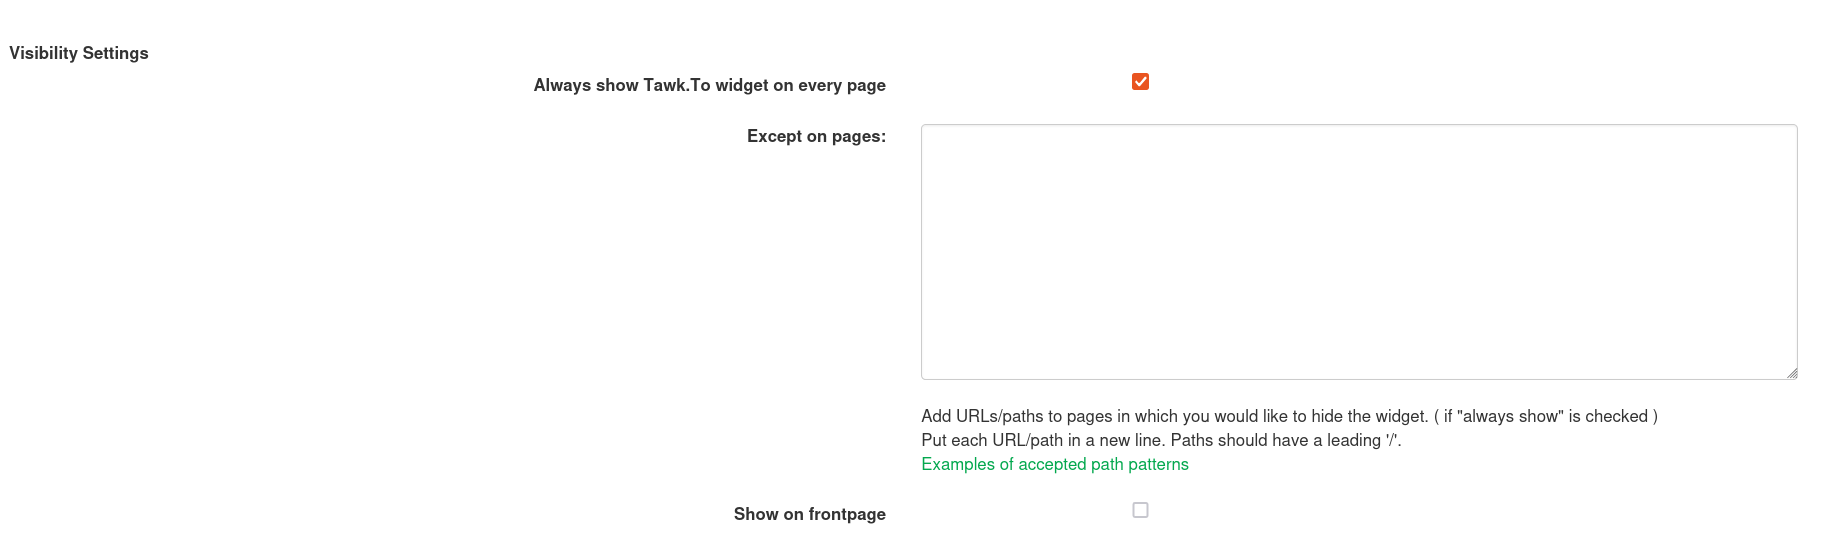
To hide the widget on specific pages, enter paths or URLs in the Except on pages field.
- Put each path or URL on a new line.
- Paths must start with “/” (for example, “/checkout”).
- URLs must start with “http” or “https”.
11. Click Save. Your widget will now appear on your storefront.

Important considerations
Manual installation step
In OpenCart 4, you must install the module after uploading it.Fine-tuned visibility control
Use the Except on pages field to hide the widget on specific pages. Make sure each entry follows the correct format.Using OpenCart 3?
Follow the steps in this guide: Adding a tawk.to widget to OpenCart 3.0.x
Now that your widget is added to your store, learn more about customizing the widget with these guides:
Change the appearance of the chat widget
Change how the widget behaves on your site
Other guides in the following categories can help you get the most out of your live chat widget:
If you have feedback about this article, or if you need more help:
Click the green live chat icon
Schedule a call with us
Visit our community