Securing your Knowledge Base custom domain and Direct Chat Link with HTTPS
The instructions below are for desktops and laptops only.
You can secure your white-labeled Knowledge Base or Chat link by enabling HTTPS with Cloudflare, giving visitors a safe and trusted experience.
Why use HTTPS?
HTTPS (HyperText Transfer Protocol Secure) encrypts communication between your site and its visitors. It protects user data, improves SEO rankings, and is required by most modern browsers for secure connections.
You can enable HTTPS on your website by using a third-party service like Cloudflare. Simply create a free Cloudflare account and update your DNS settings to proxy your traffic through their service.
Enabling HTTPS with Cloudflare
2. After creating your account, you’ll be brought to the dashboard. Enter your domain and click Continue.

3. Click Select plan on the plan you want. You can choose a free or paid plan.

4. Cloudflare will scan and display your DNS records. Review them and click Continue to activation at the bottom.

To complete the setup, you’ll need to point your domain to Cloudflare:
1. Log in to your domain registrar (e.g., GoDaddy).
2. Replace your current nameservers with the ones provided by Cloudflare. Refer to your domain registrar for specific instructions.
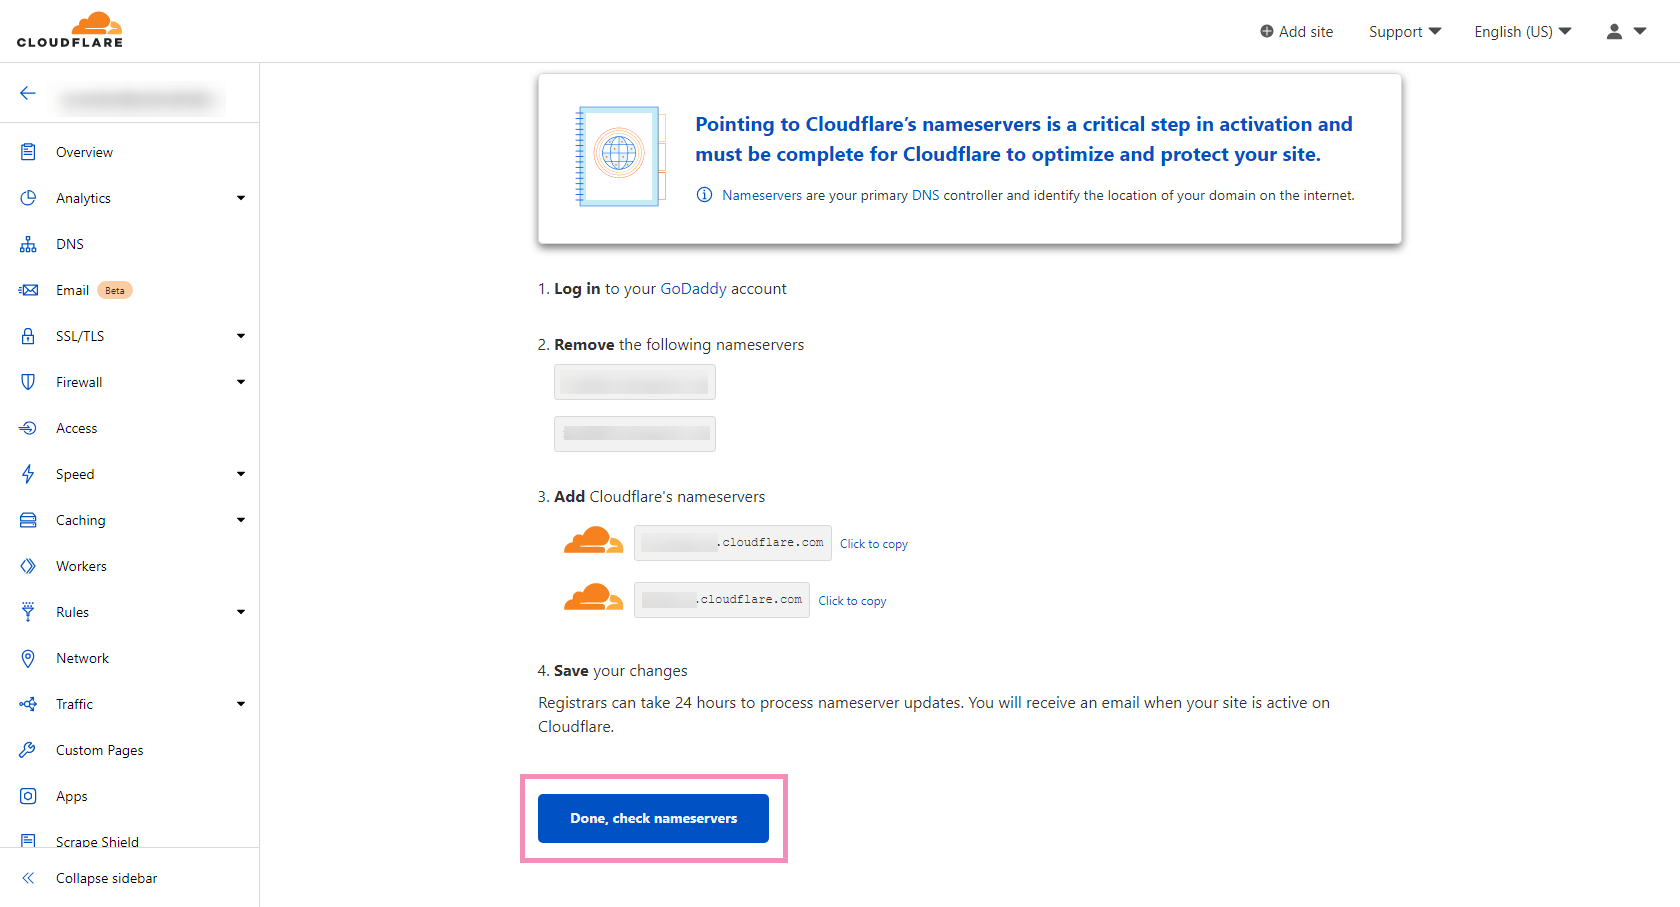
Note: DNS changes can take up to 24 hours to update.
Important considerations
You must configure HTTPS manually; it's not enabled by default for white-labeled domains.
Cloudflare’s Free Plan supports everything you need for this setup.
If you have feedback about this article, or if you need more help:
Click the green live chat icon
Schedule a call with us
Visit our community