Make: Add a new subscriber to a Mailchimp audience when a chat starts
Integrating tawk.to with your Mailchimp account makes it easy to build your email list faster and stay in touch with new leads. Make allows you to connect tawk.to with hundreds of apps using zero-code integrations.
Follow the steps below to set up a workflow that adds a new email subscriber to an audience in Mailchimp whenever a visitor initiates a chat.
Note: To set up this automation, you’ll need to have accounts with both Make and Mailchimp. You’ll also need to set set up and activate your Pre-Chat Form.
Learn more about creating automations with Make and tawk.to in this article: Make
Learn about setting up your Pre-Chat Form: Using the Pre-Chat Form
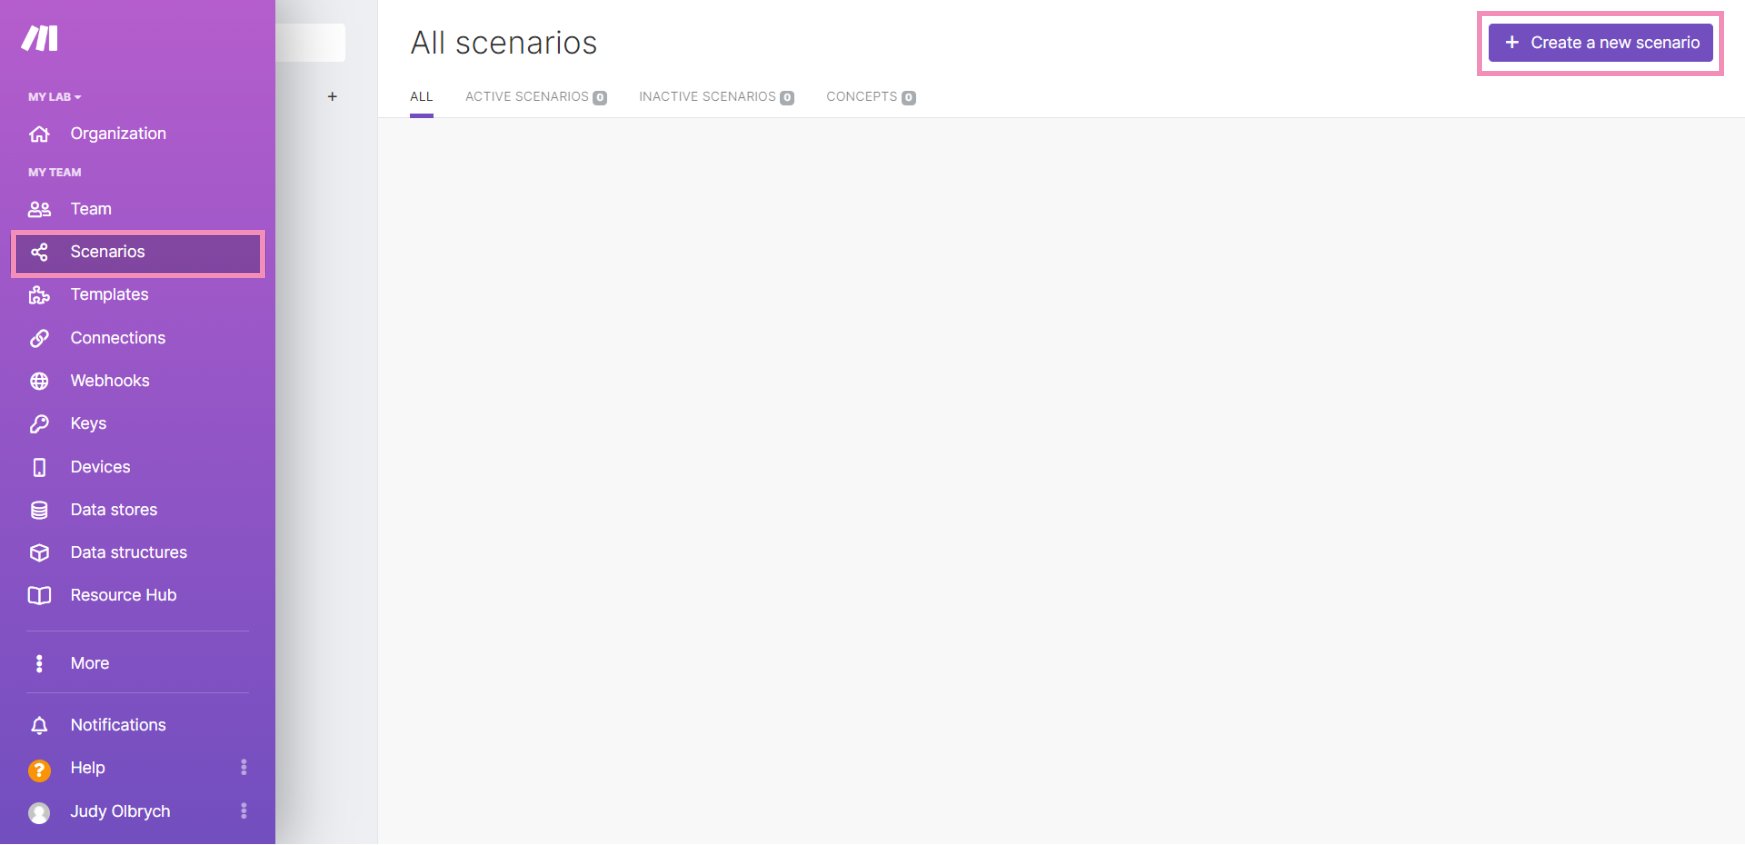
1 - Create a new scenario
Log in to your Make account. Then, navigate to Scenarios in the left navigation menu.
To create a new workflow, click the Create a new scenario button in the upper right of your Make dashboard.
Click the plus (+) sign to add an app and search for tawk.to.
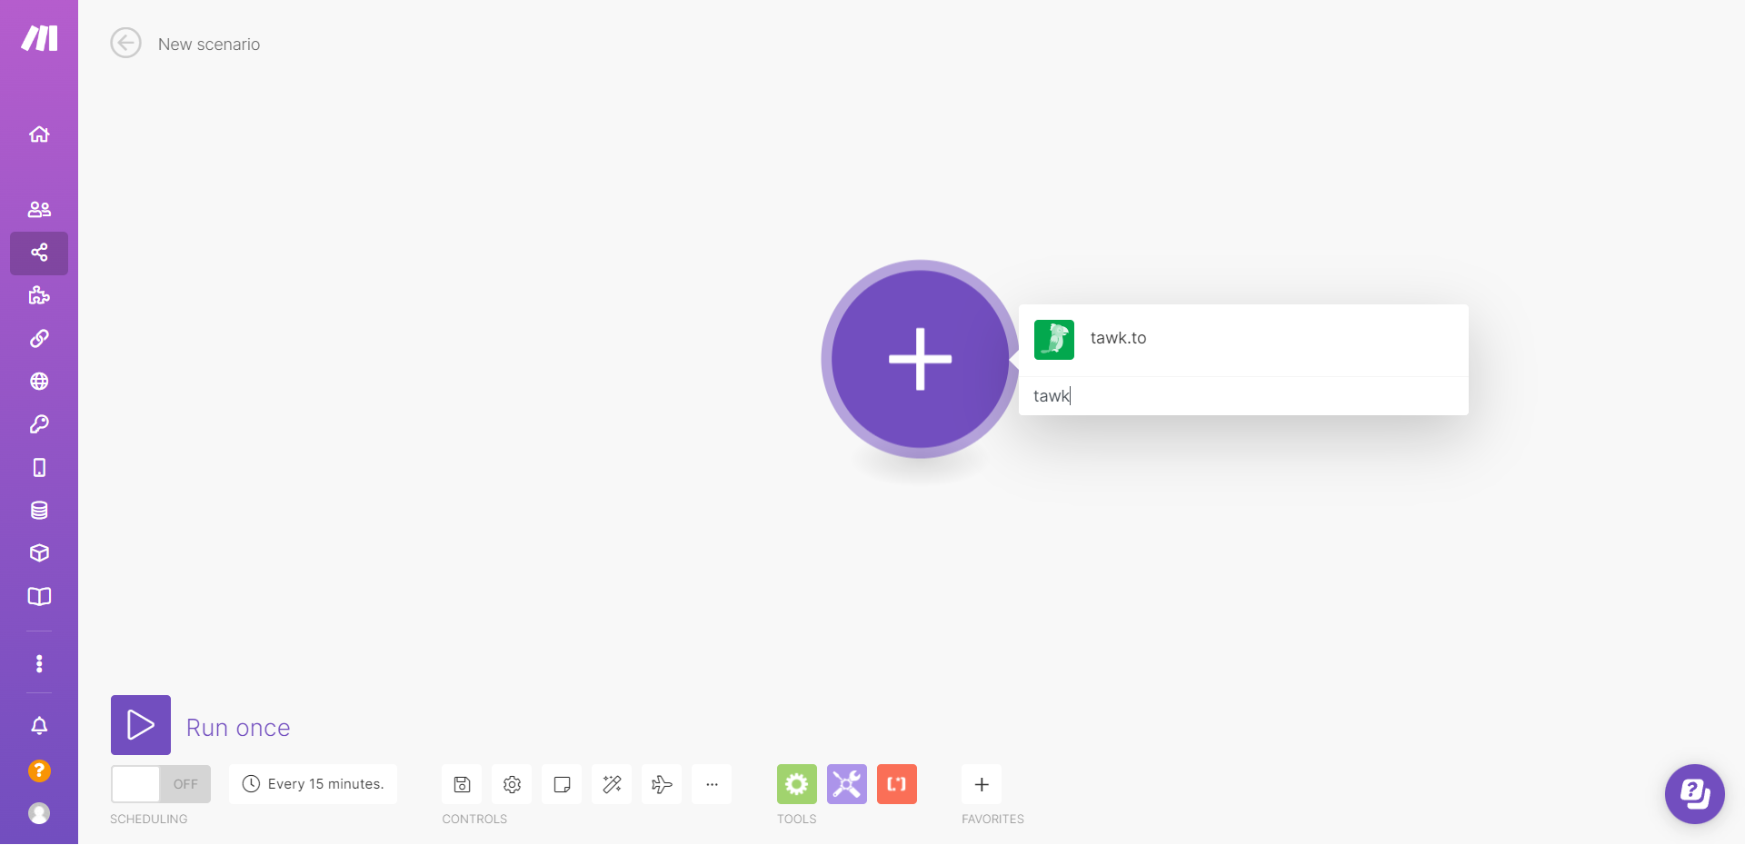
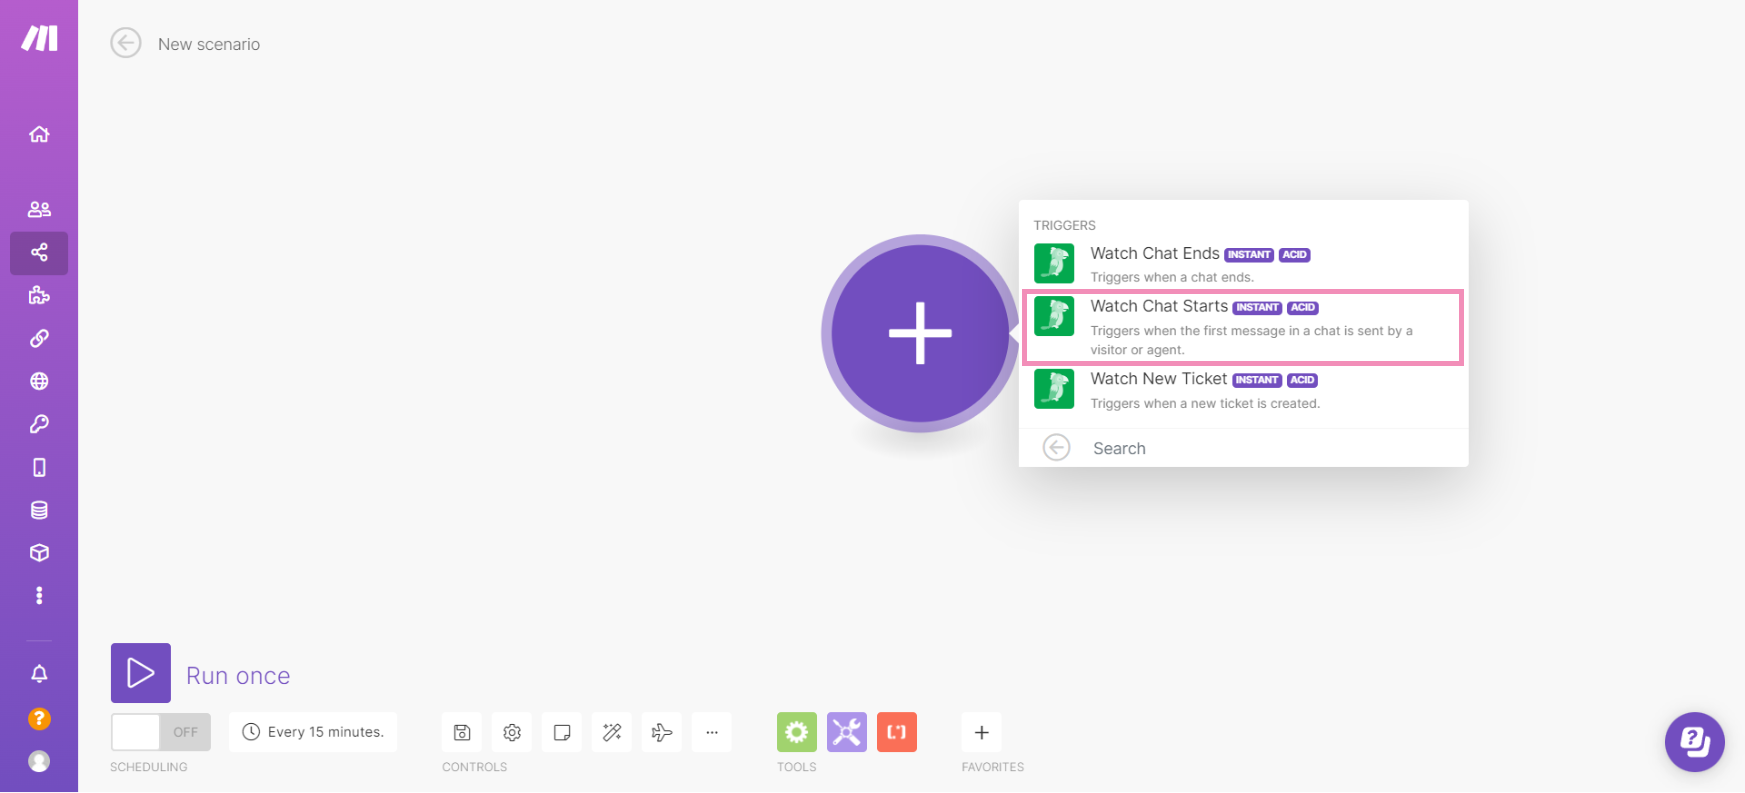
Select Watch Chat Starts.
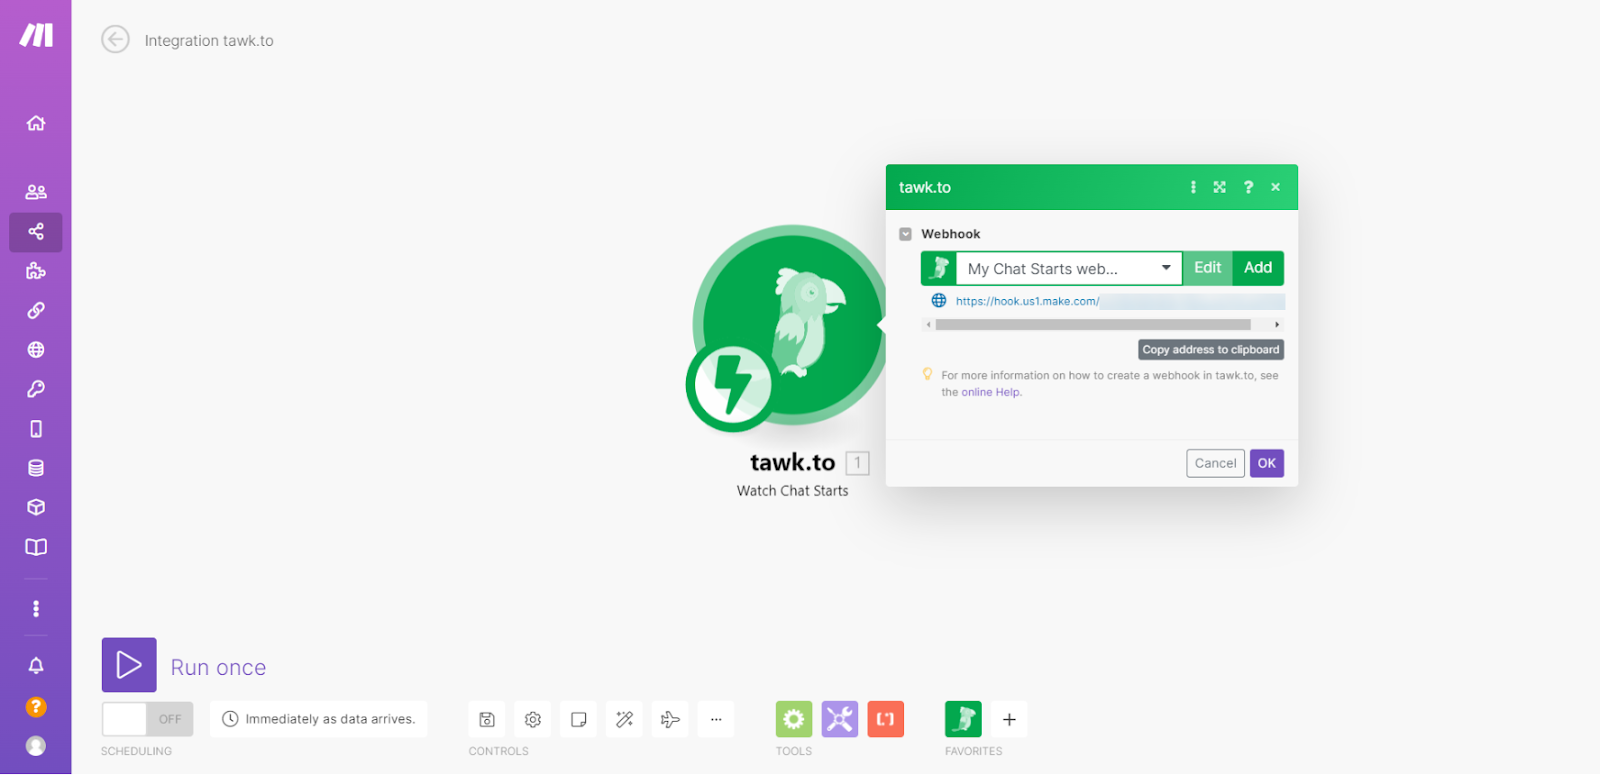
2 - Select or create a webhook
Select an existing webhook. If you do not already have a webhook for watching new chat starts in tawk.to, select the Add button.
Name your webhook and select Save to update your settings.
Then, copy the URL address to your clipboard and click OK. You’ll need the URL to create a webhook in your tawk.to account.
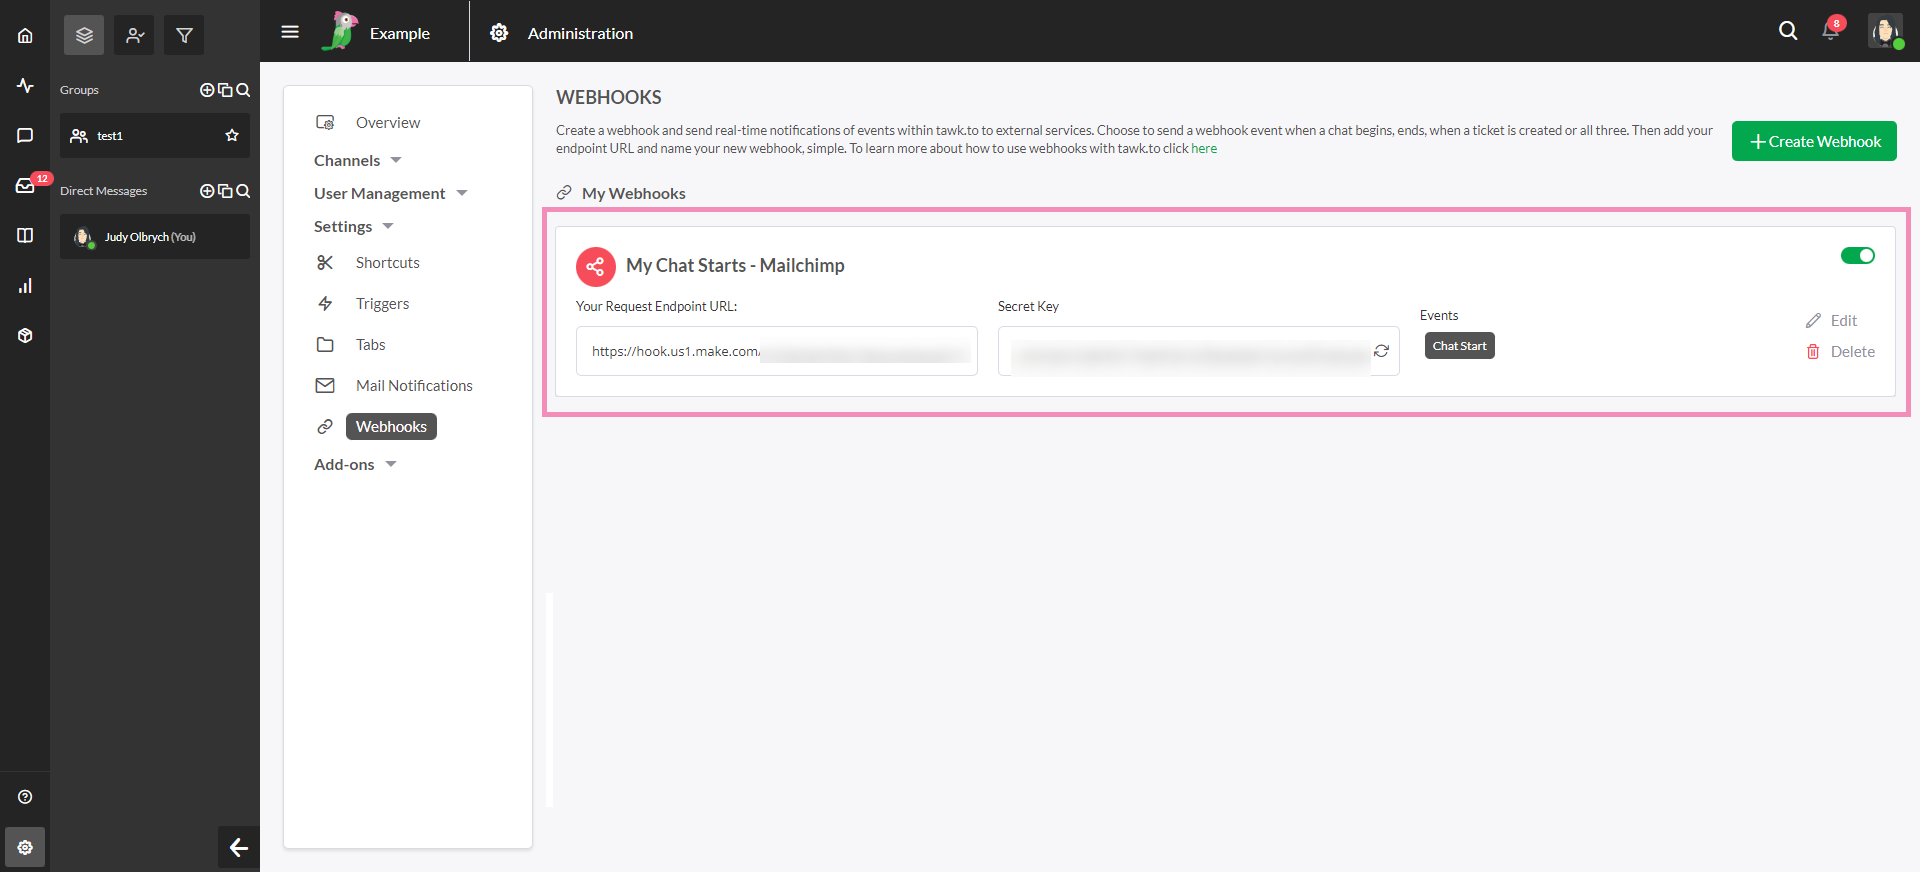
Log in to your tawk.to Dashboard and make your way to⚙️Administration ➞ Settings ➞ Webhooks for your selected property.
Then, click the + Create Webhook button in the upper right.
In the Name field, enter the name of your new webhook.
Enter the webhook URL you copied under Your Endpoint URL.
Under Select Events, tick the box for Chat Starts.
Then, click the Continue button.
See our guide to creating webhooks here: Creating and managing Webhooks
3 - Connect your Mailchimp account
Click the plus (+) sign to add another module to your workflow and search for Mailchimp.
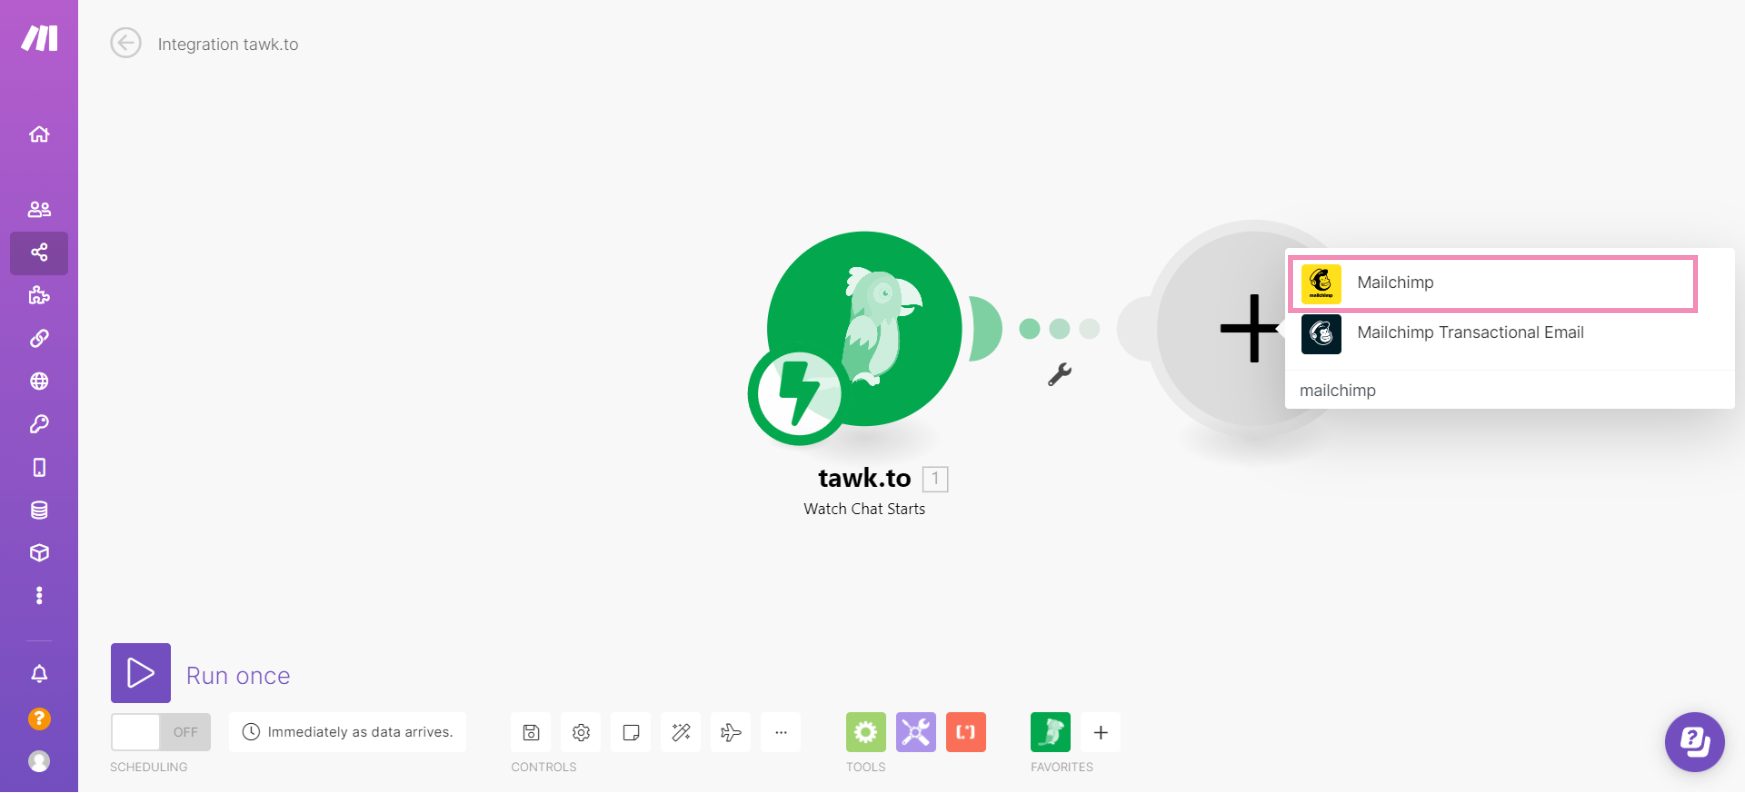
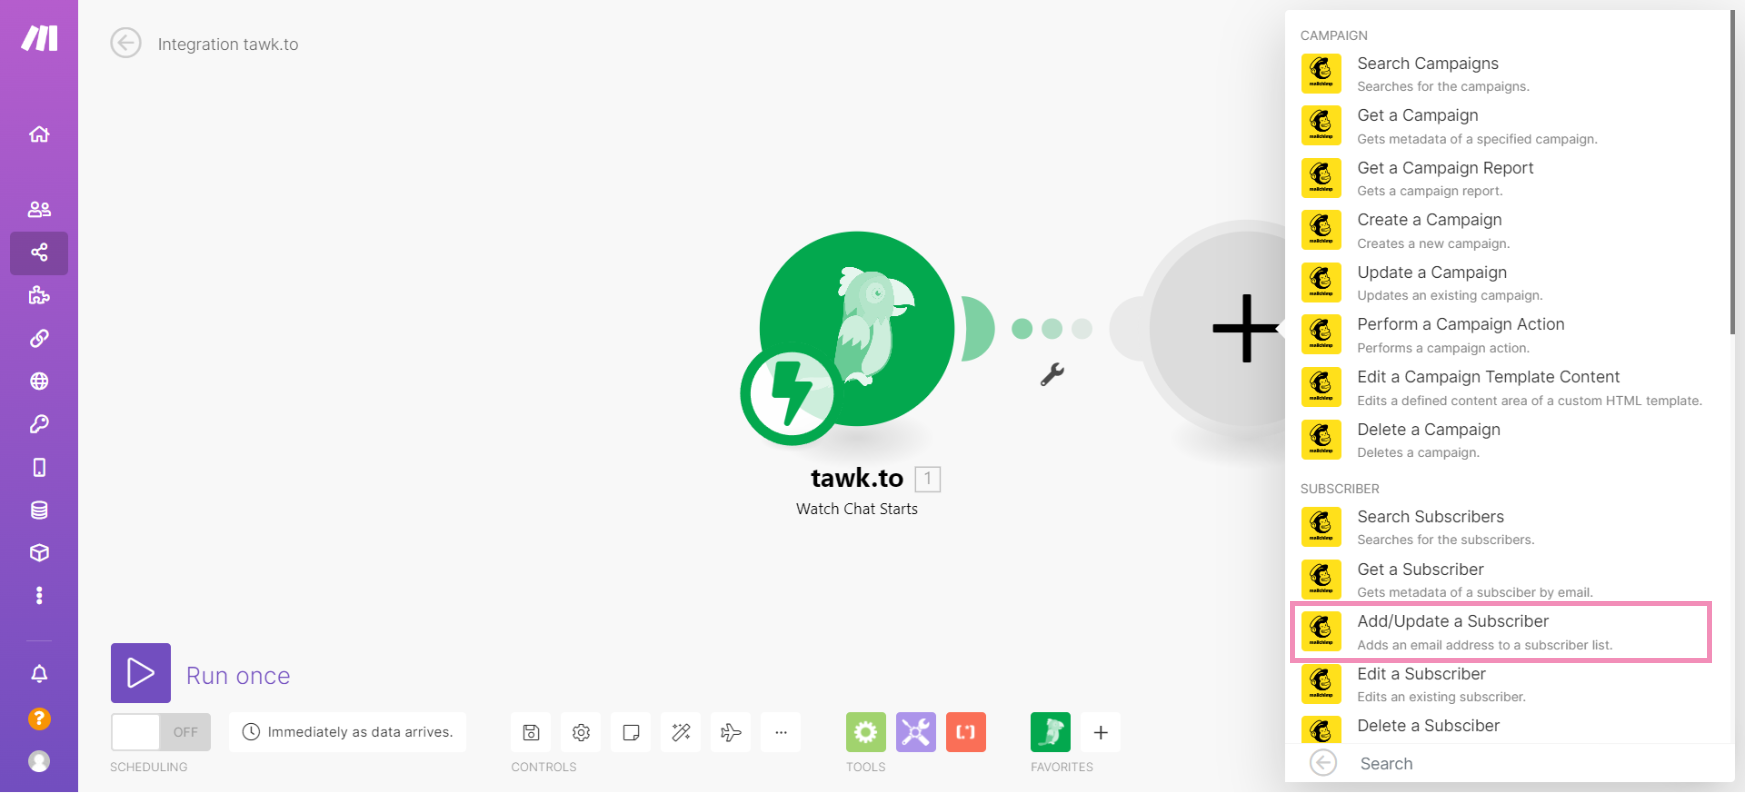
To add a new email to a subscriber list in your Mailchimp account when a chat starts, select Add/Update a Subscriber. Then, click the OK button.
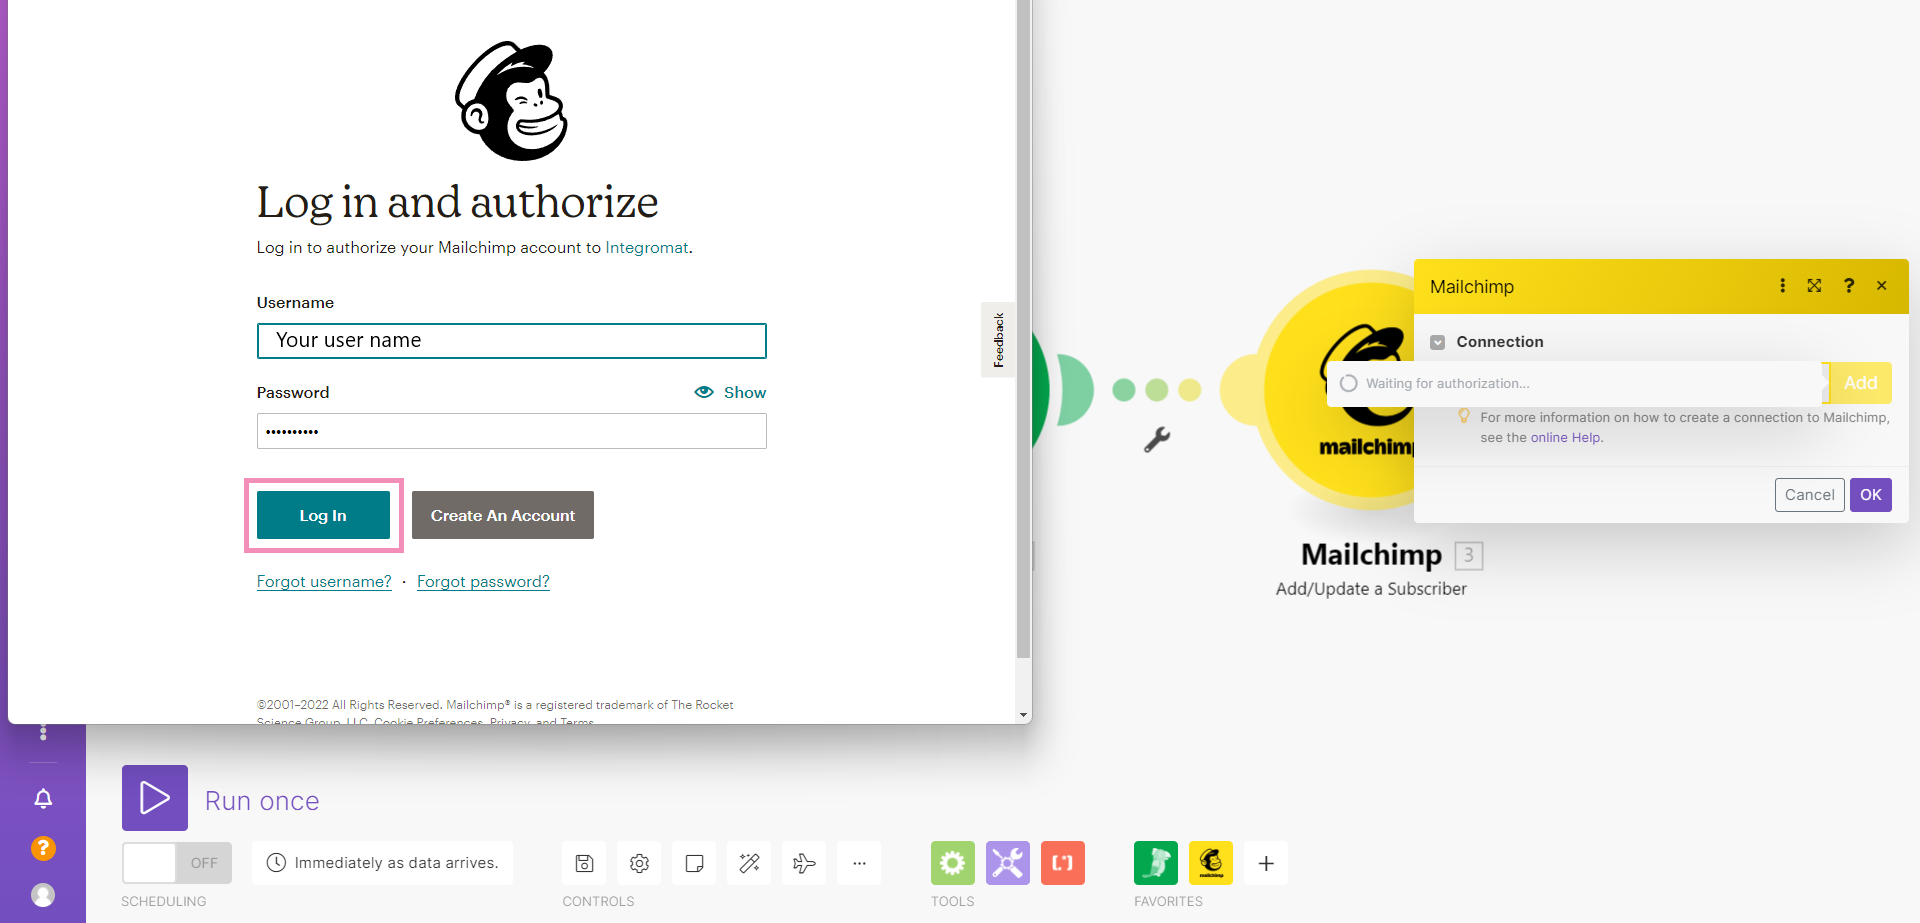
Under Connection, select a Mailchimp account you’ve previously connected with Make or click Add to create a new connection. Then, click OK.
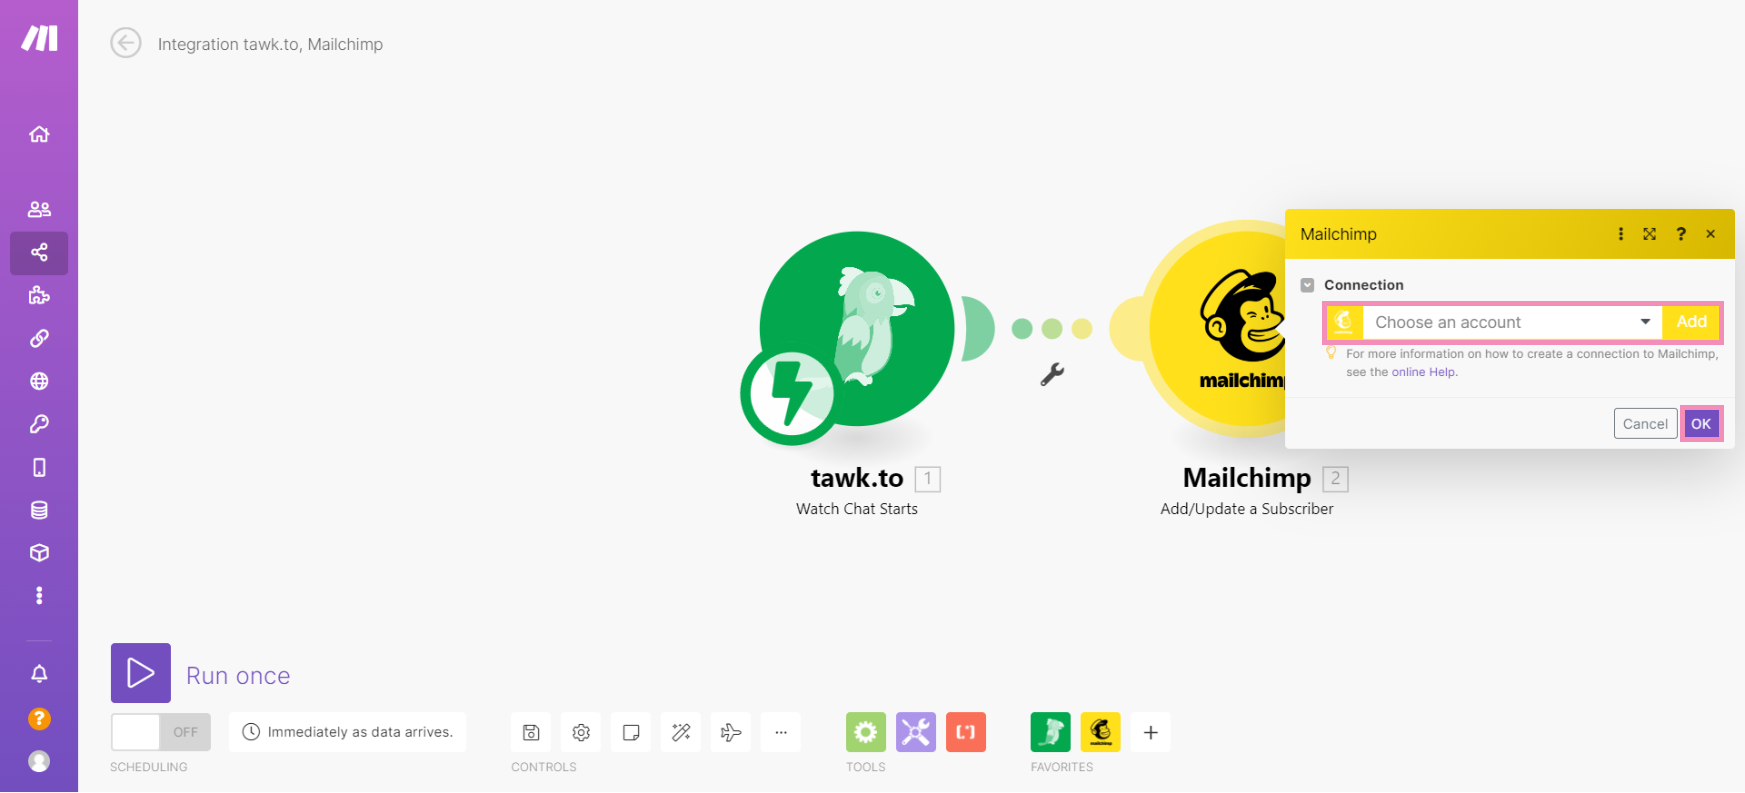
A new window will open allowing you to Log in to your Mailchimp account and authorize the connection with Make (Integromat).
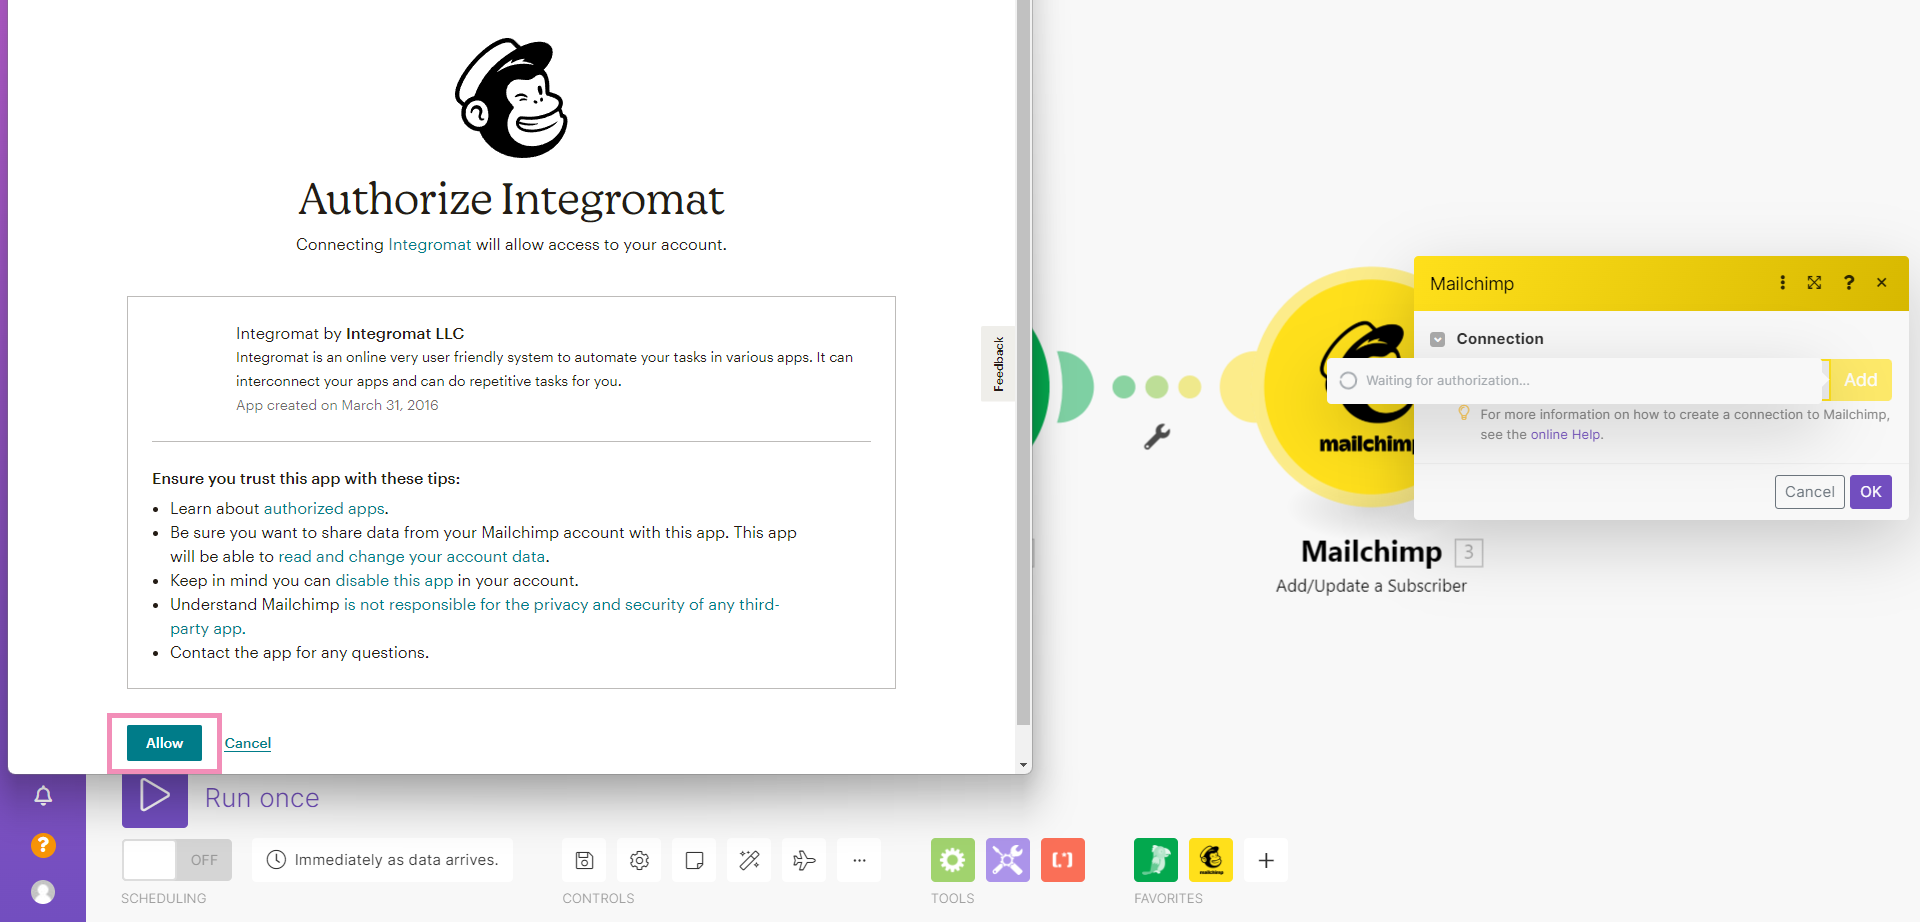
Select Allow to complete the authorization.
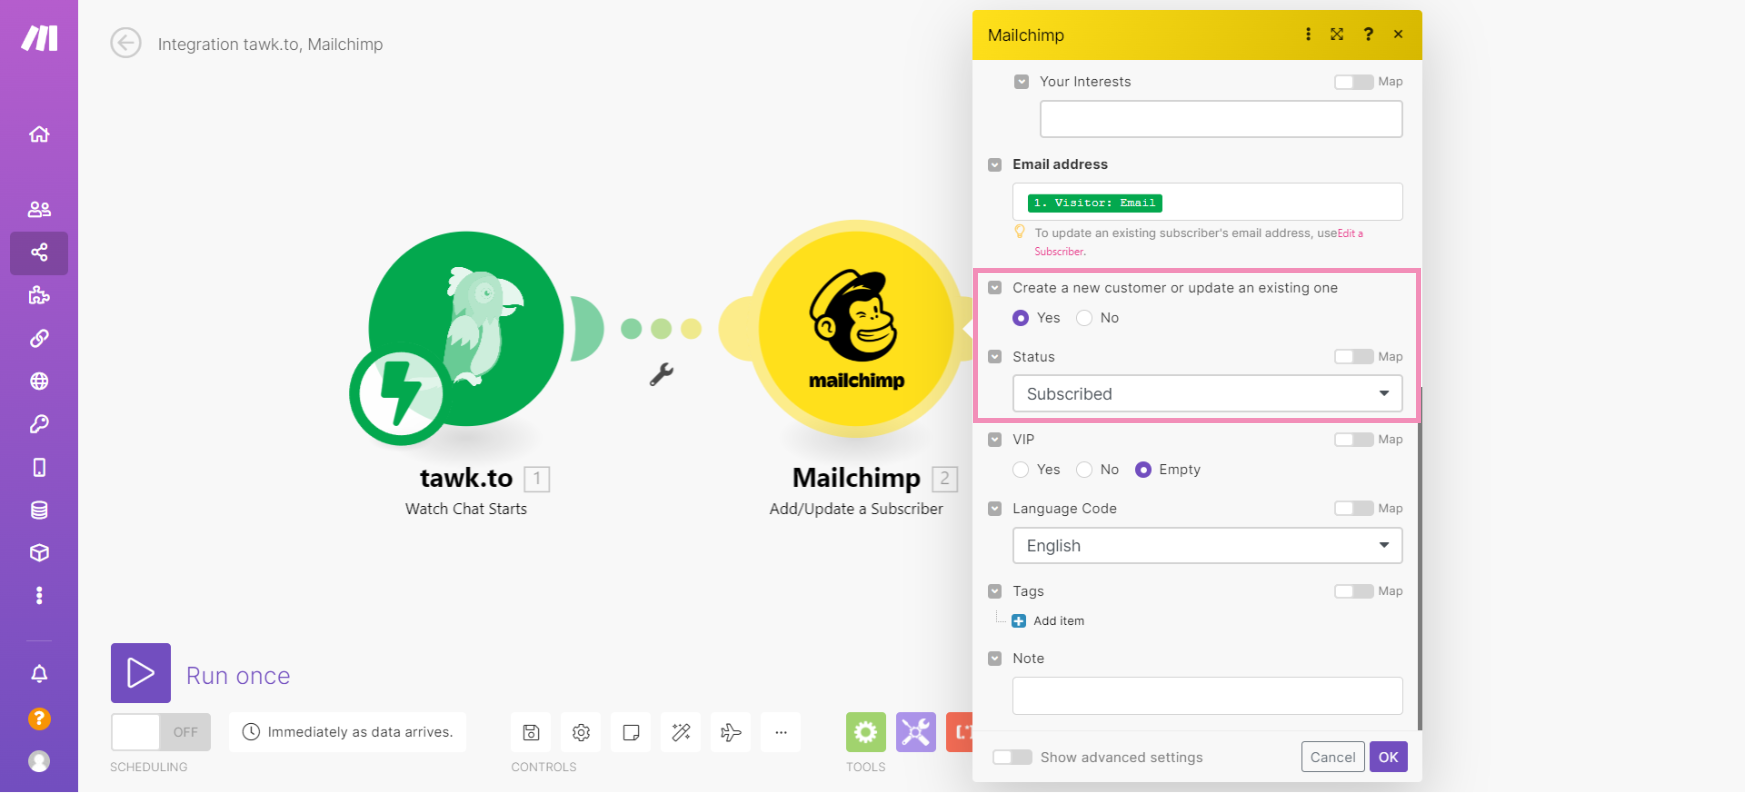
Under List ID, select the audience the new subscriber will be added to.
Then, add values in the fields containing the visitor information you would like to transfer from tawk.to to your Mailchimp account.
Under Enter a List ID, you can select the option to enter the subscriber values manually or choose Select from a list to add tokens for fields from tawk.to.
Under First Name, select or enter 1.visitor.name.
Under Email address, select or enter 1.visitor.email.

Under Create a new customer or update an existing one, select Yes.
Under Status, select Subscribed.
Then, click the OK button.
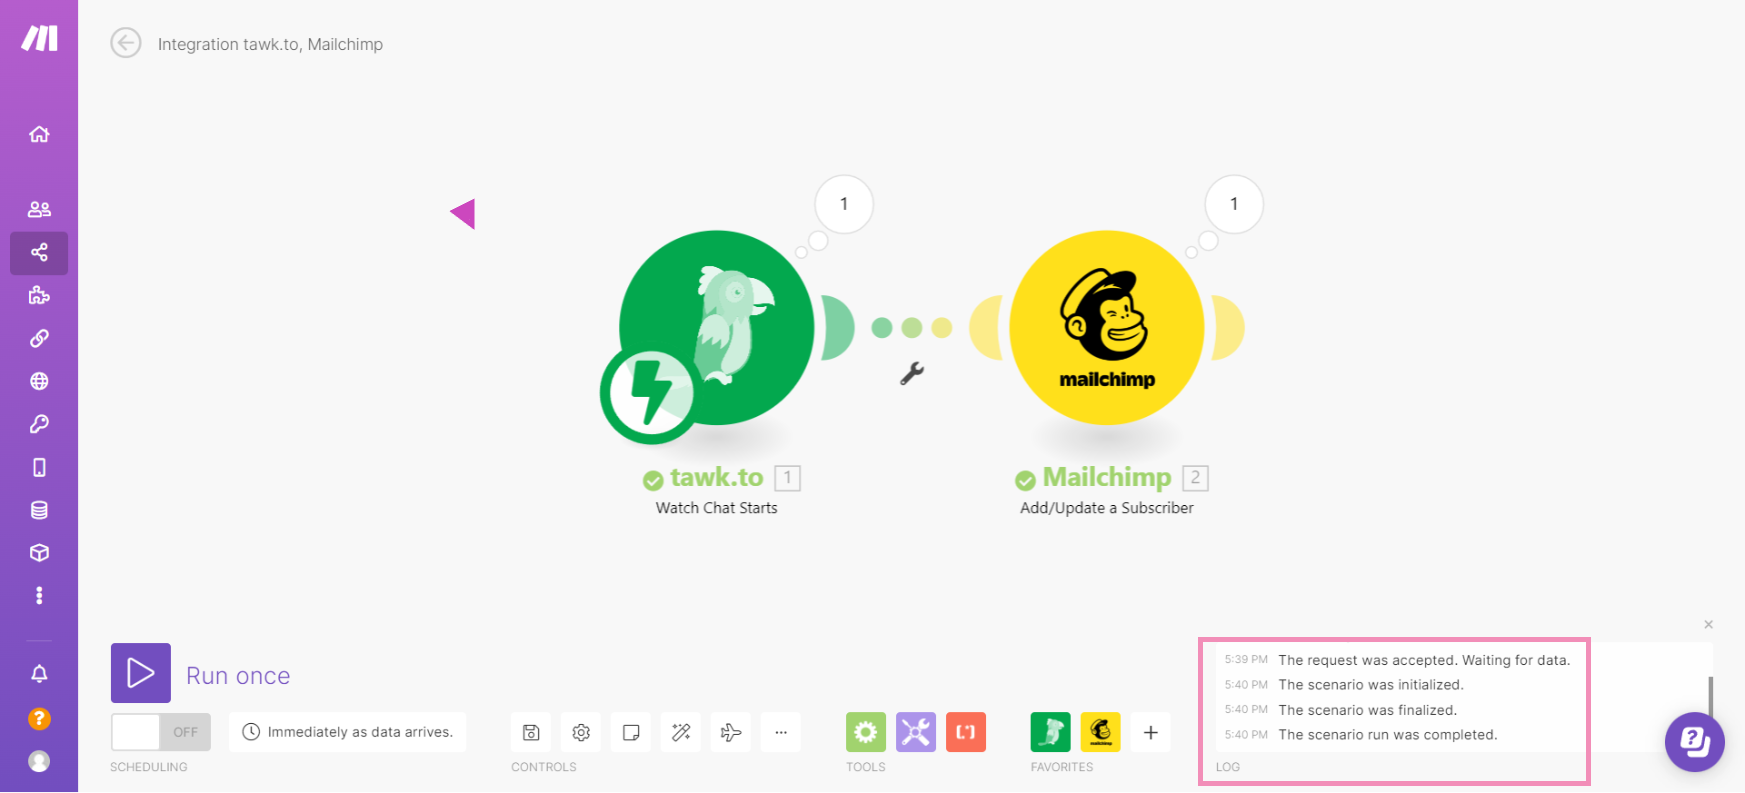
In the lower-left corner, click Run once.
Send yourself a test message in the widget.
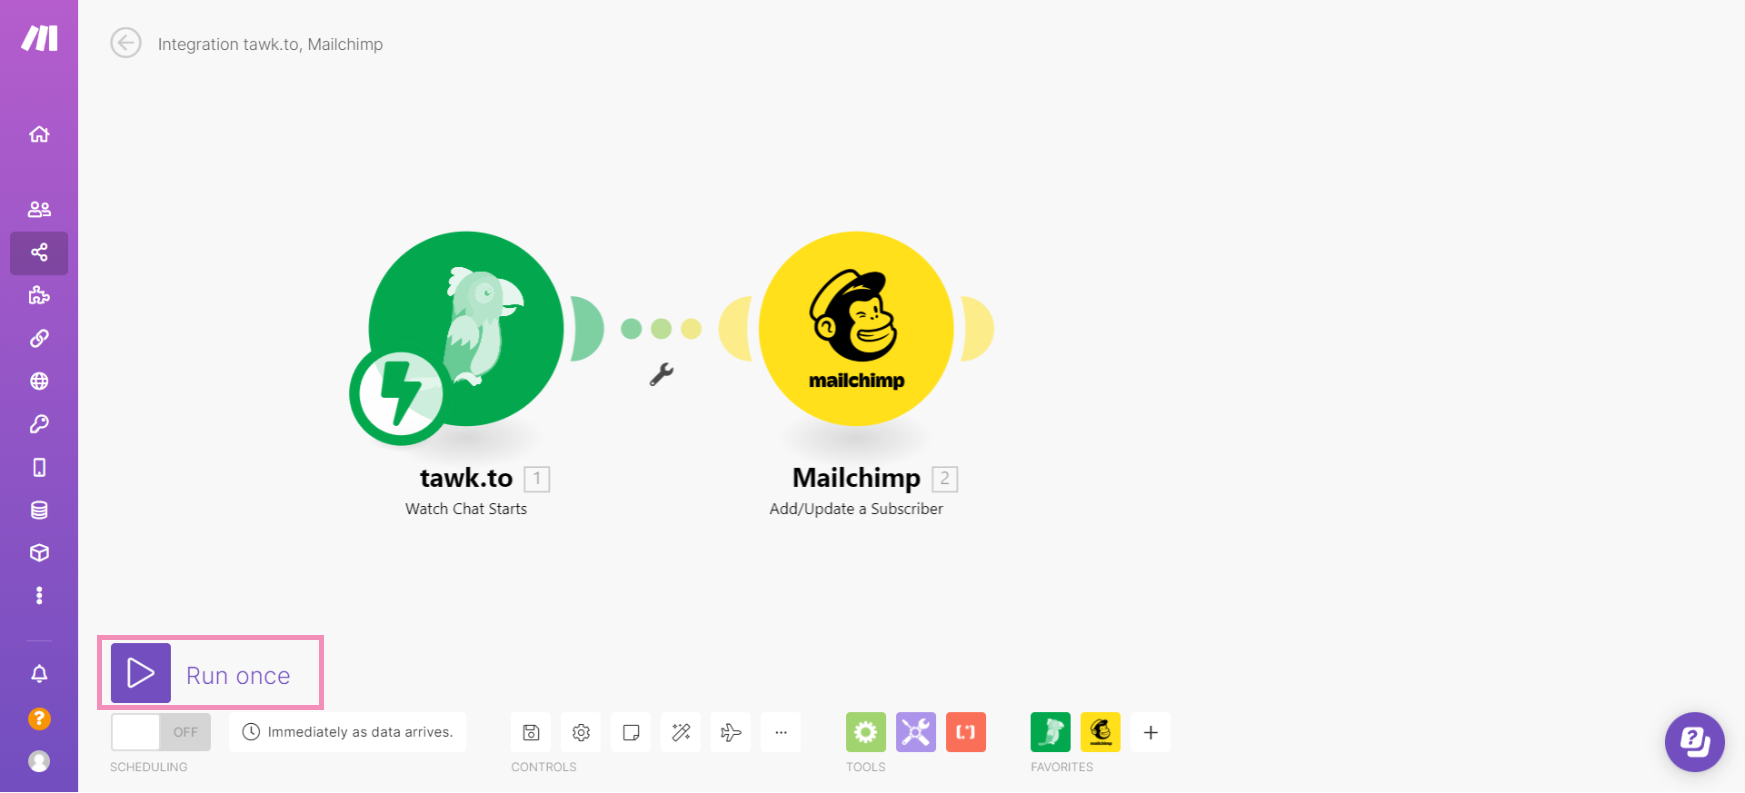
Then, check the status of your newly created scenario.
4 - Activate your new scenario
To activate your new workflow, navigate to the Scenarios tab in the left menu.
Next to your scenario, check to make sure the toggle is switched to the on position.

Now, when a visitor starts a chat in your widget and fills out your Pre-Chat Form, their name and email will be added to the Mailchimp subscriber list for the audience you selected.
If you need someone to walk you through the setup process, book a call with our support team.