Adding the tawk.to widget to Joomla 3
[Desktop]
Download links
Installation for the plugin
1. Download plg_tawkto-<release_version>.zip.
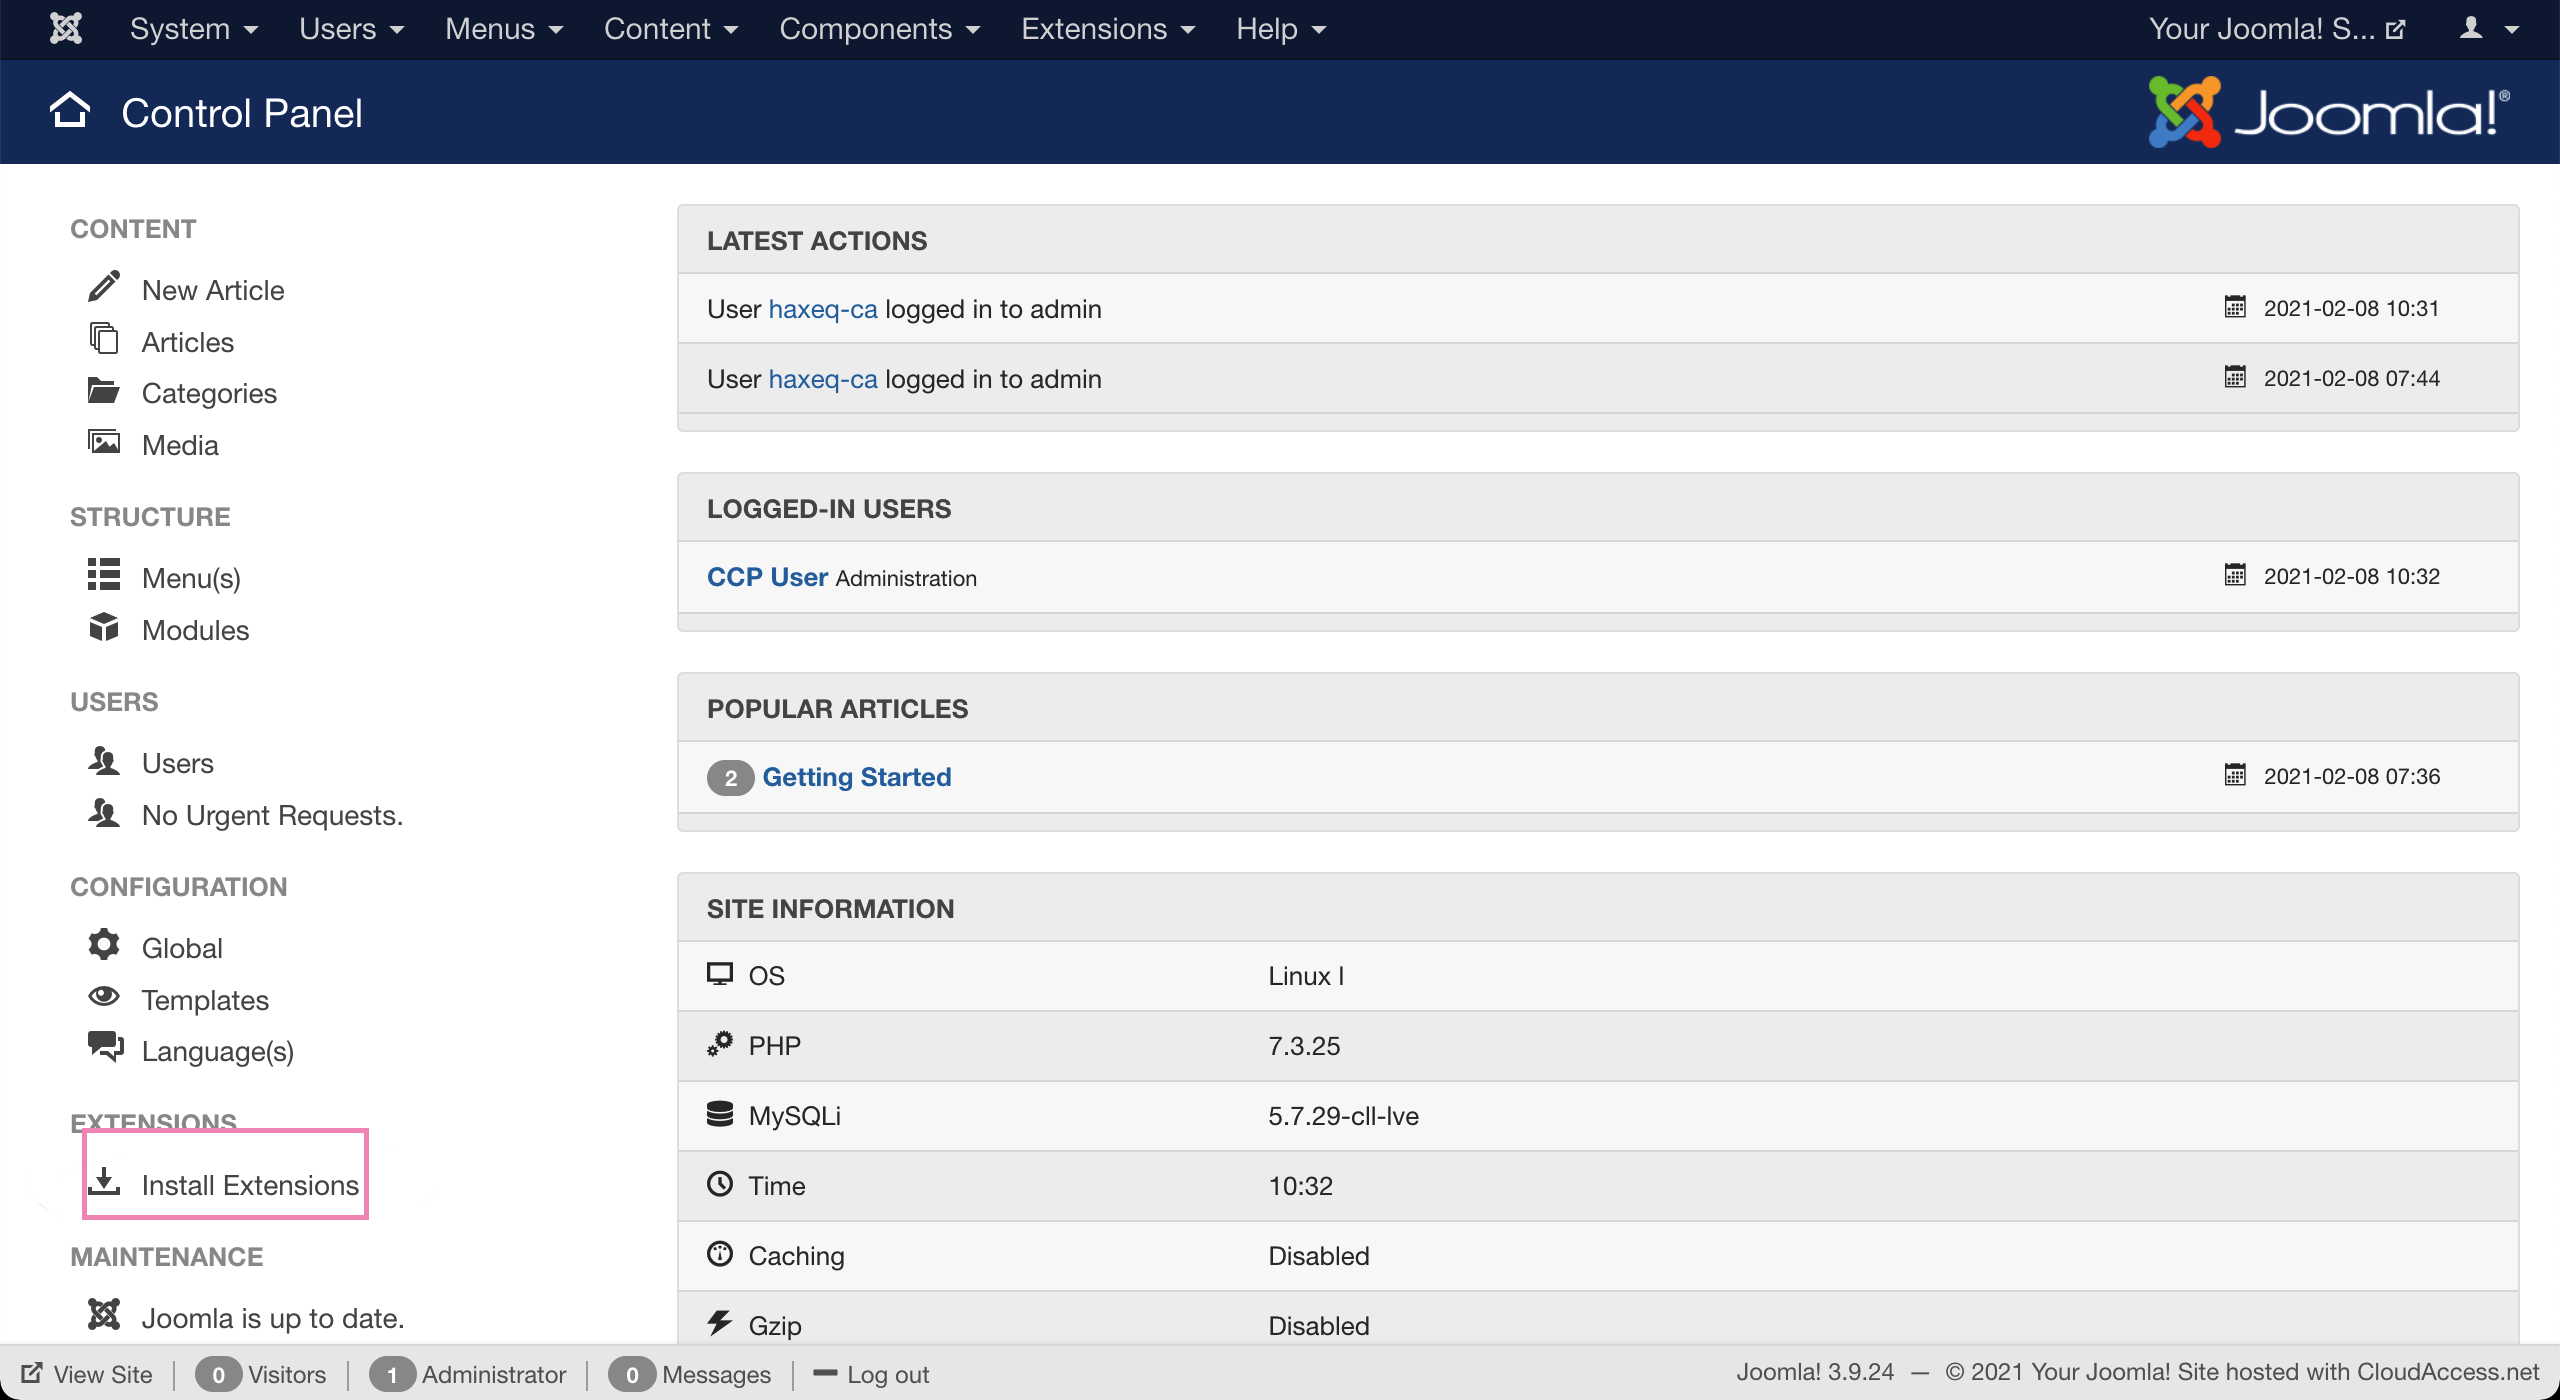
2. In the Joomla administration panel, select Install Extensions in the left sidebar menu.
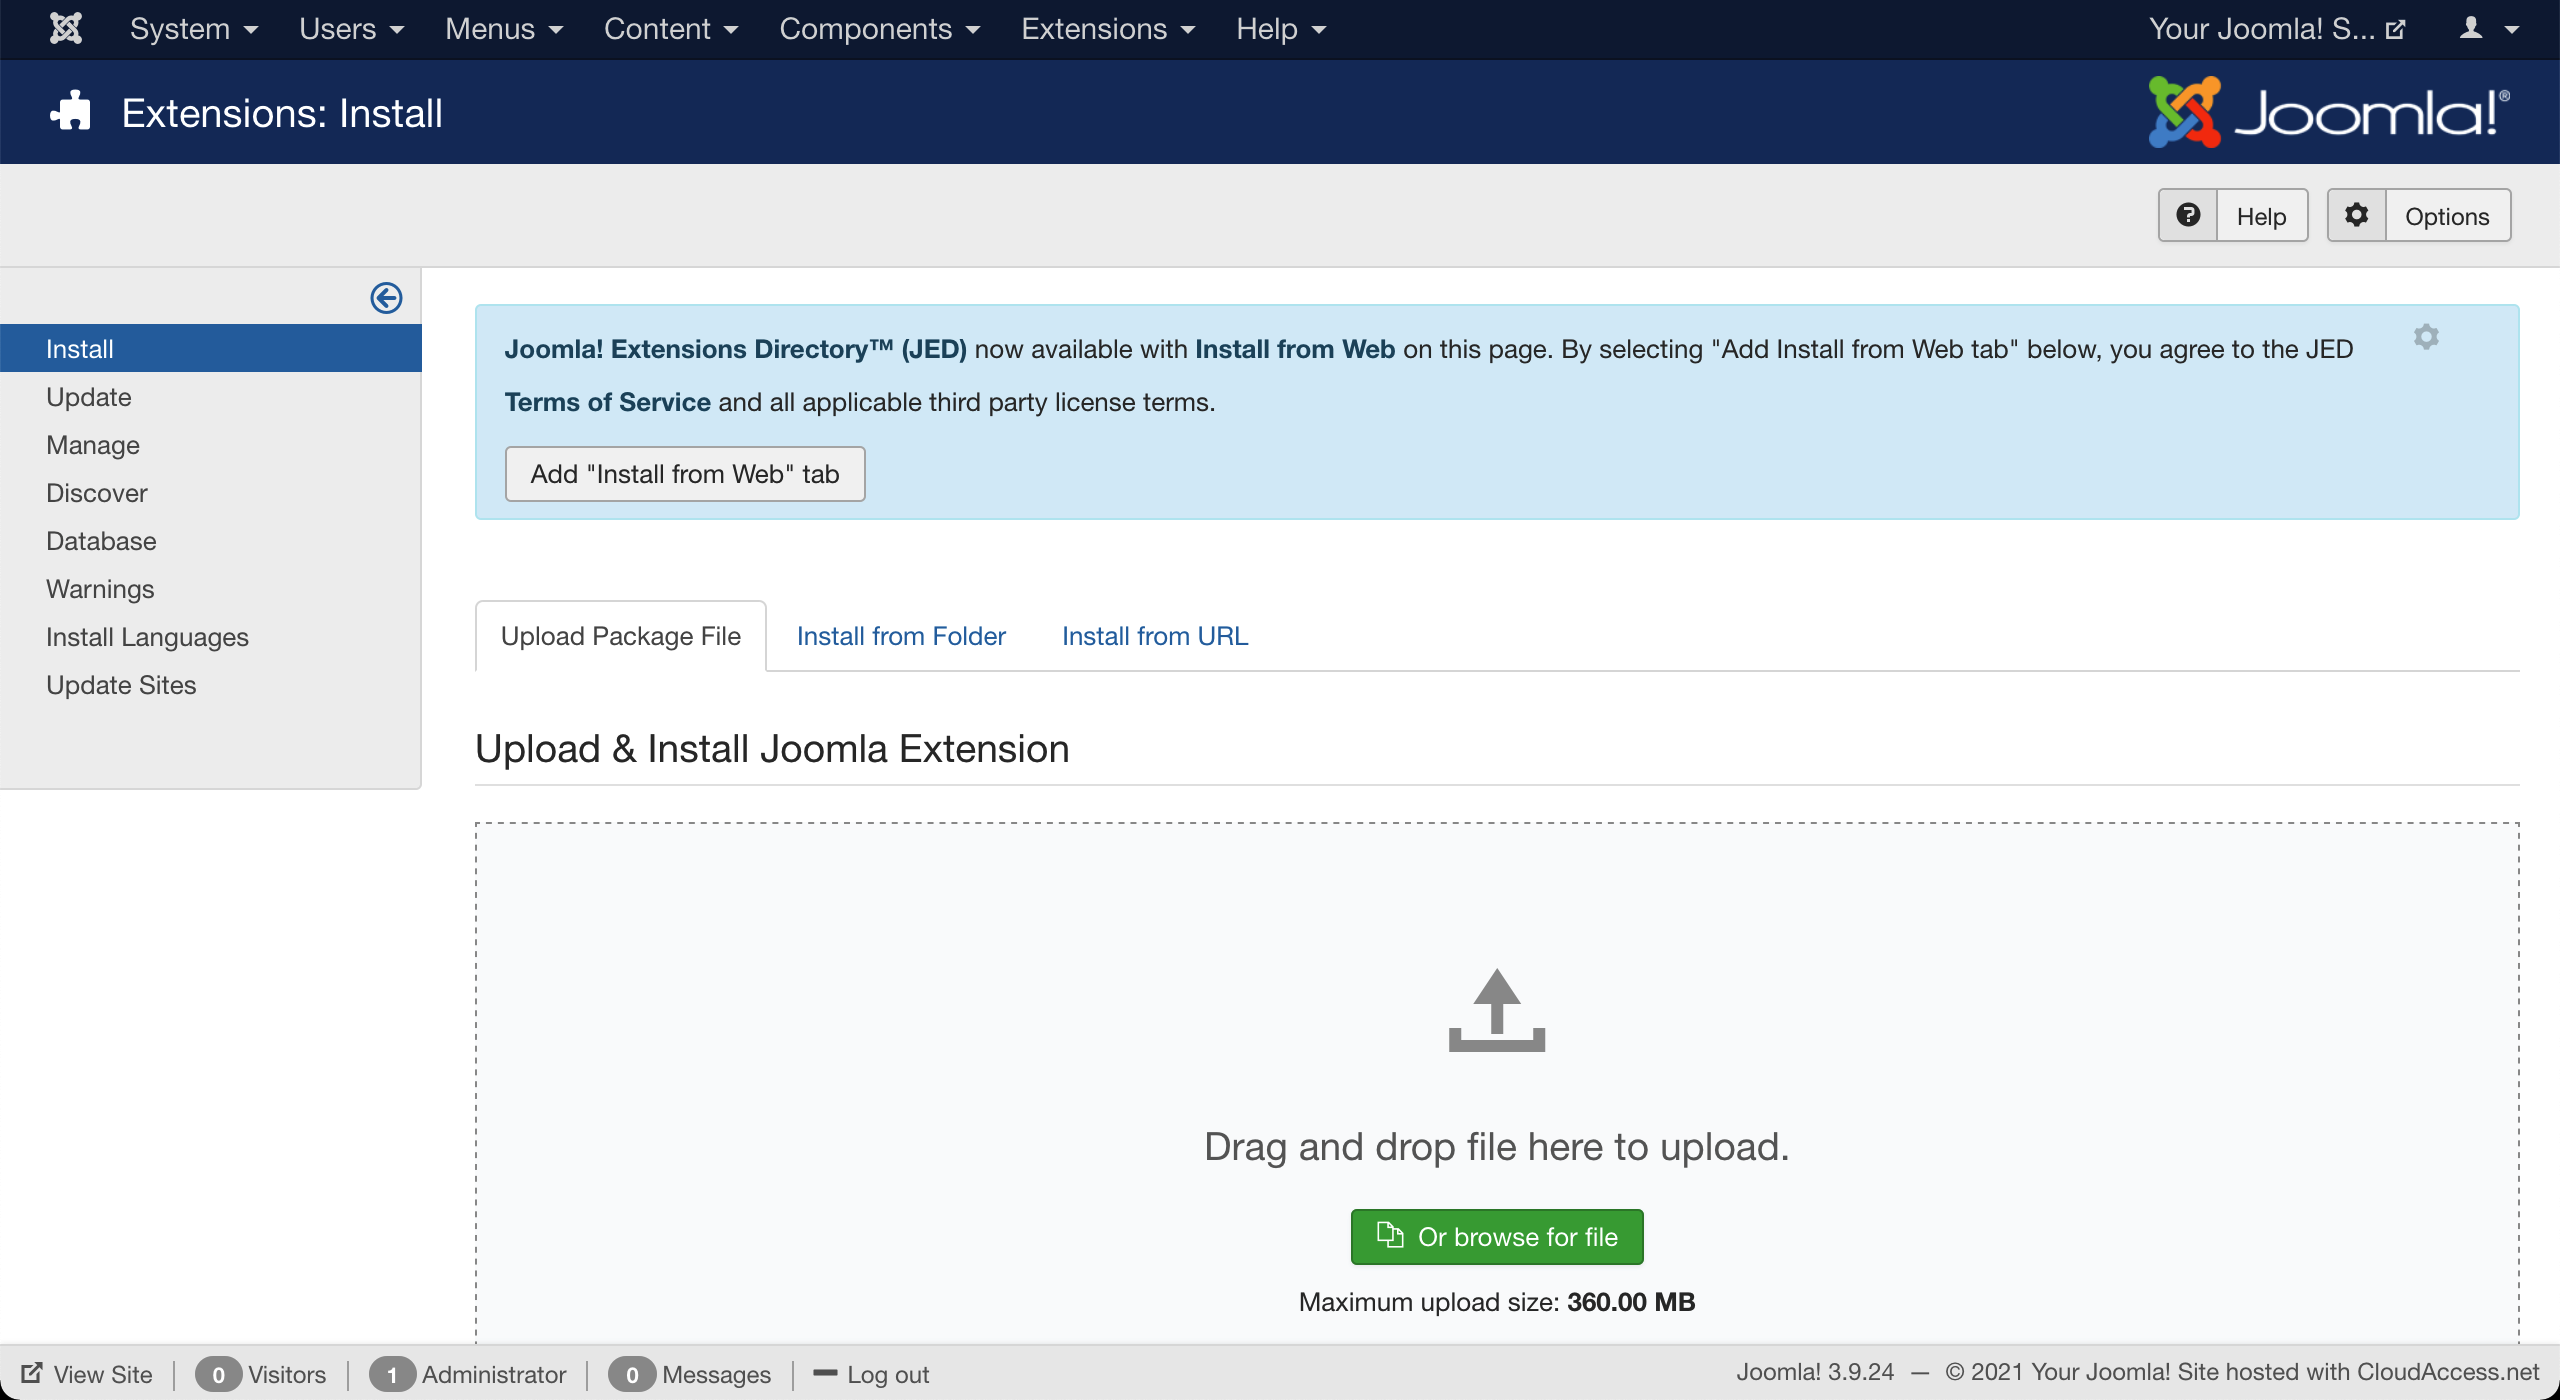
3. Drag and drop the zip file or click the green Or browse for file button and select the zip file.
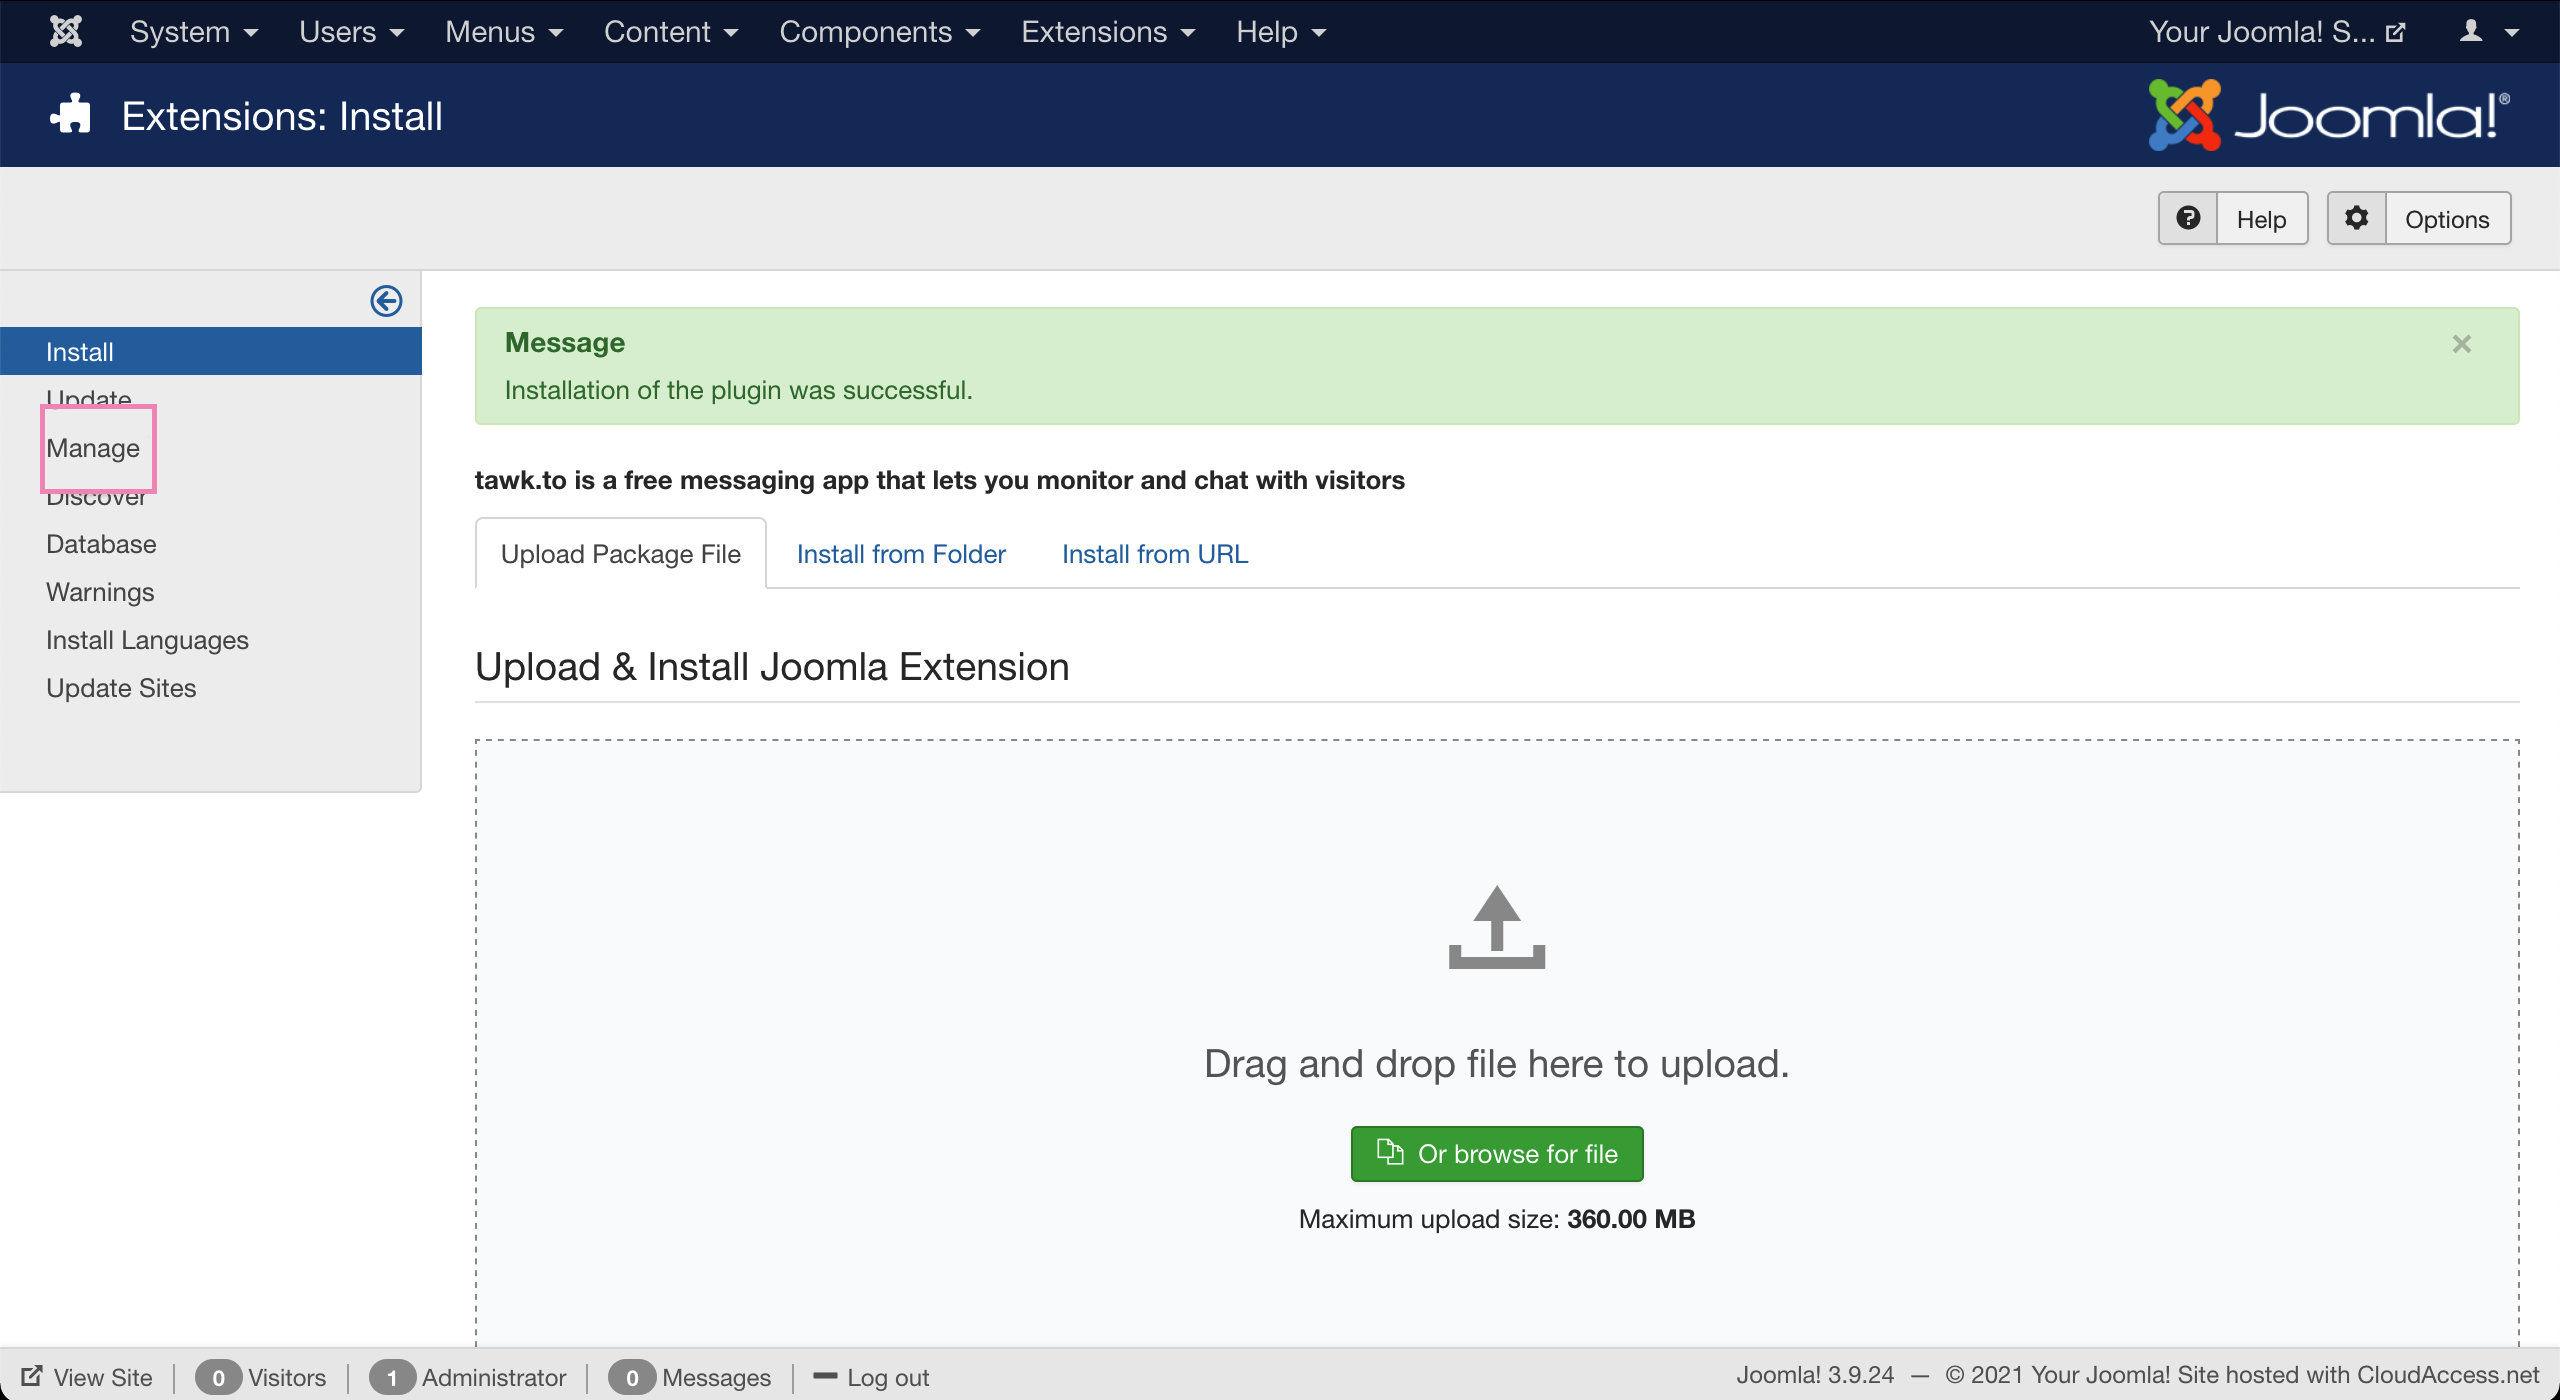
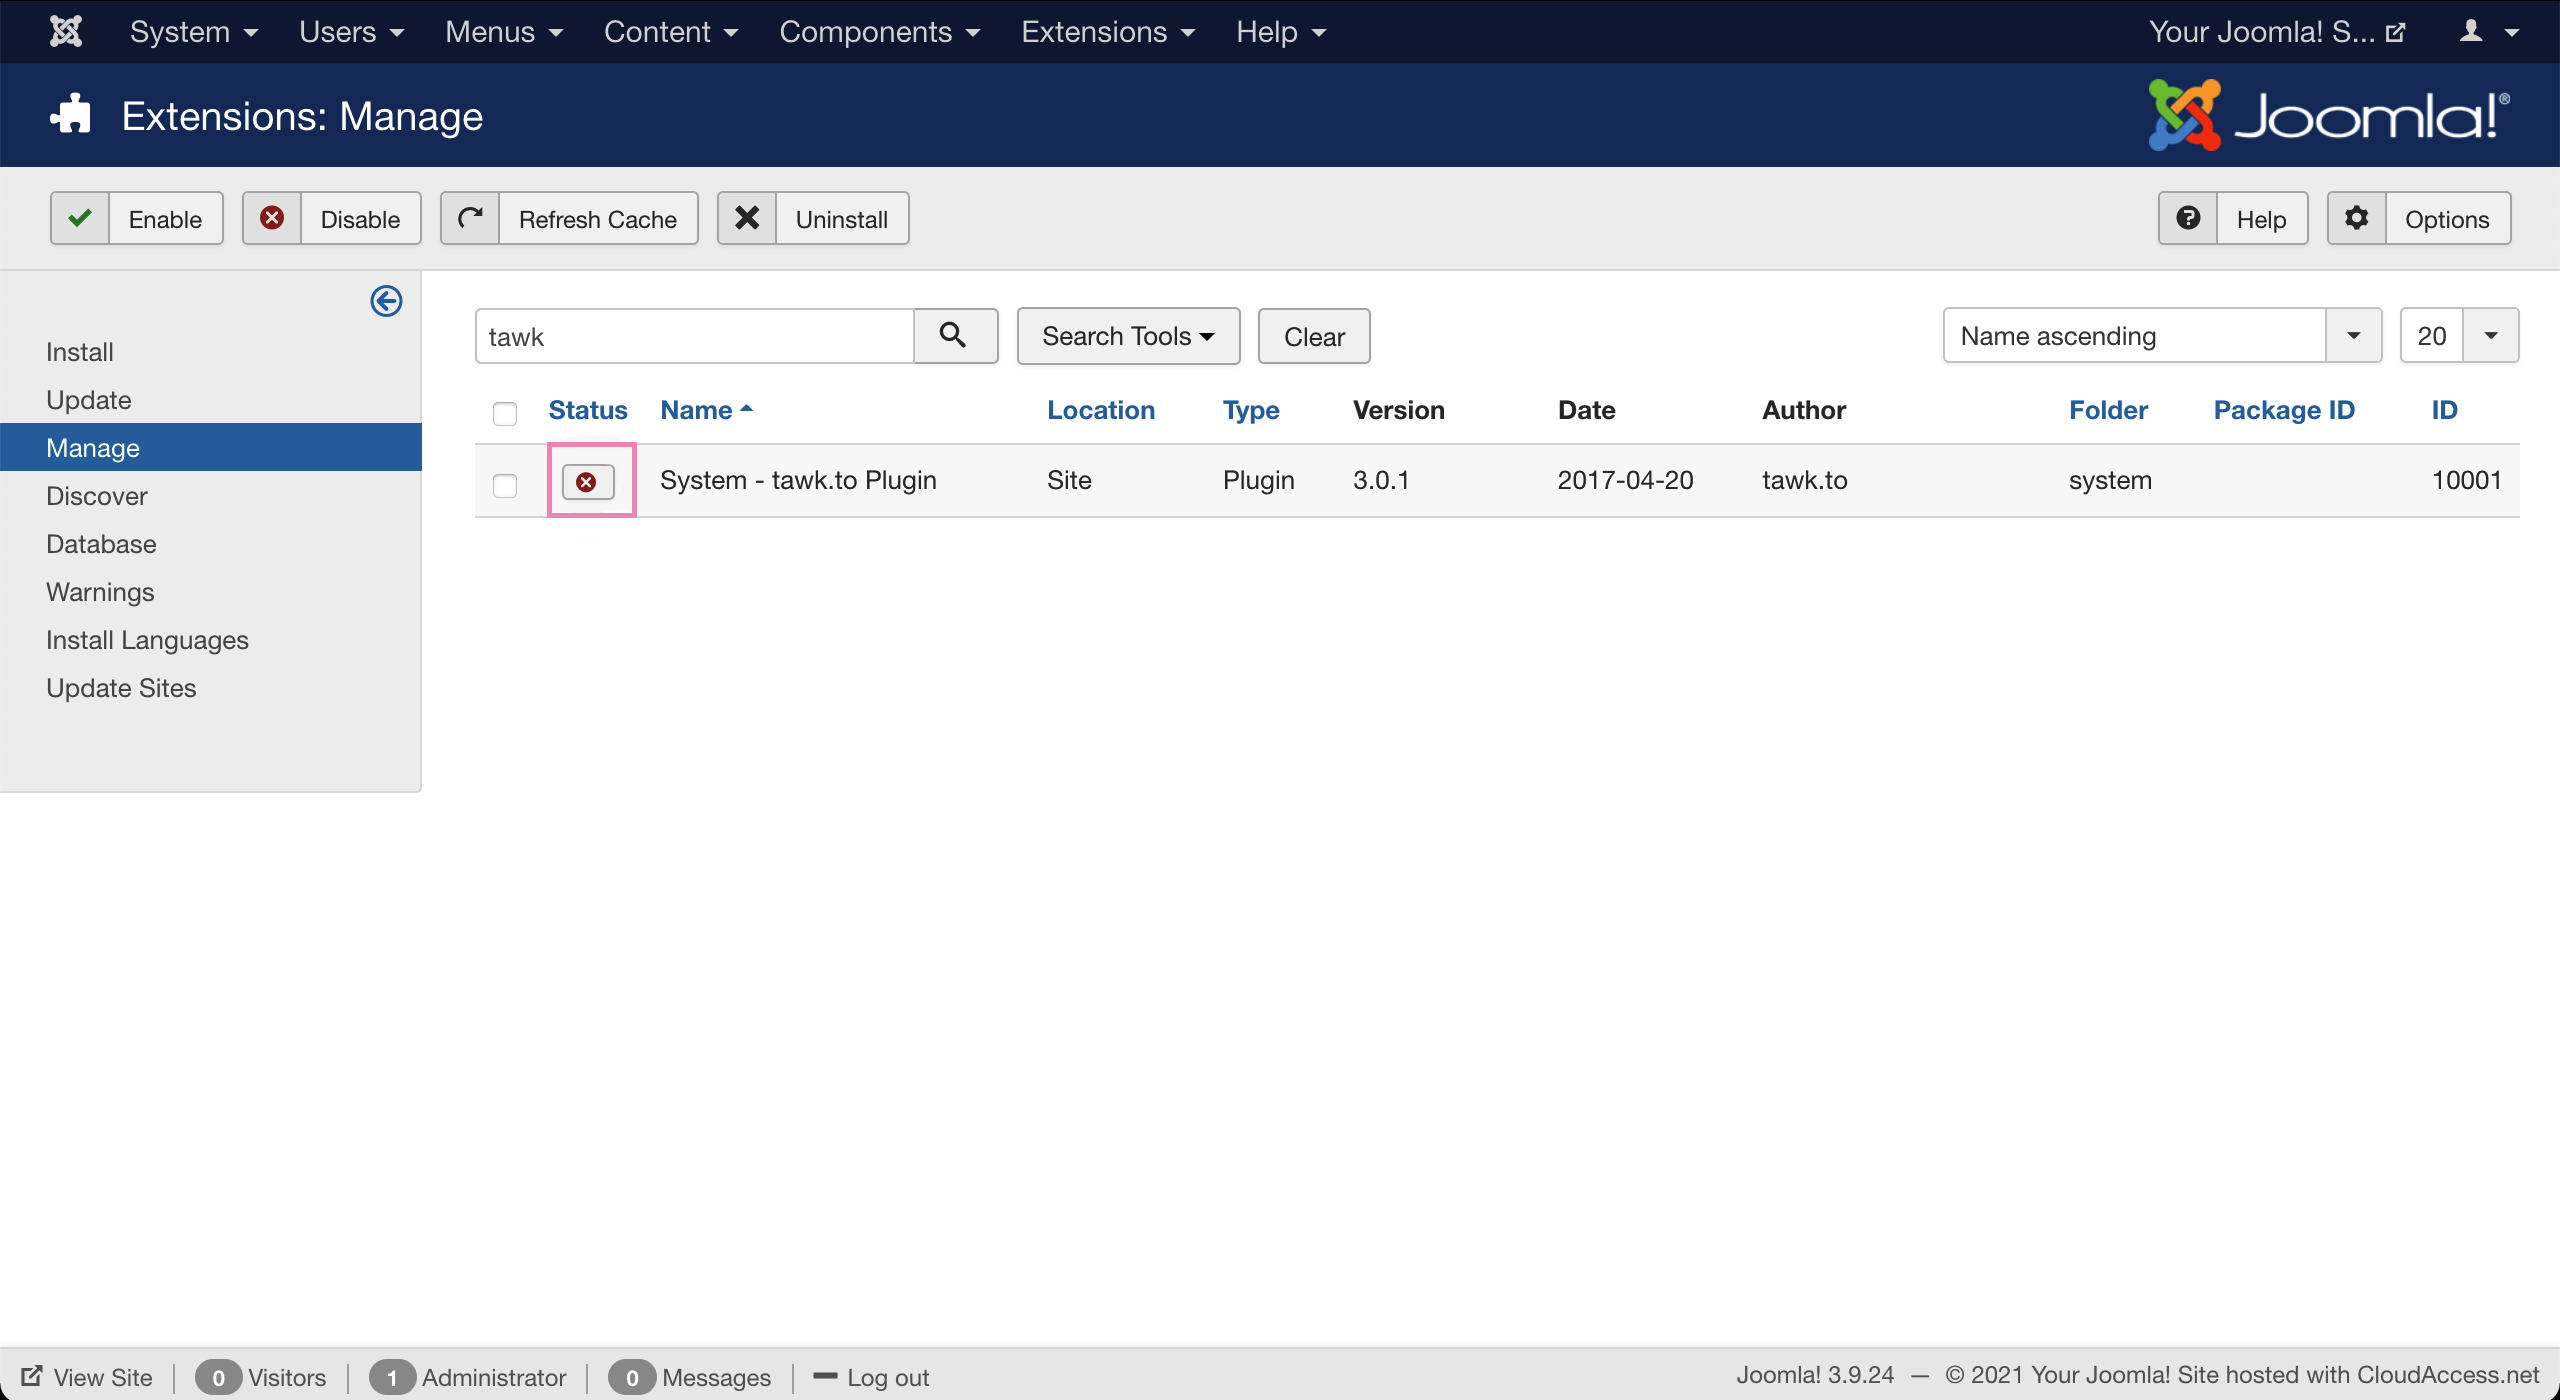
4. Then click Manage and search for "tawk" to find the newly added extension.
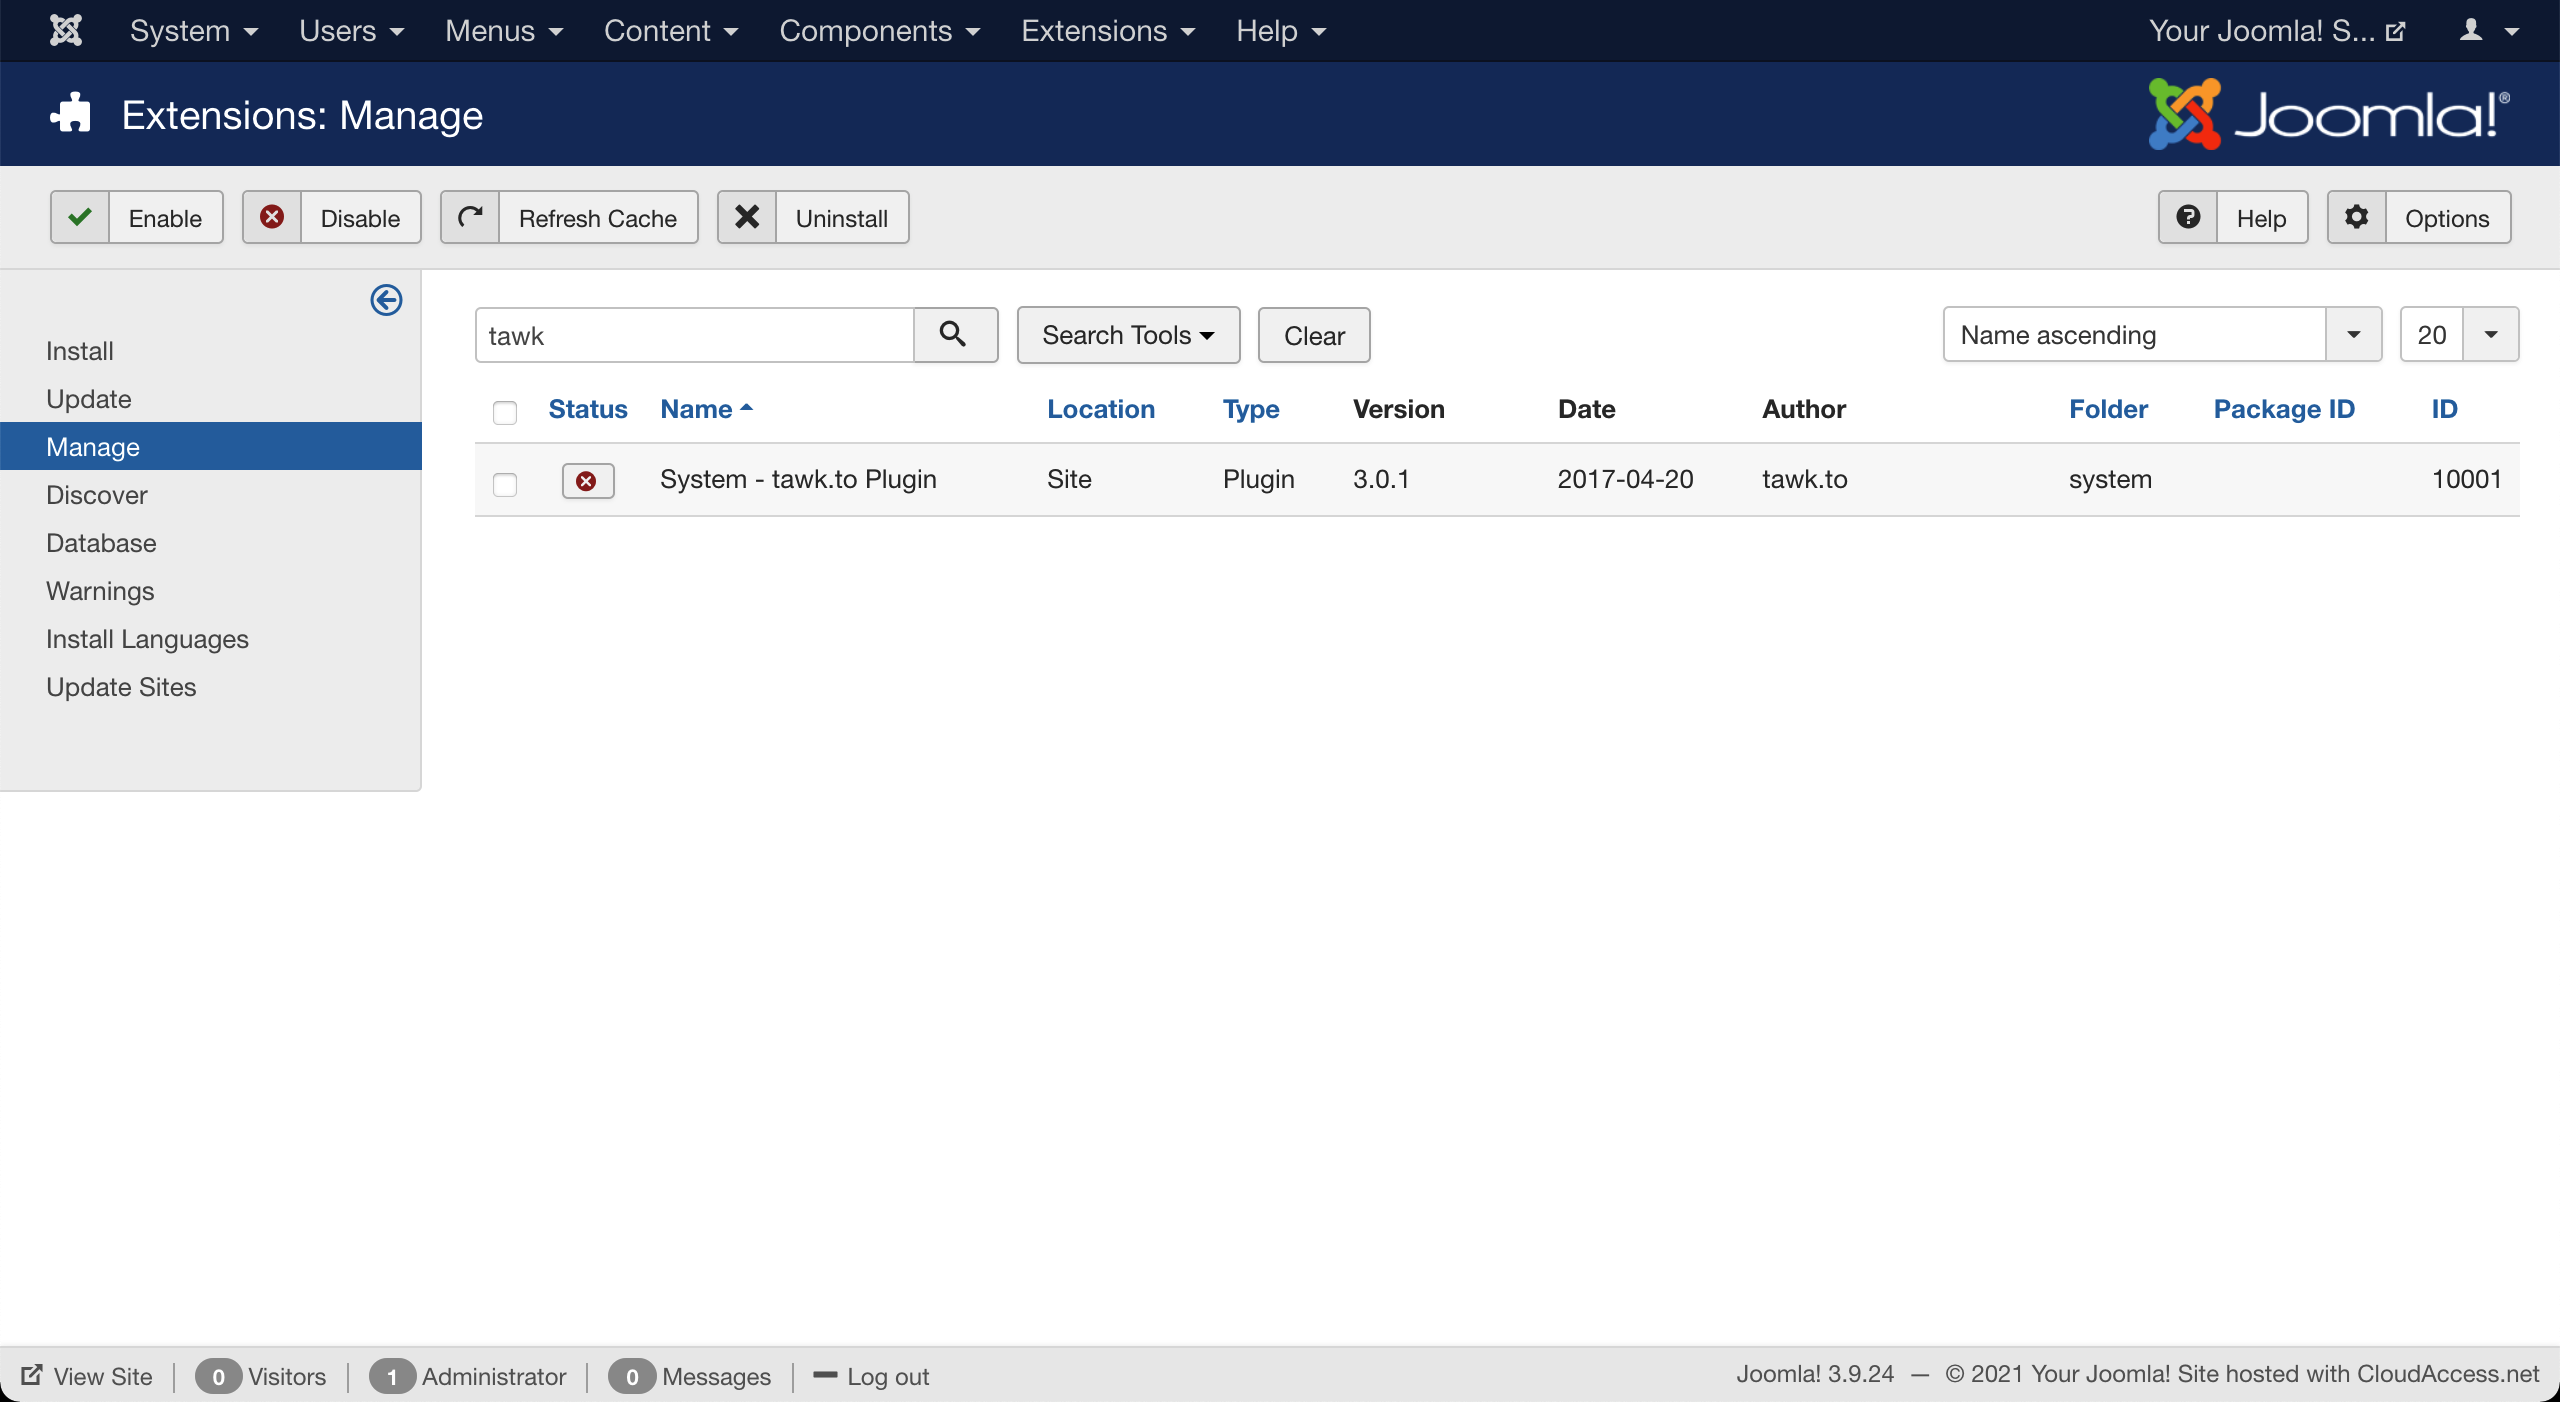
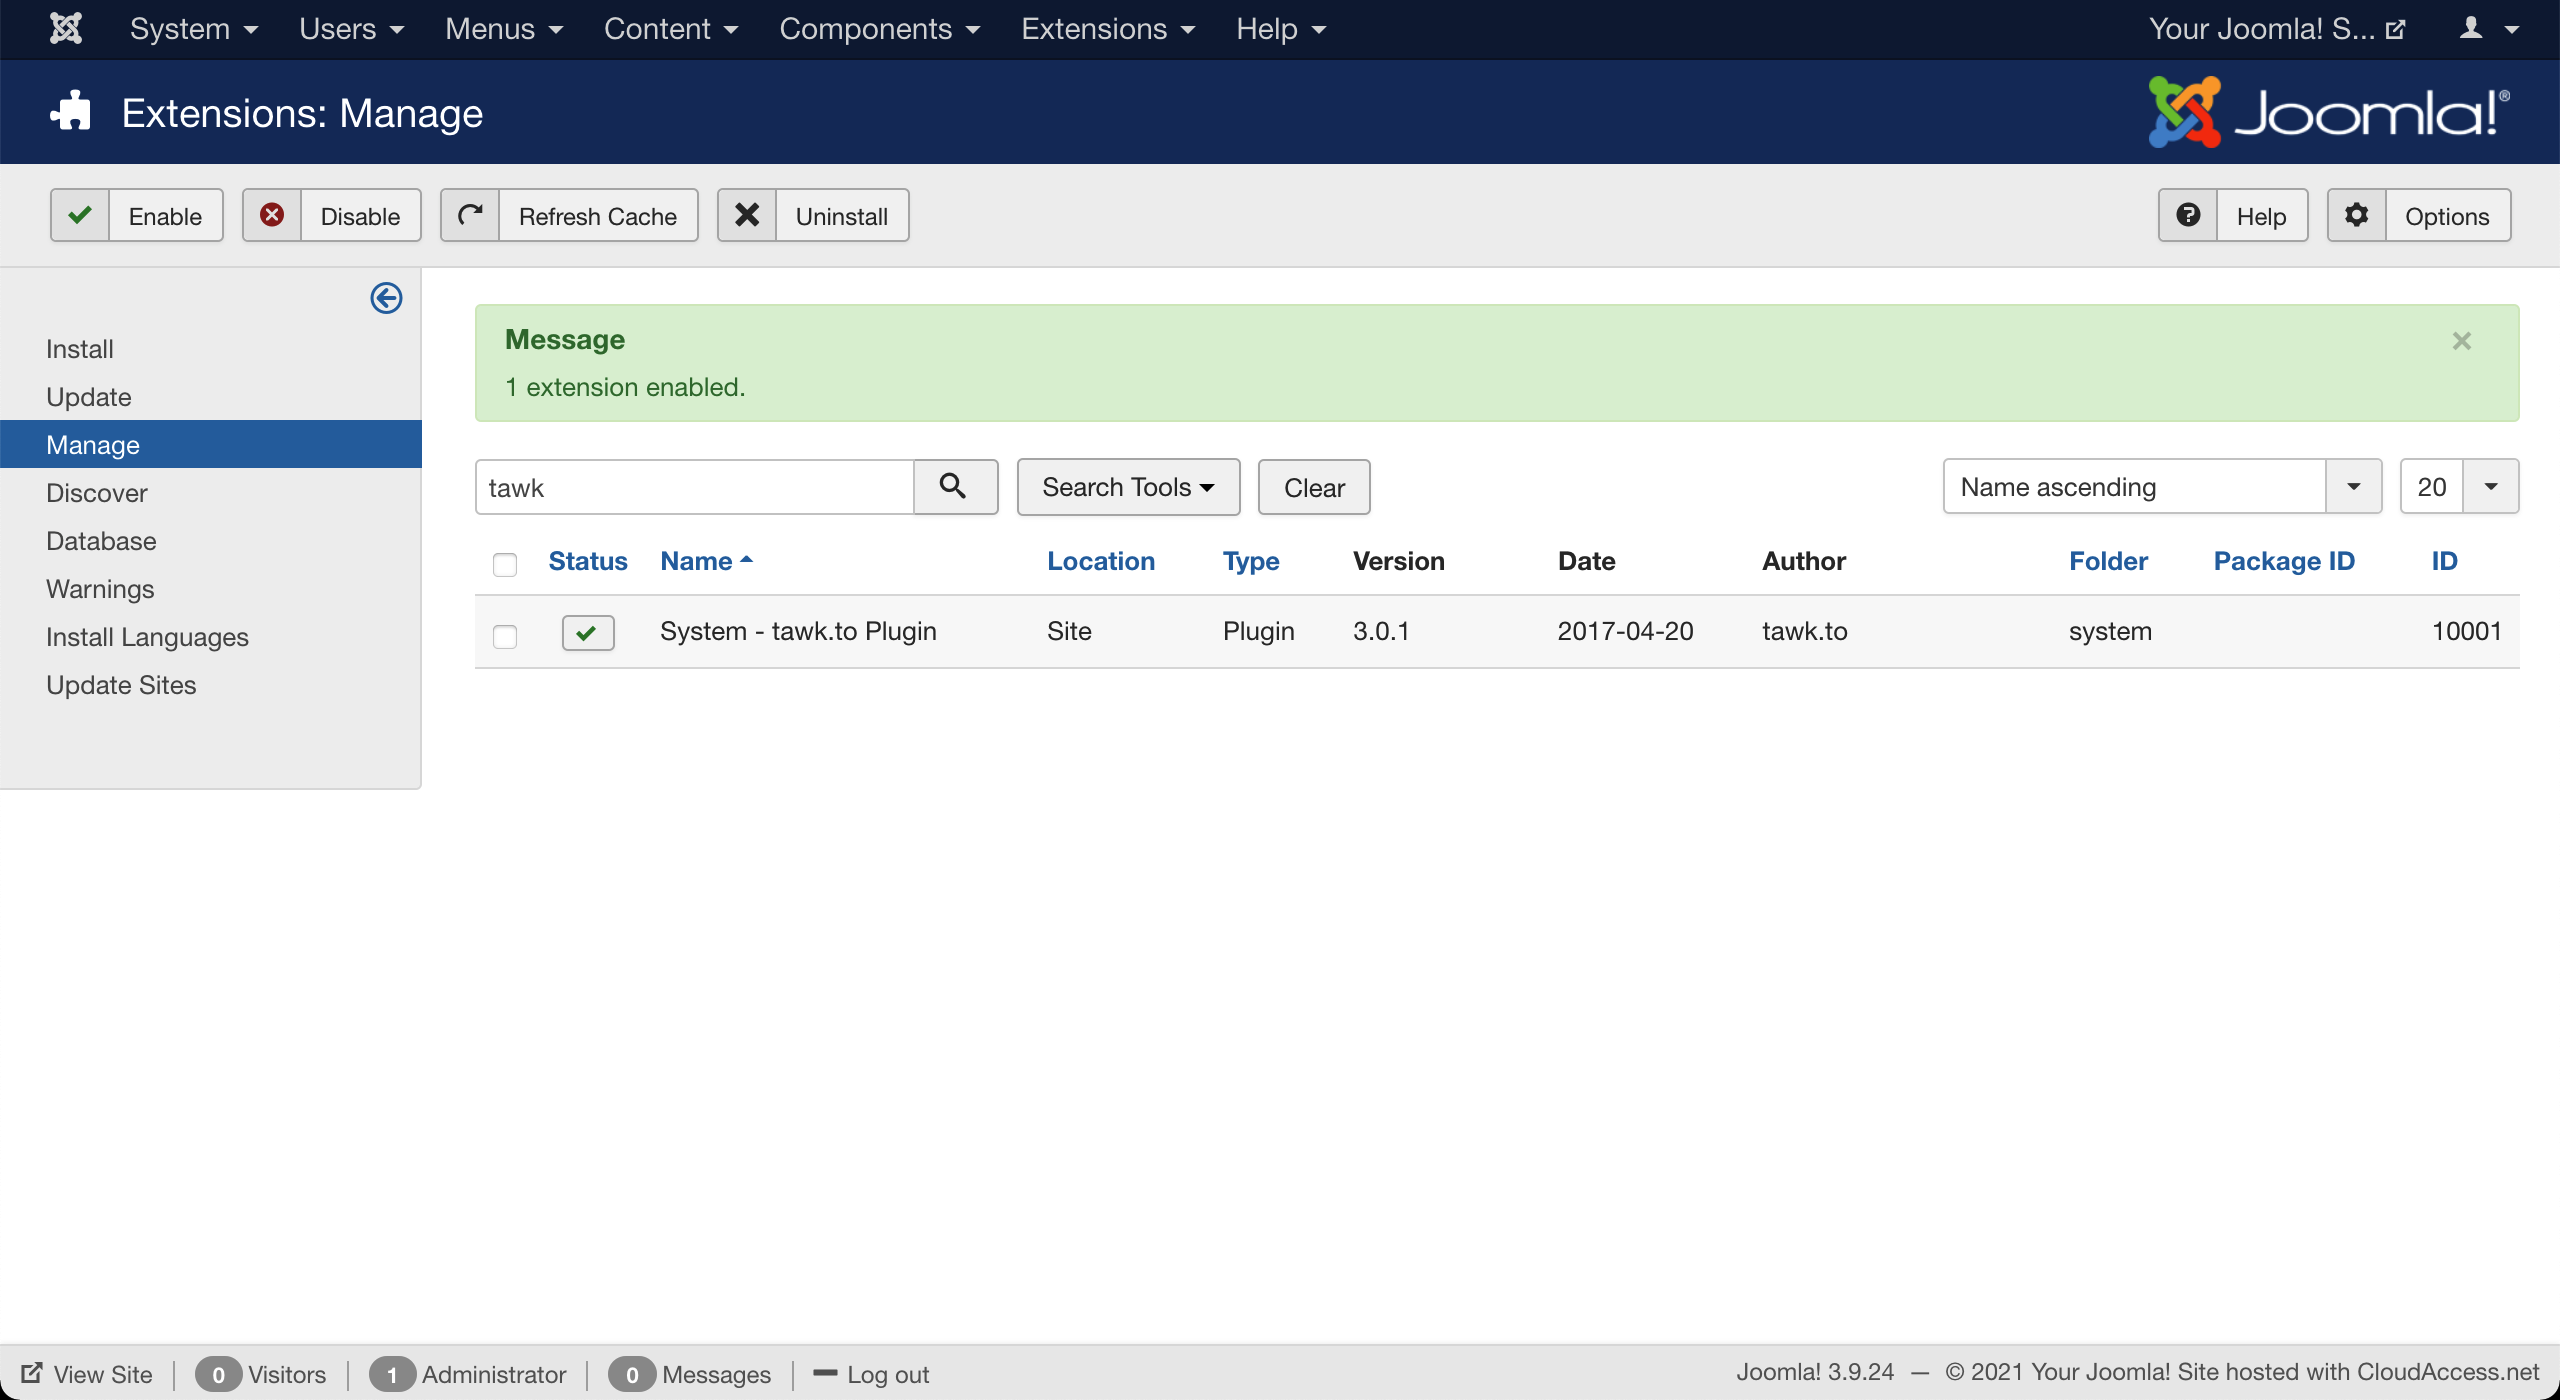
5. To enable the plugin, click the status symbol so it shows a green tick.
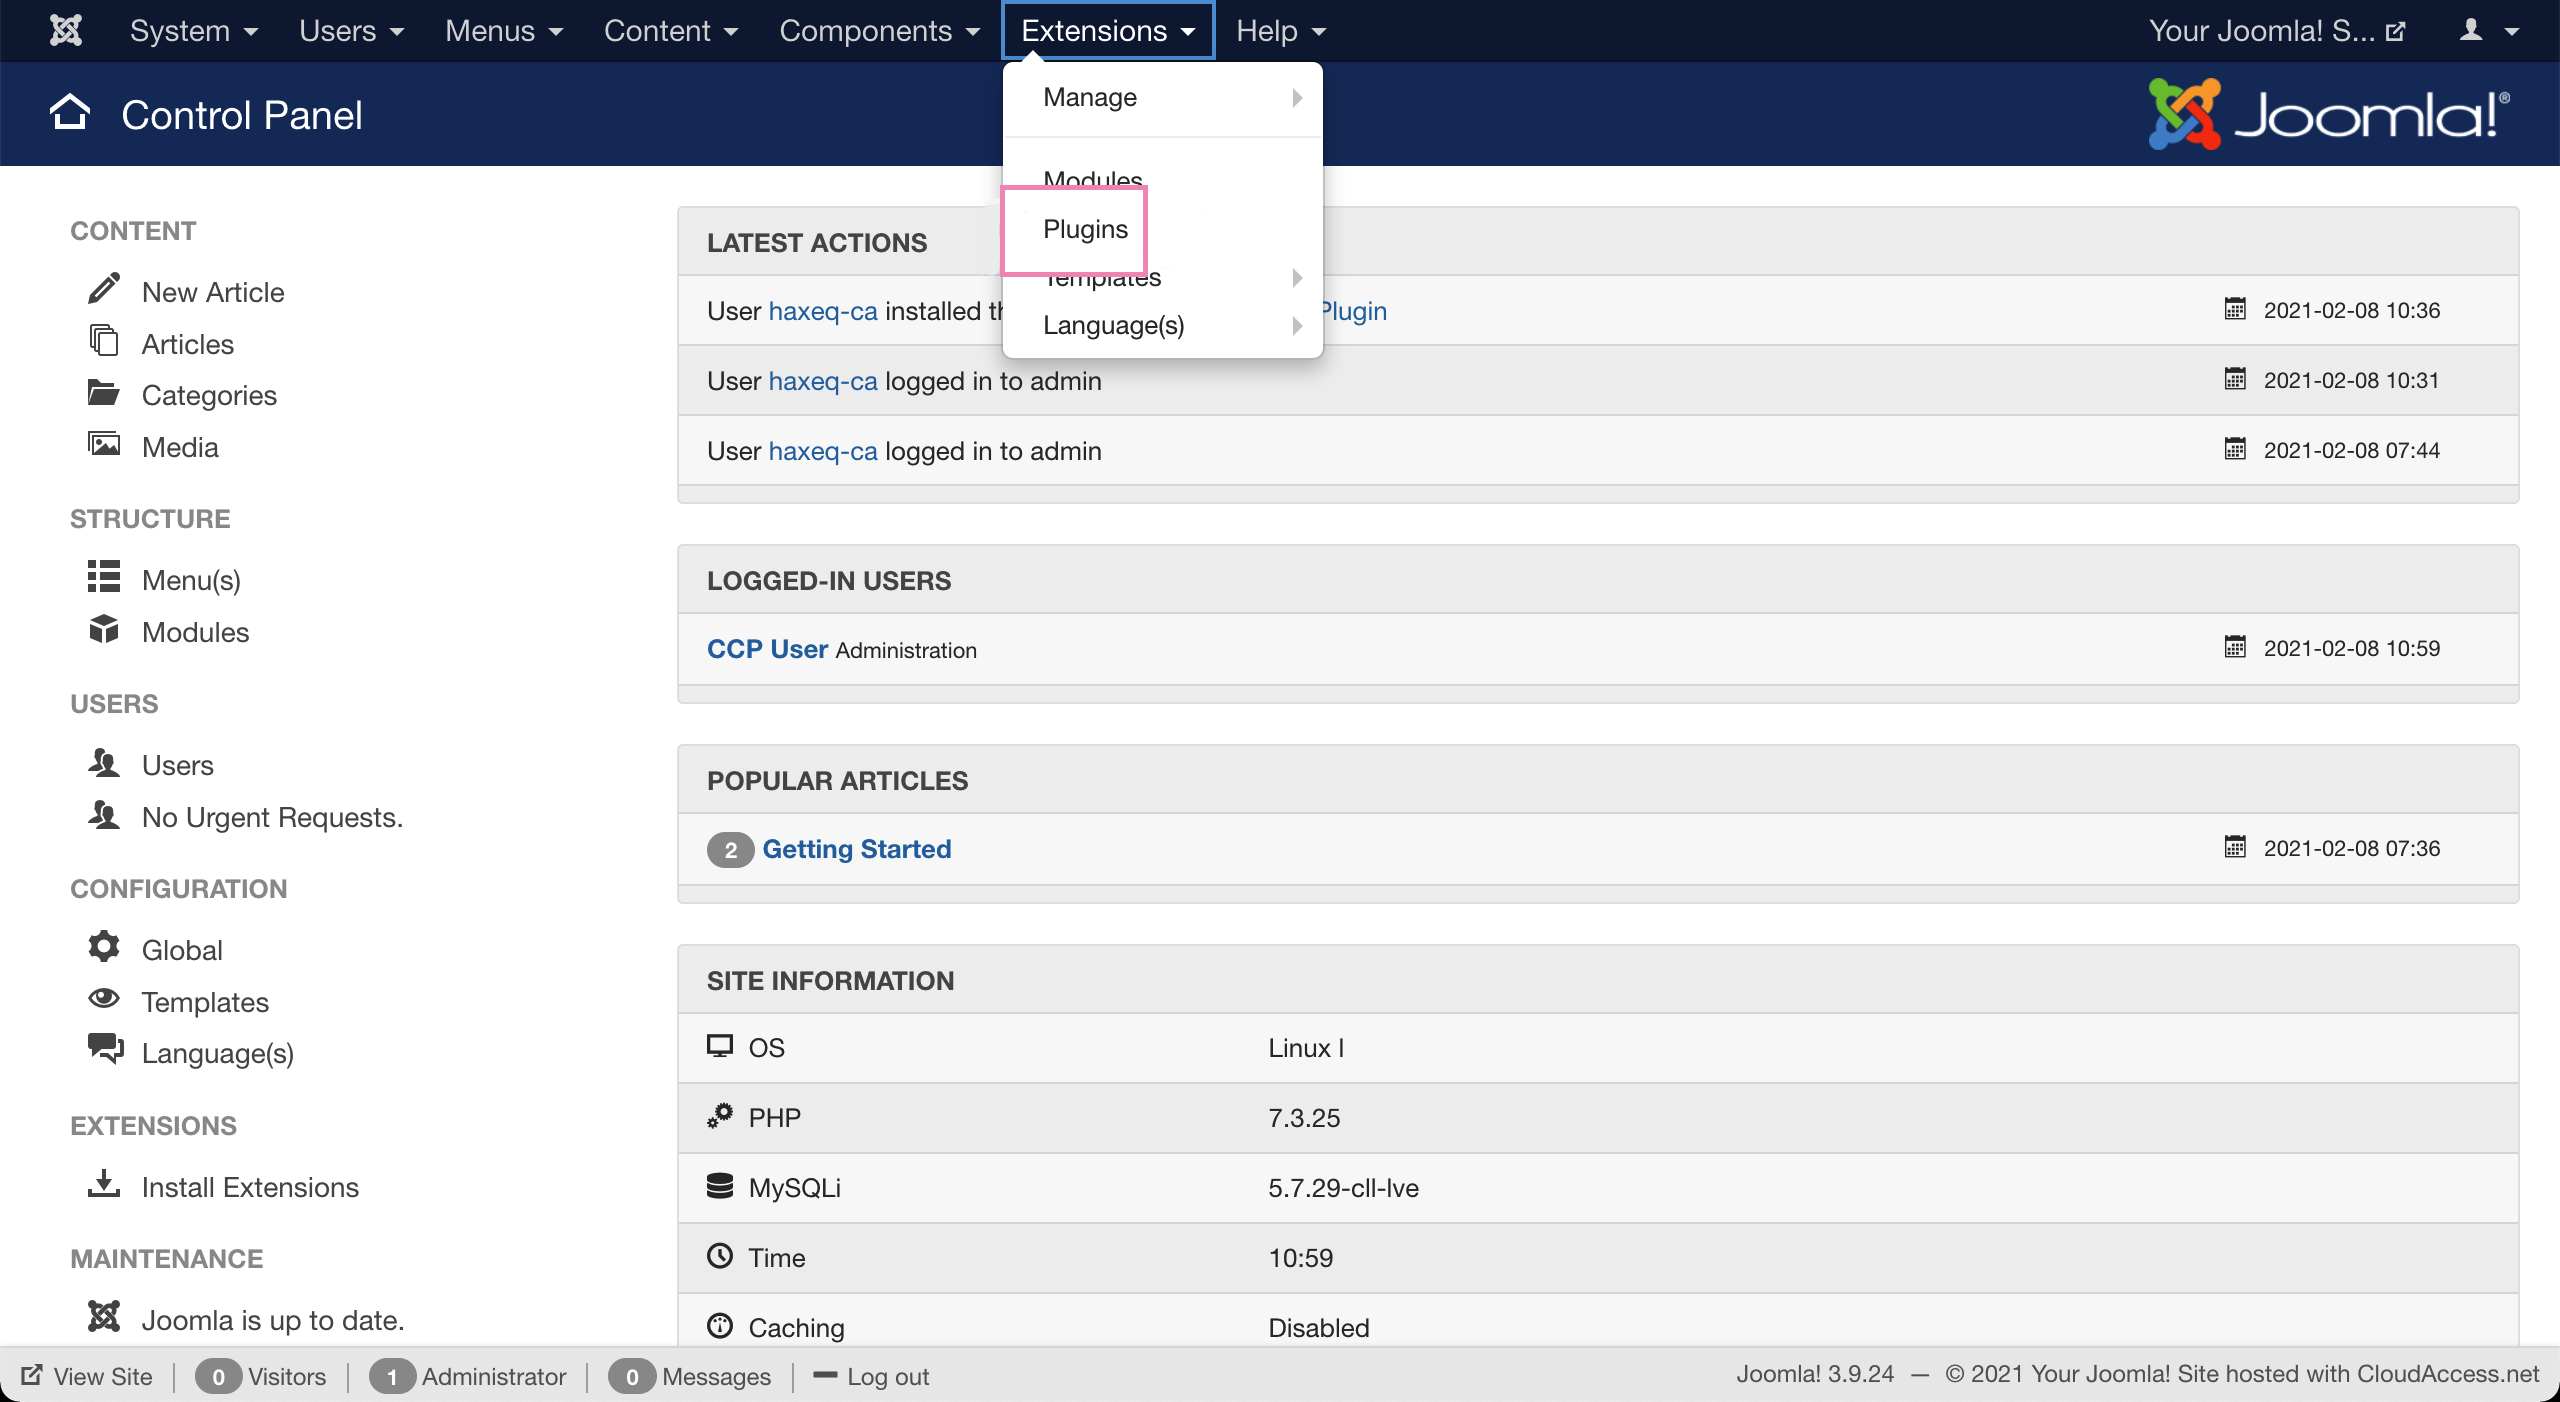
6. To sign in to your tawk.to account, click select Plugins in the Extensions drop-down menu.
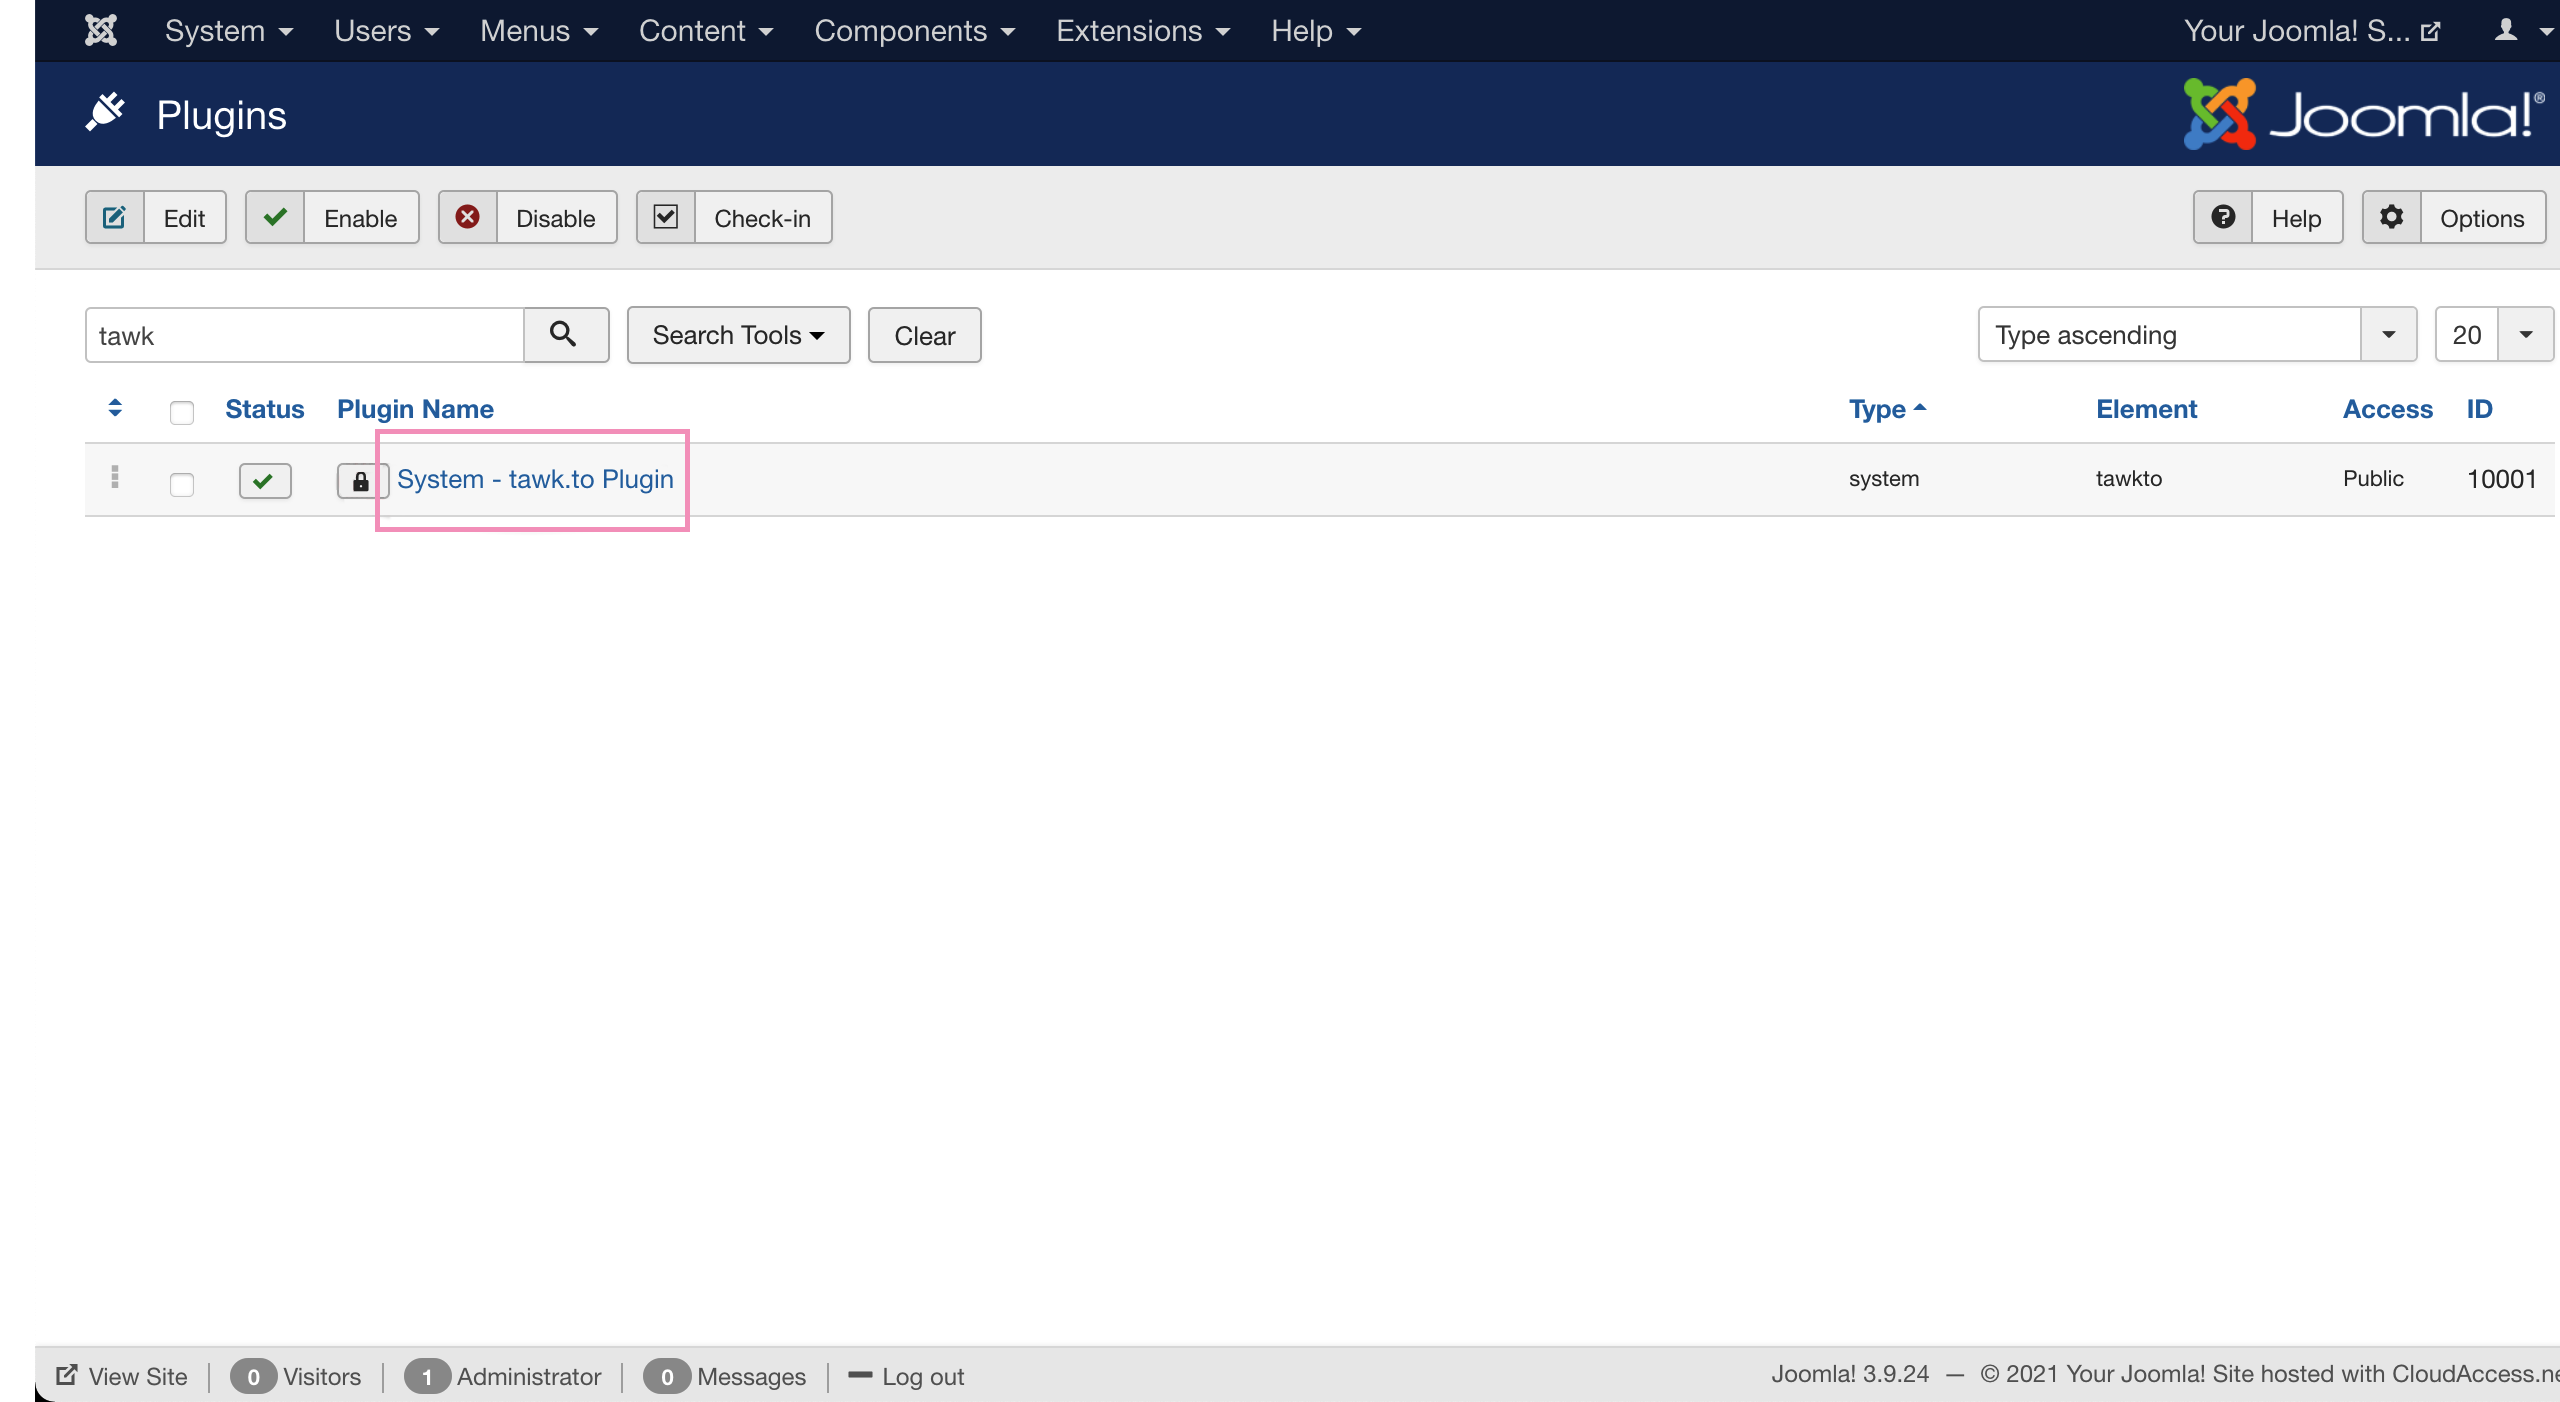
7. Search for tawk and select System - tawk.to Plugin.
8. Log in to your tawk.to account.


10. The widget should now appear on your site.
Installation for the module
1. Download mod_tawkto-<release_version>.zip from the latest release.
2. In the Joomla administration panel, go to Install Extensions.
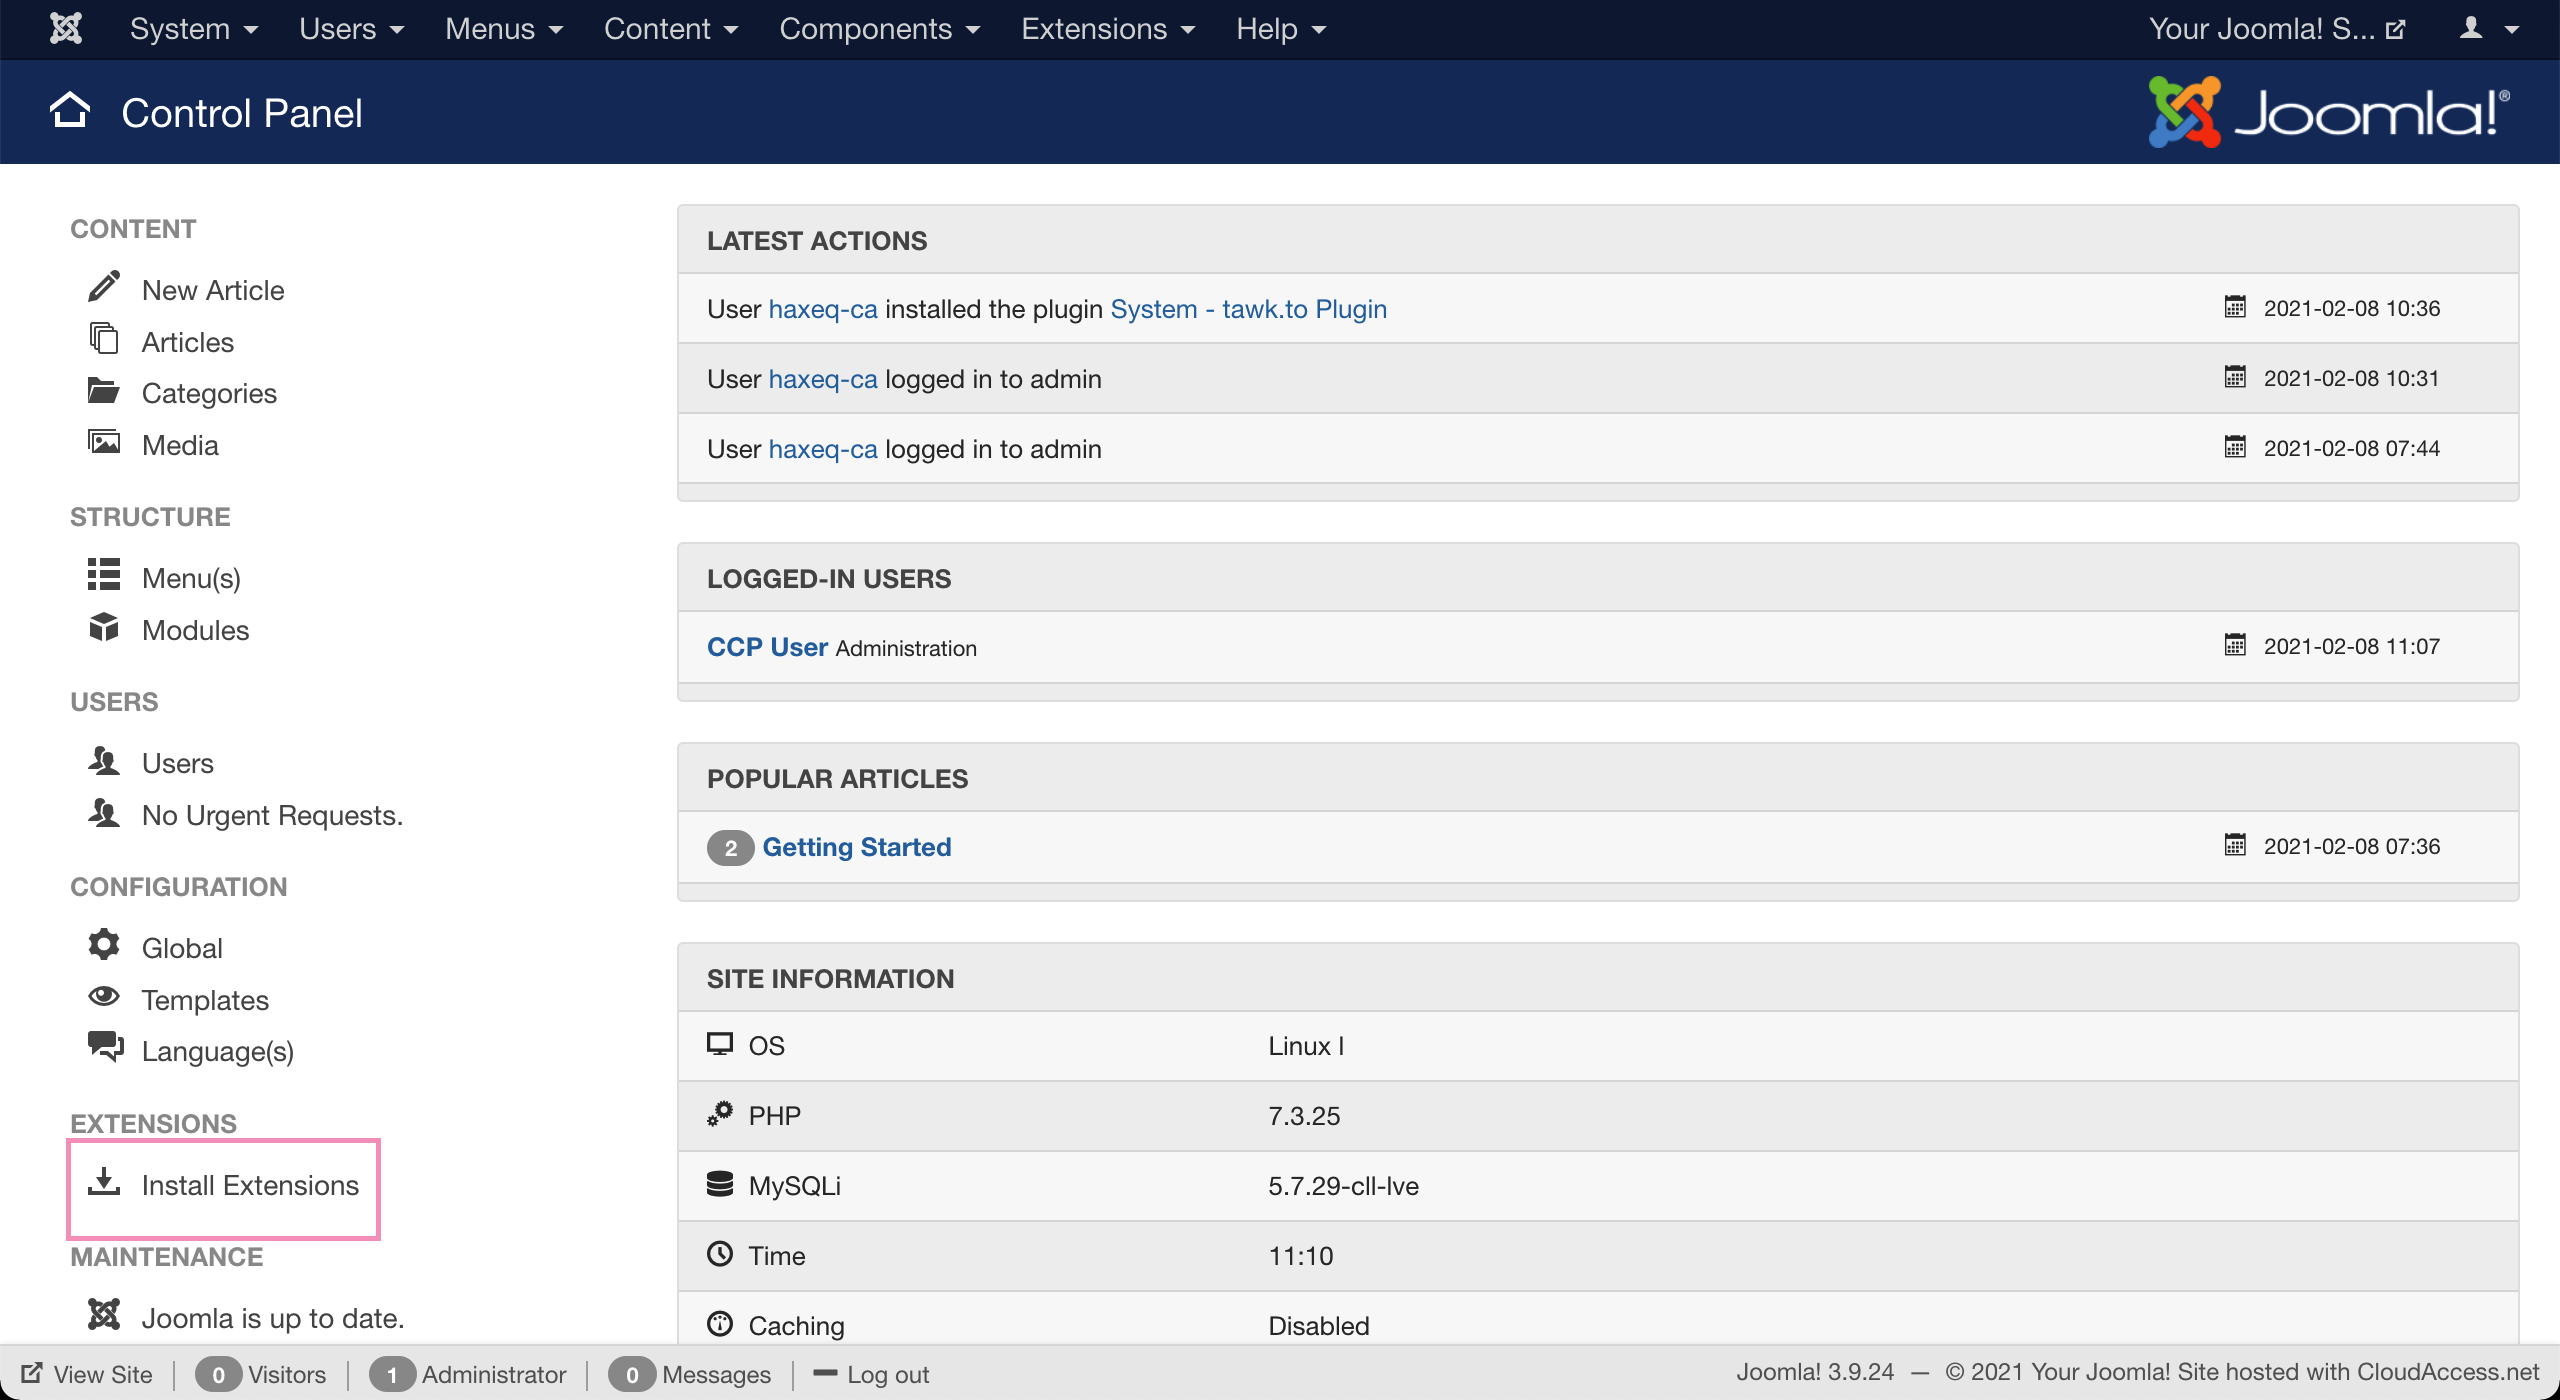
3. Drag and drop the zip file or click the green Or browse for file button and select the zip file.
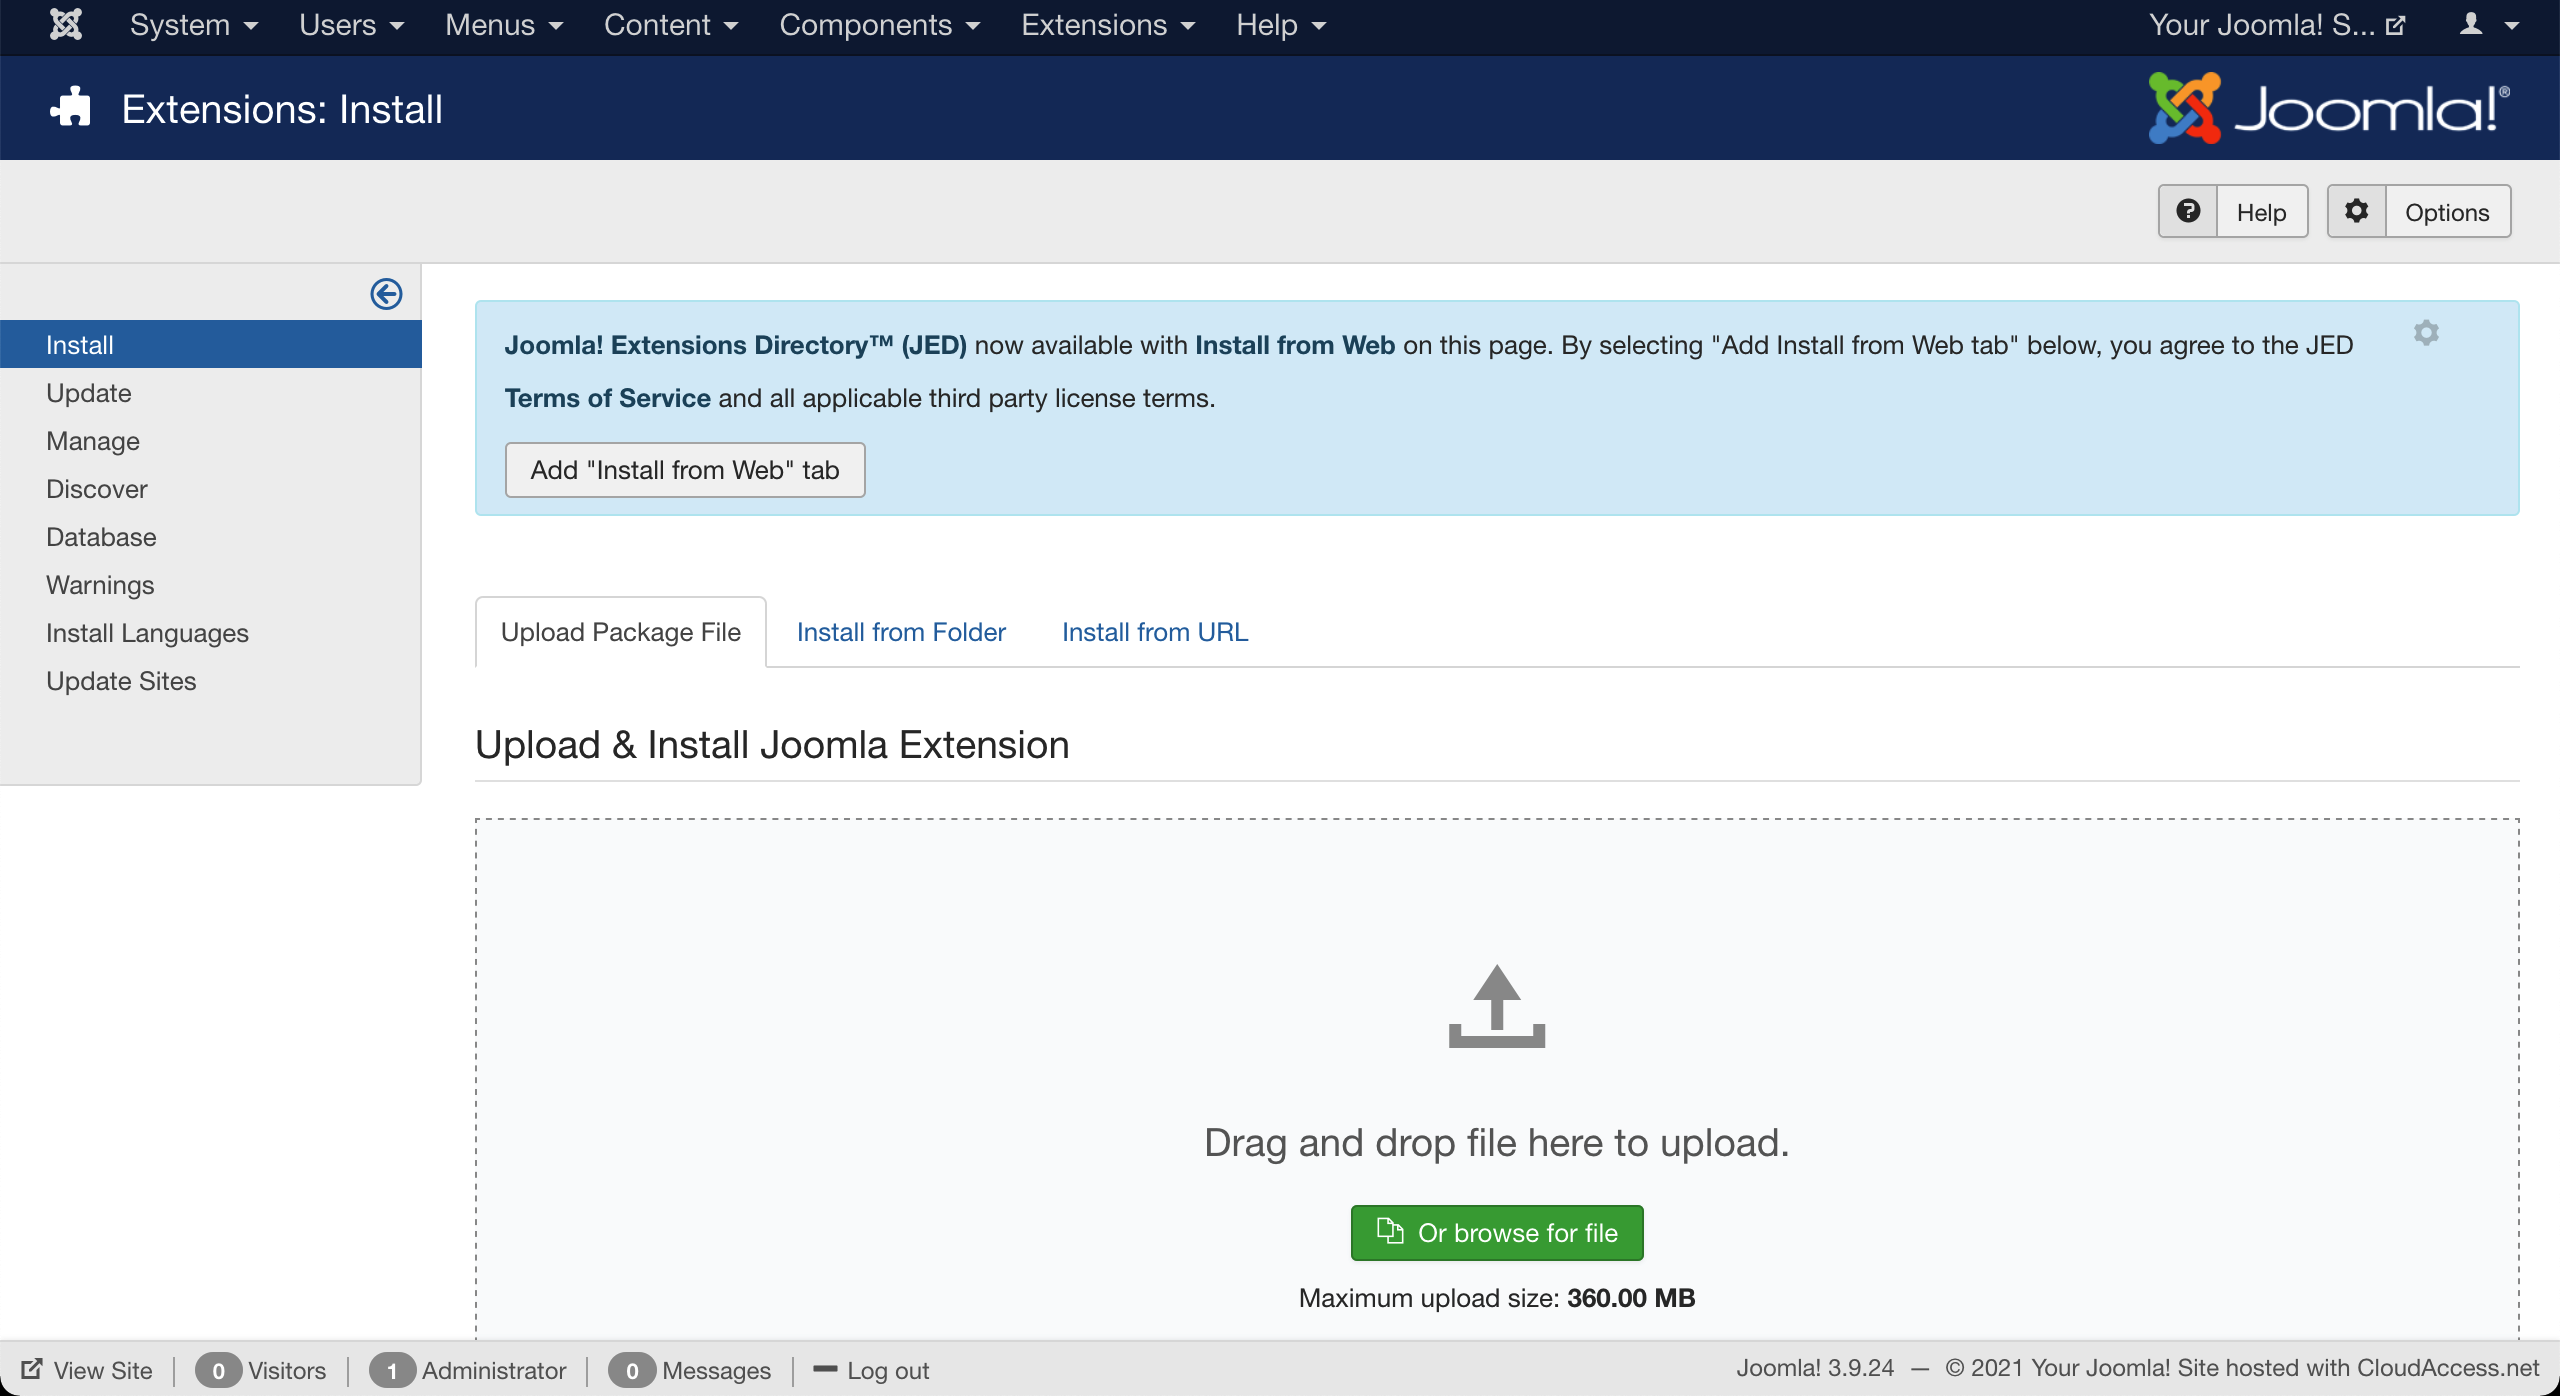
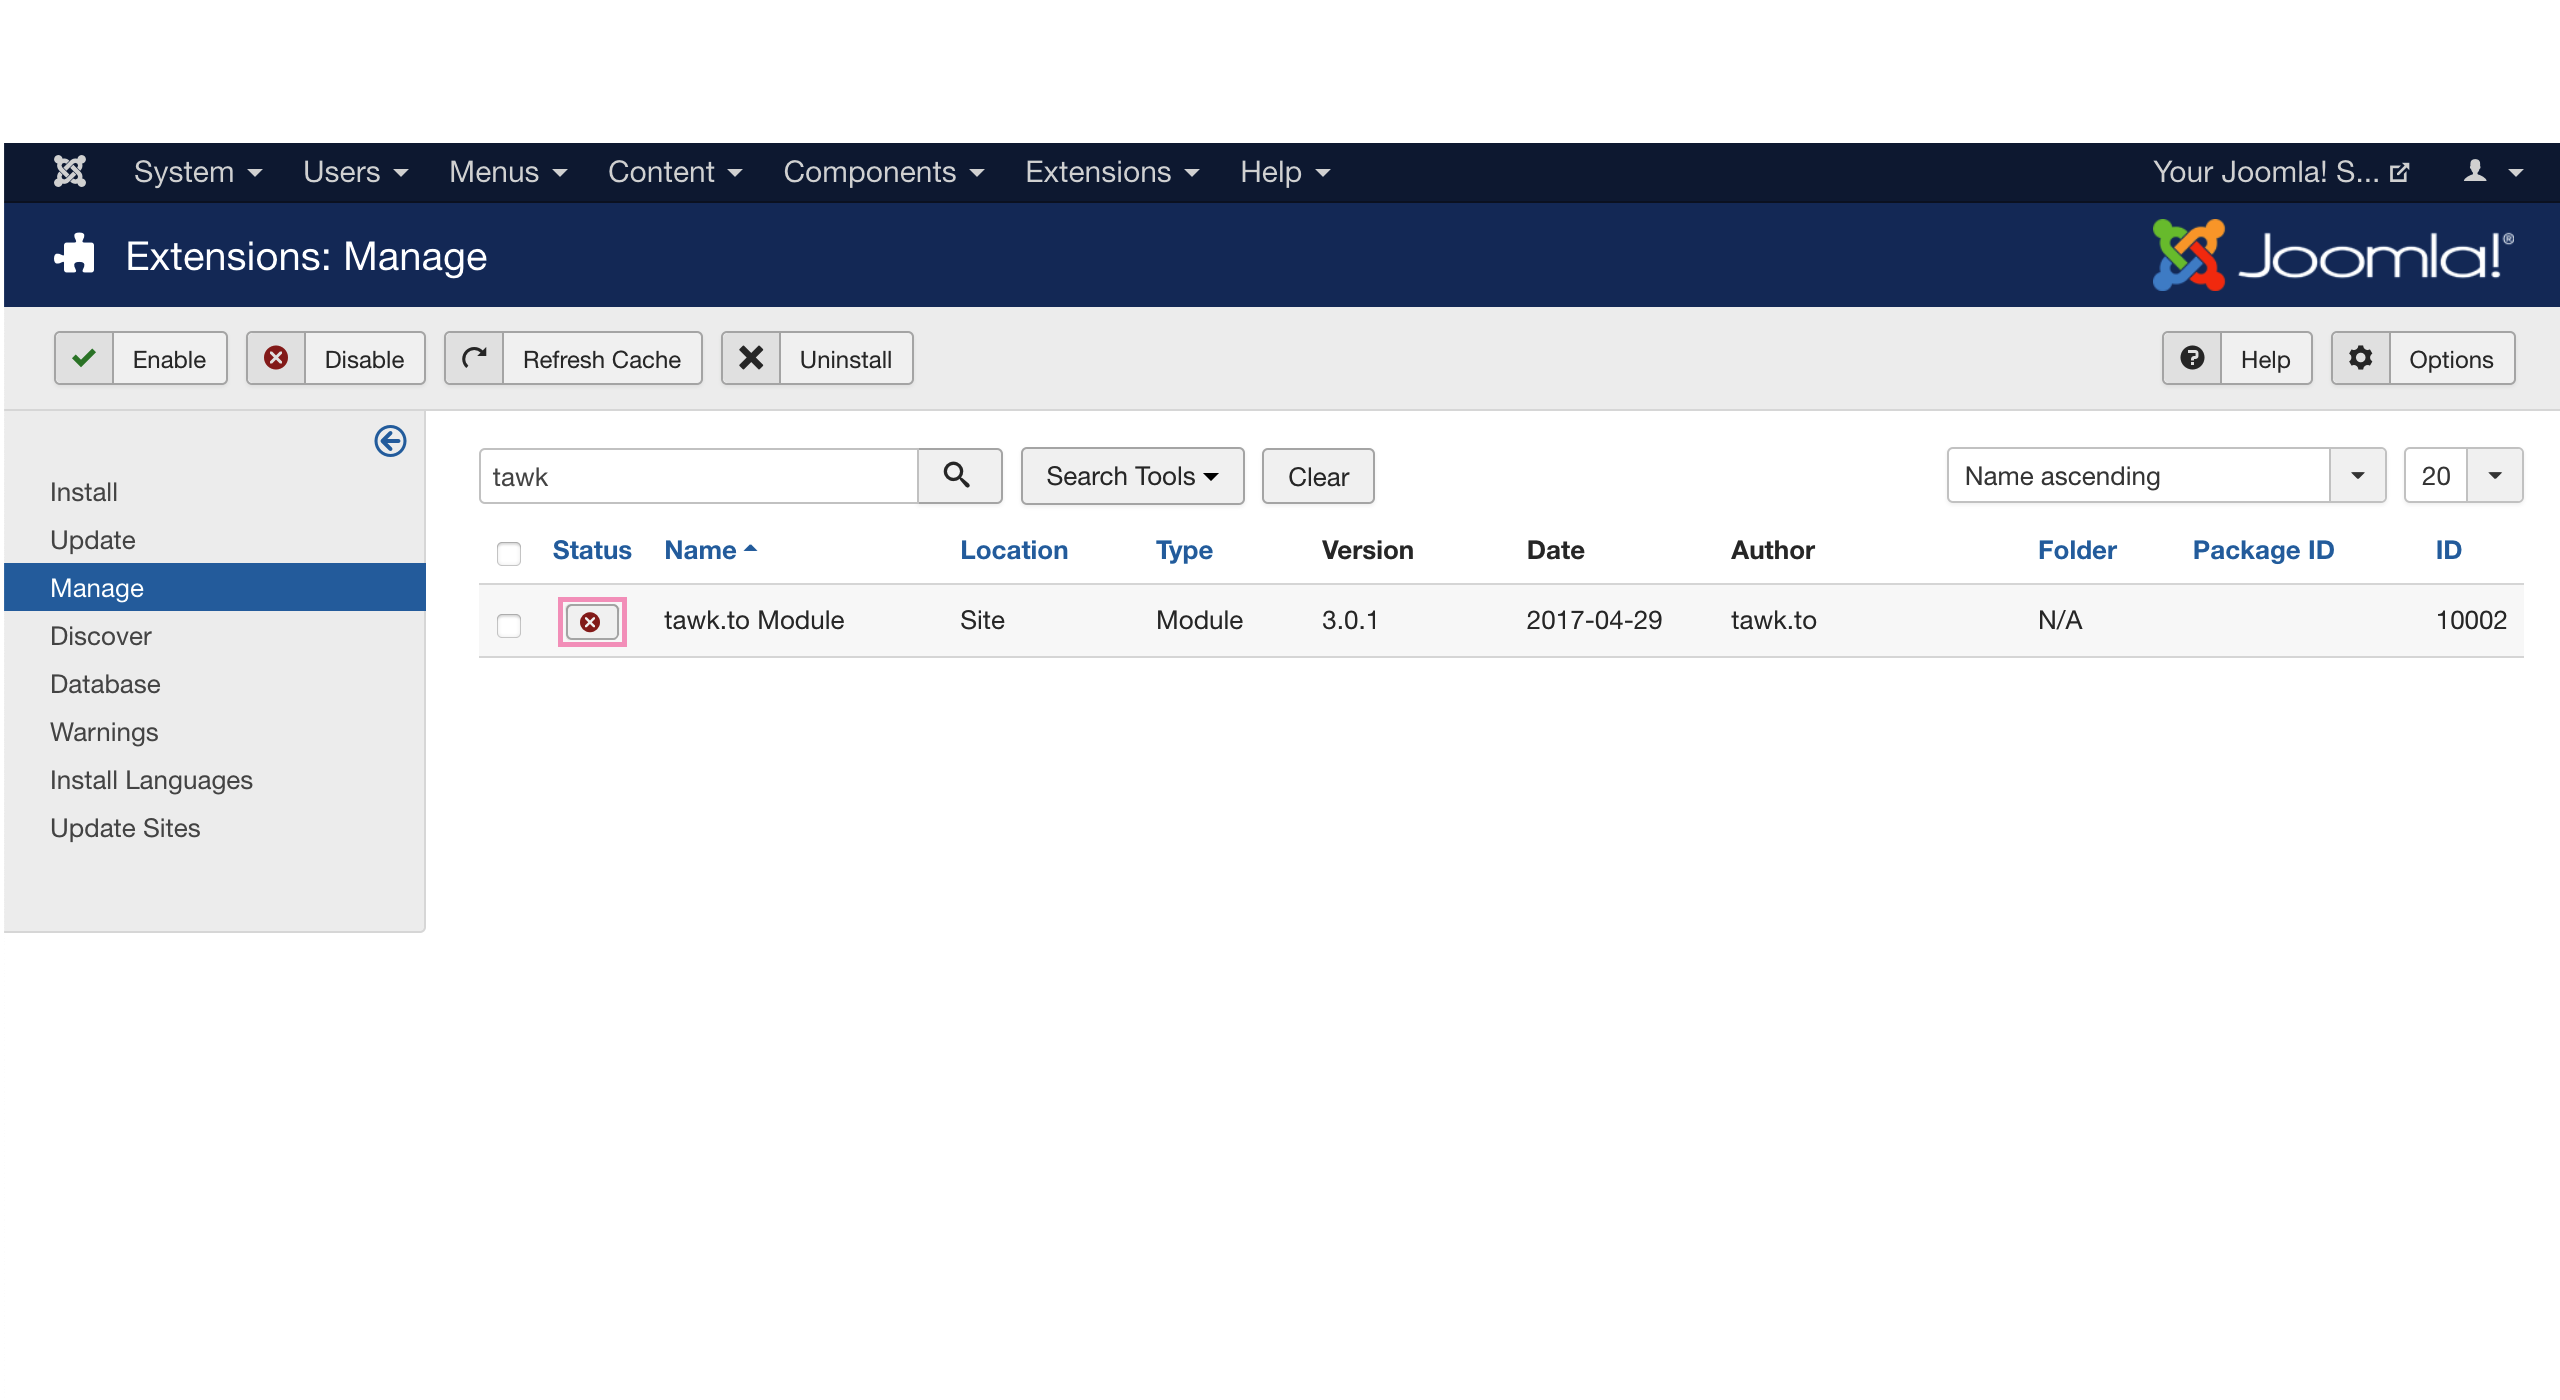
4. Then, select Manage and search for "tawk" to find the newly added extension.
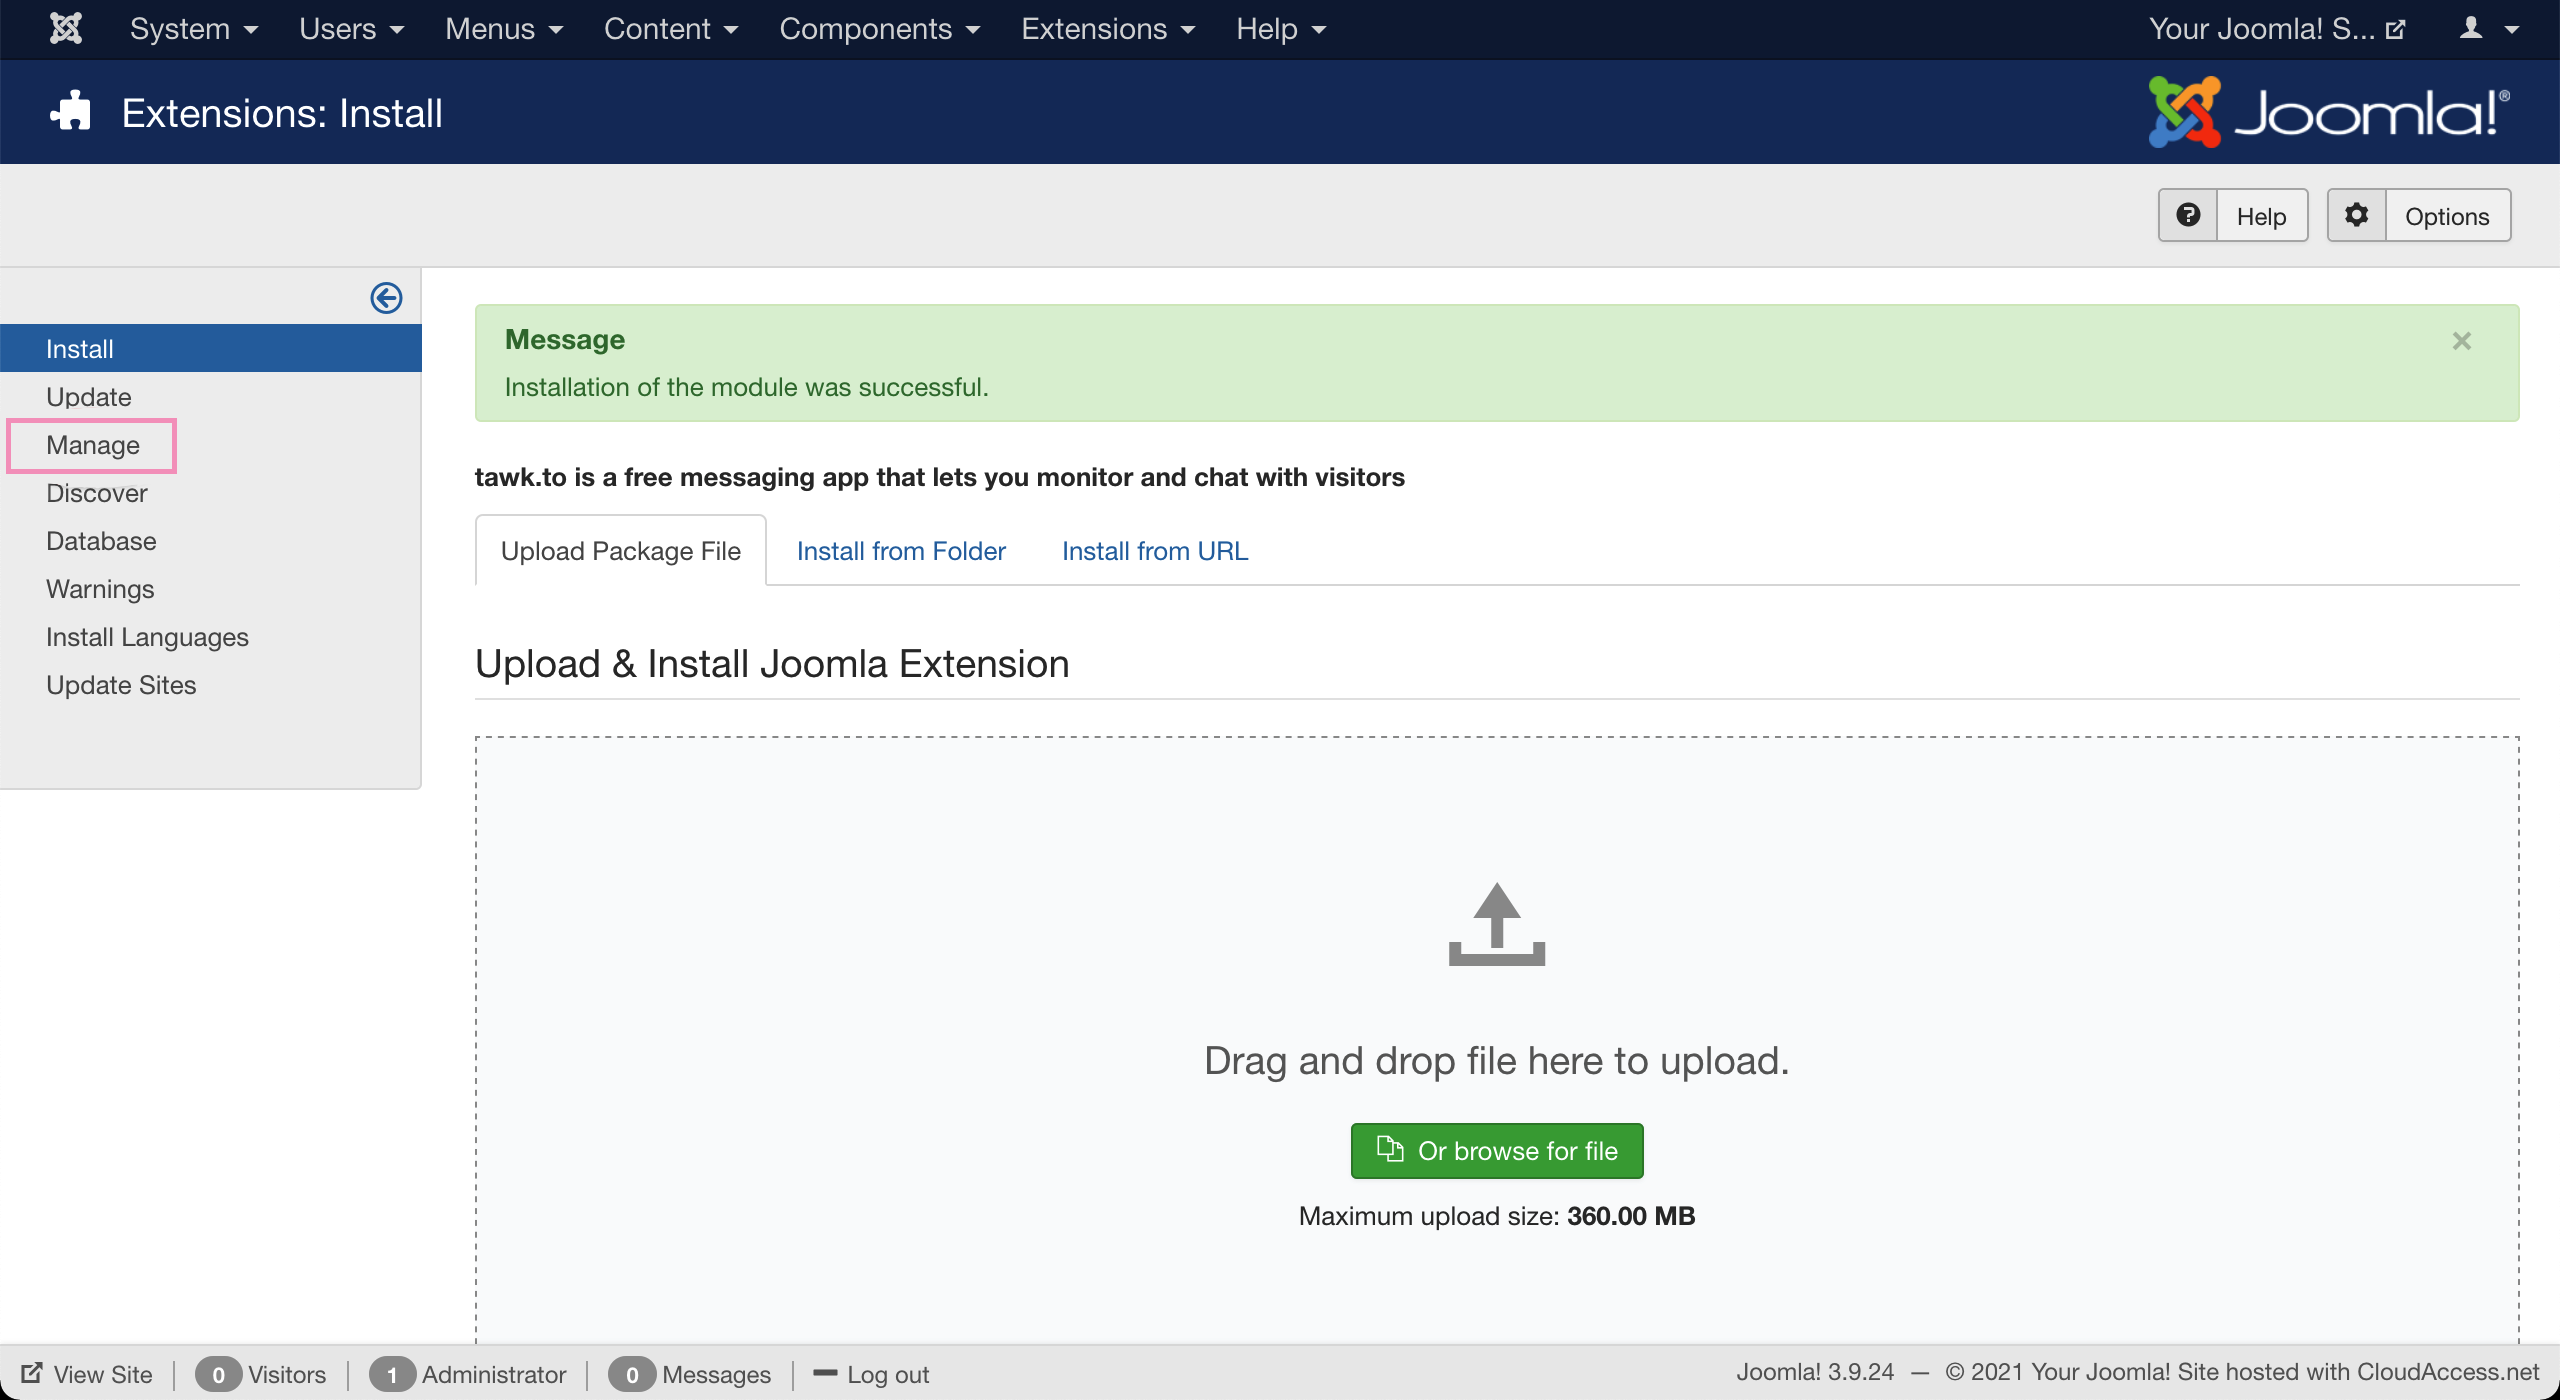
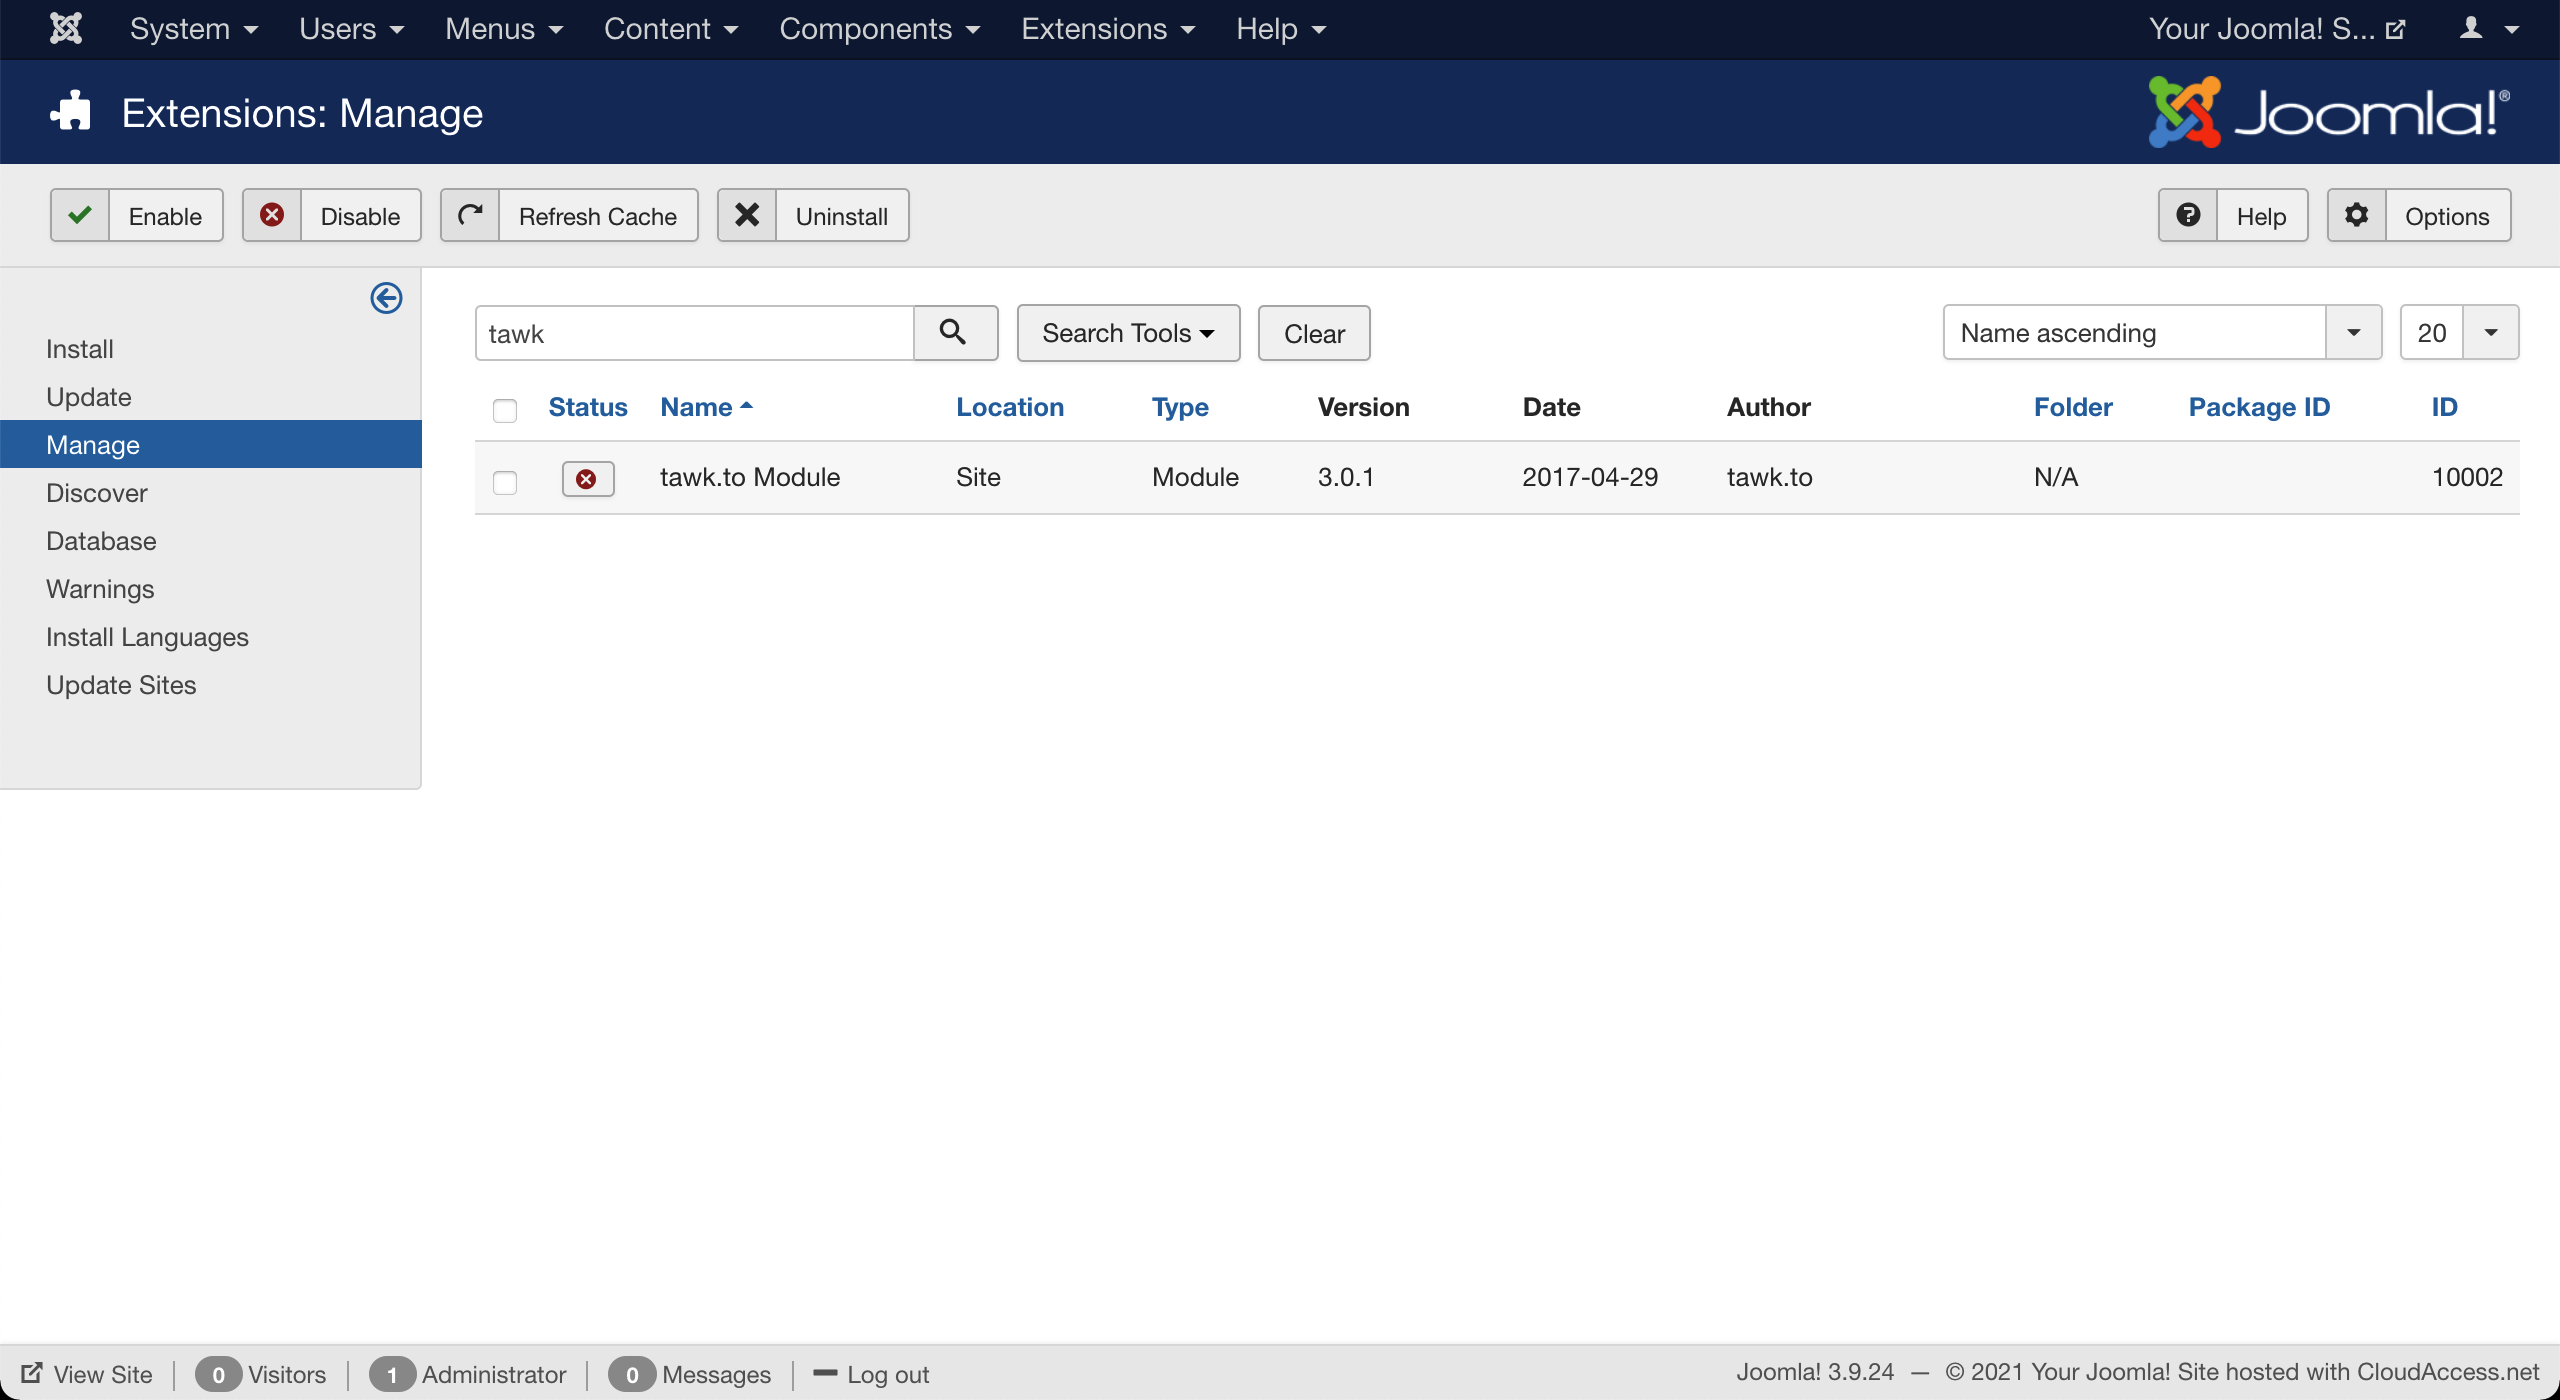
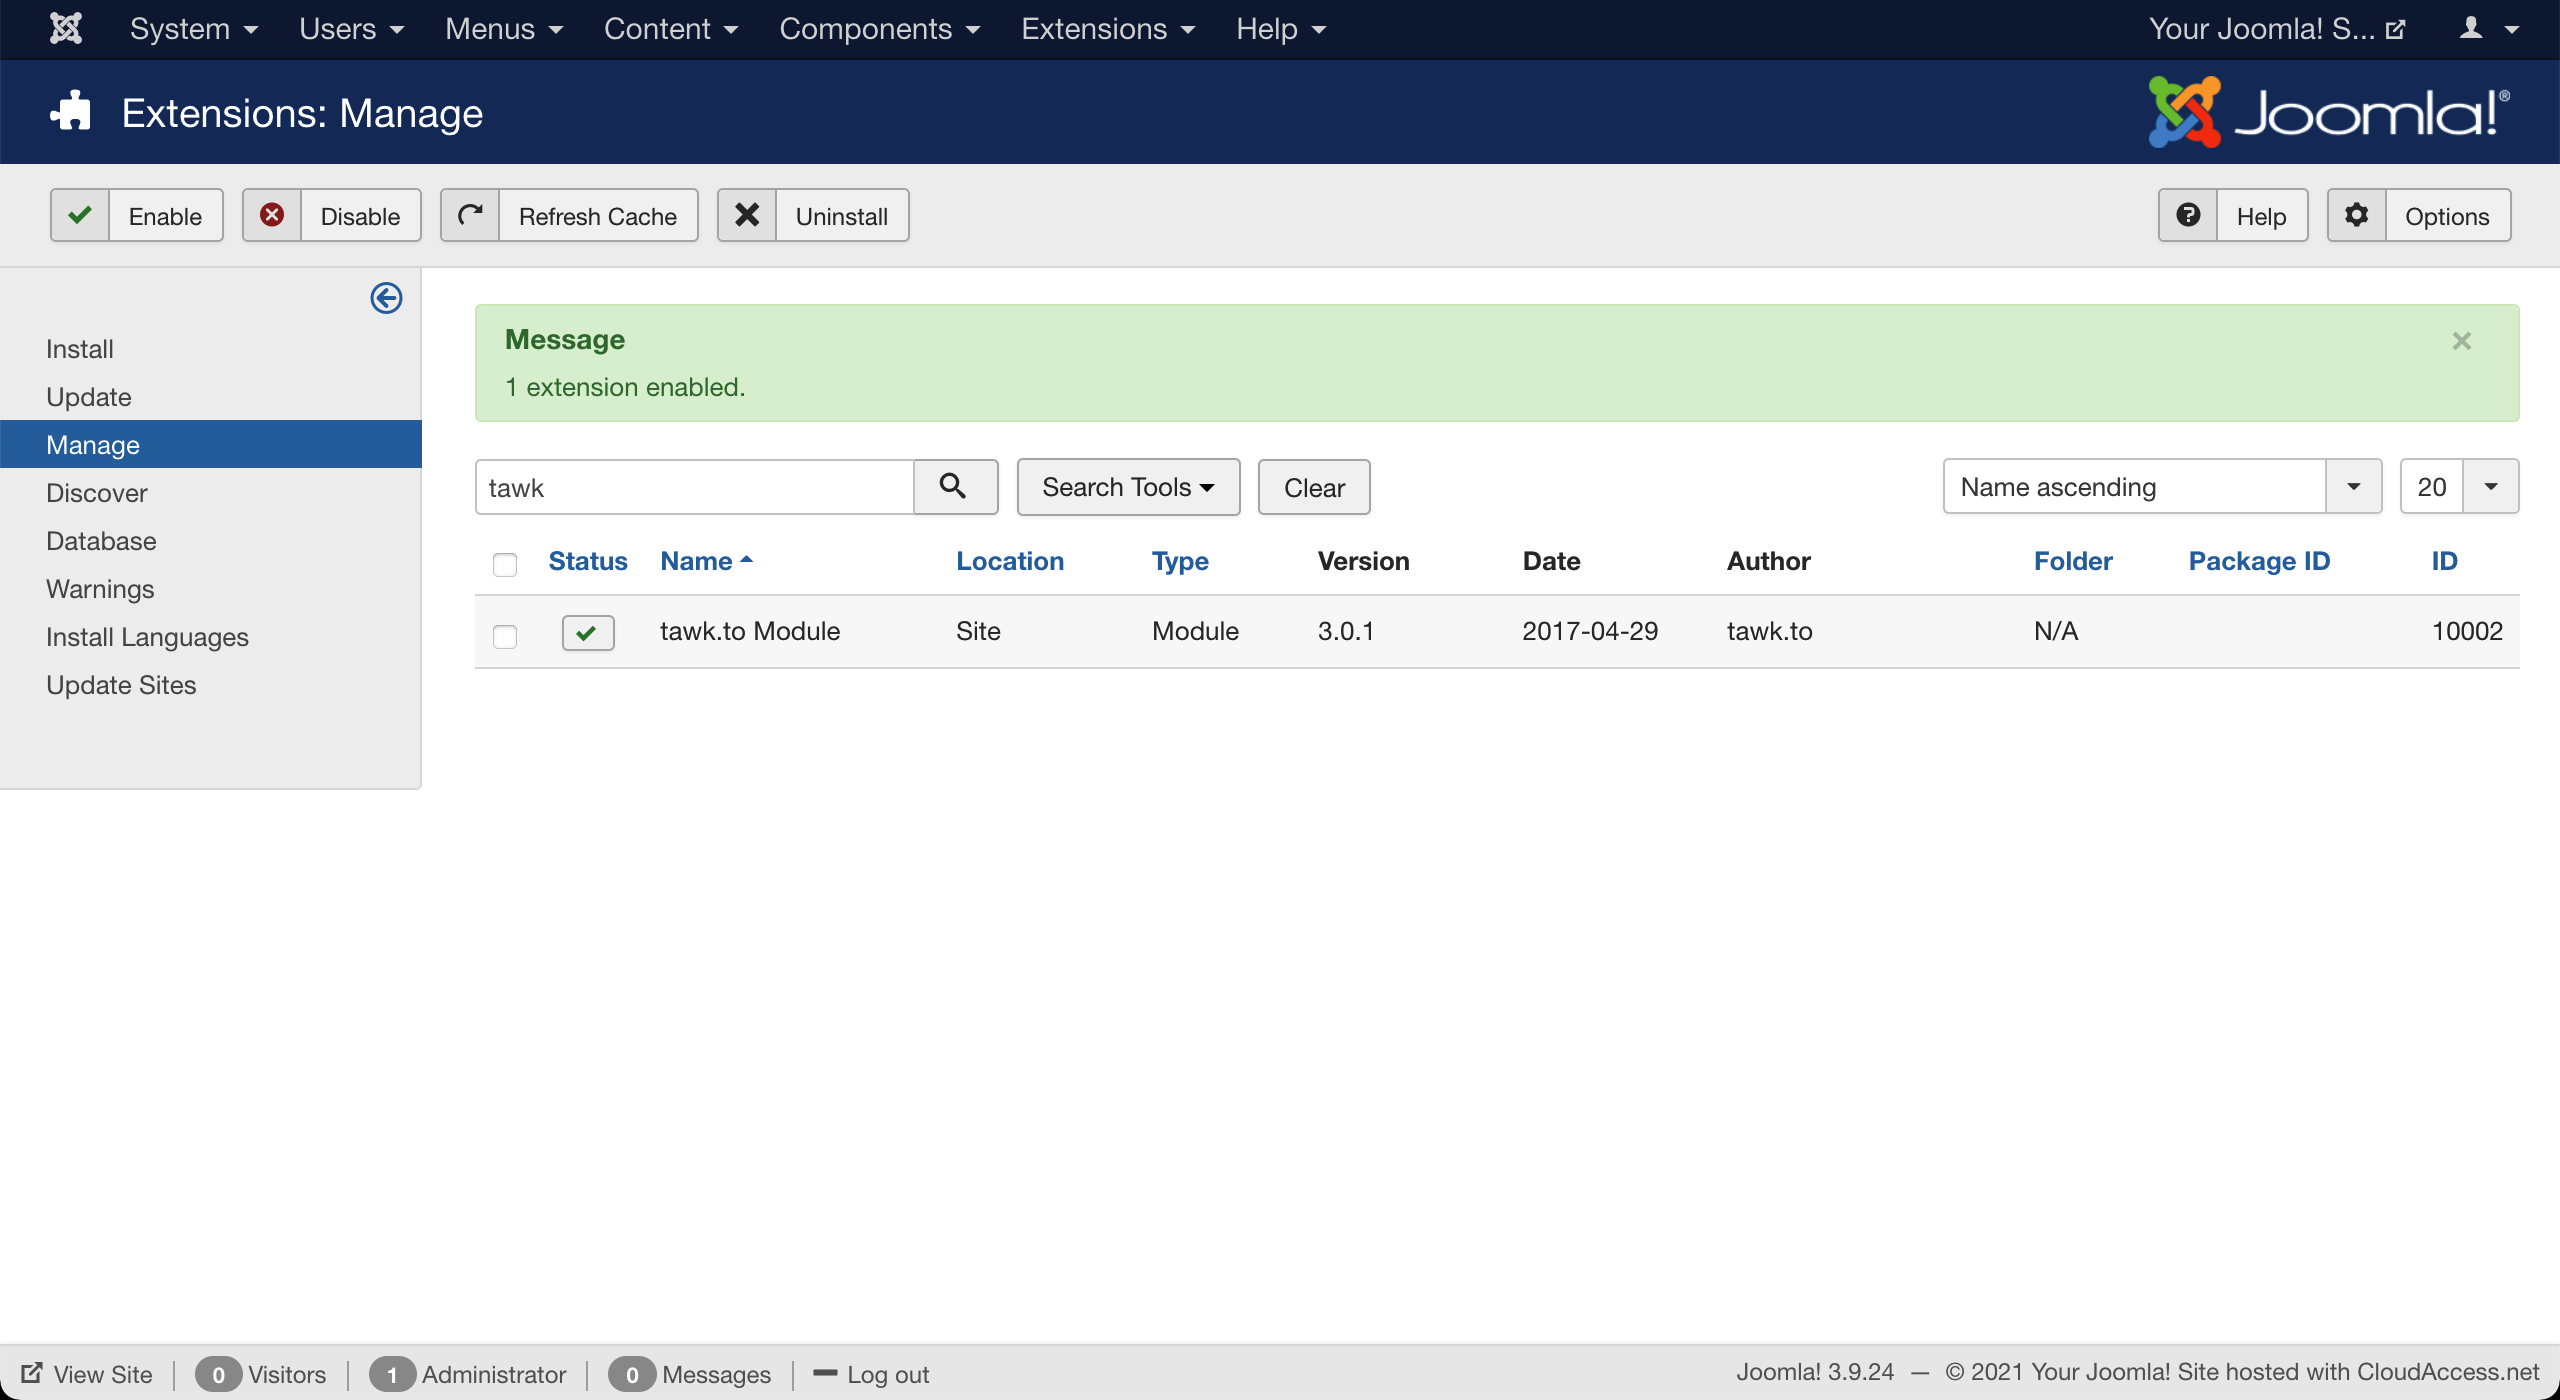
5. To enable the plugin, click the status symbol so it shows a green tick.
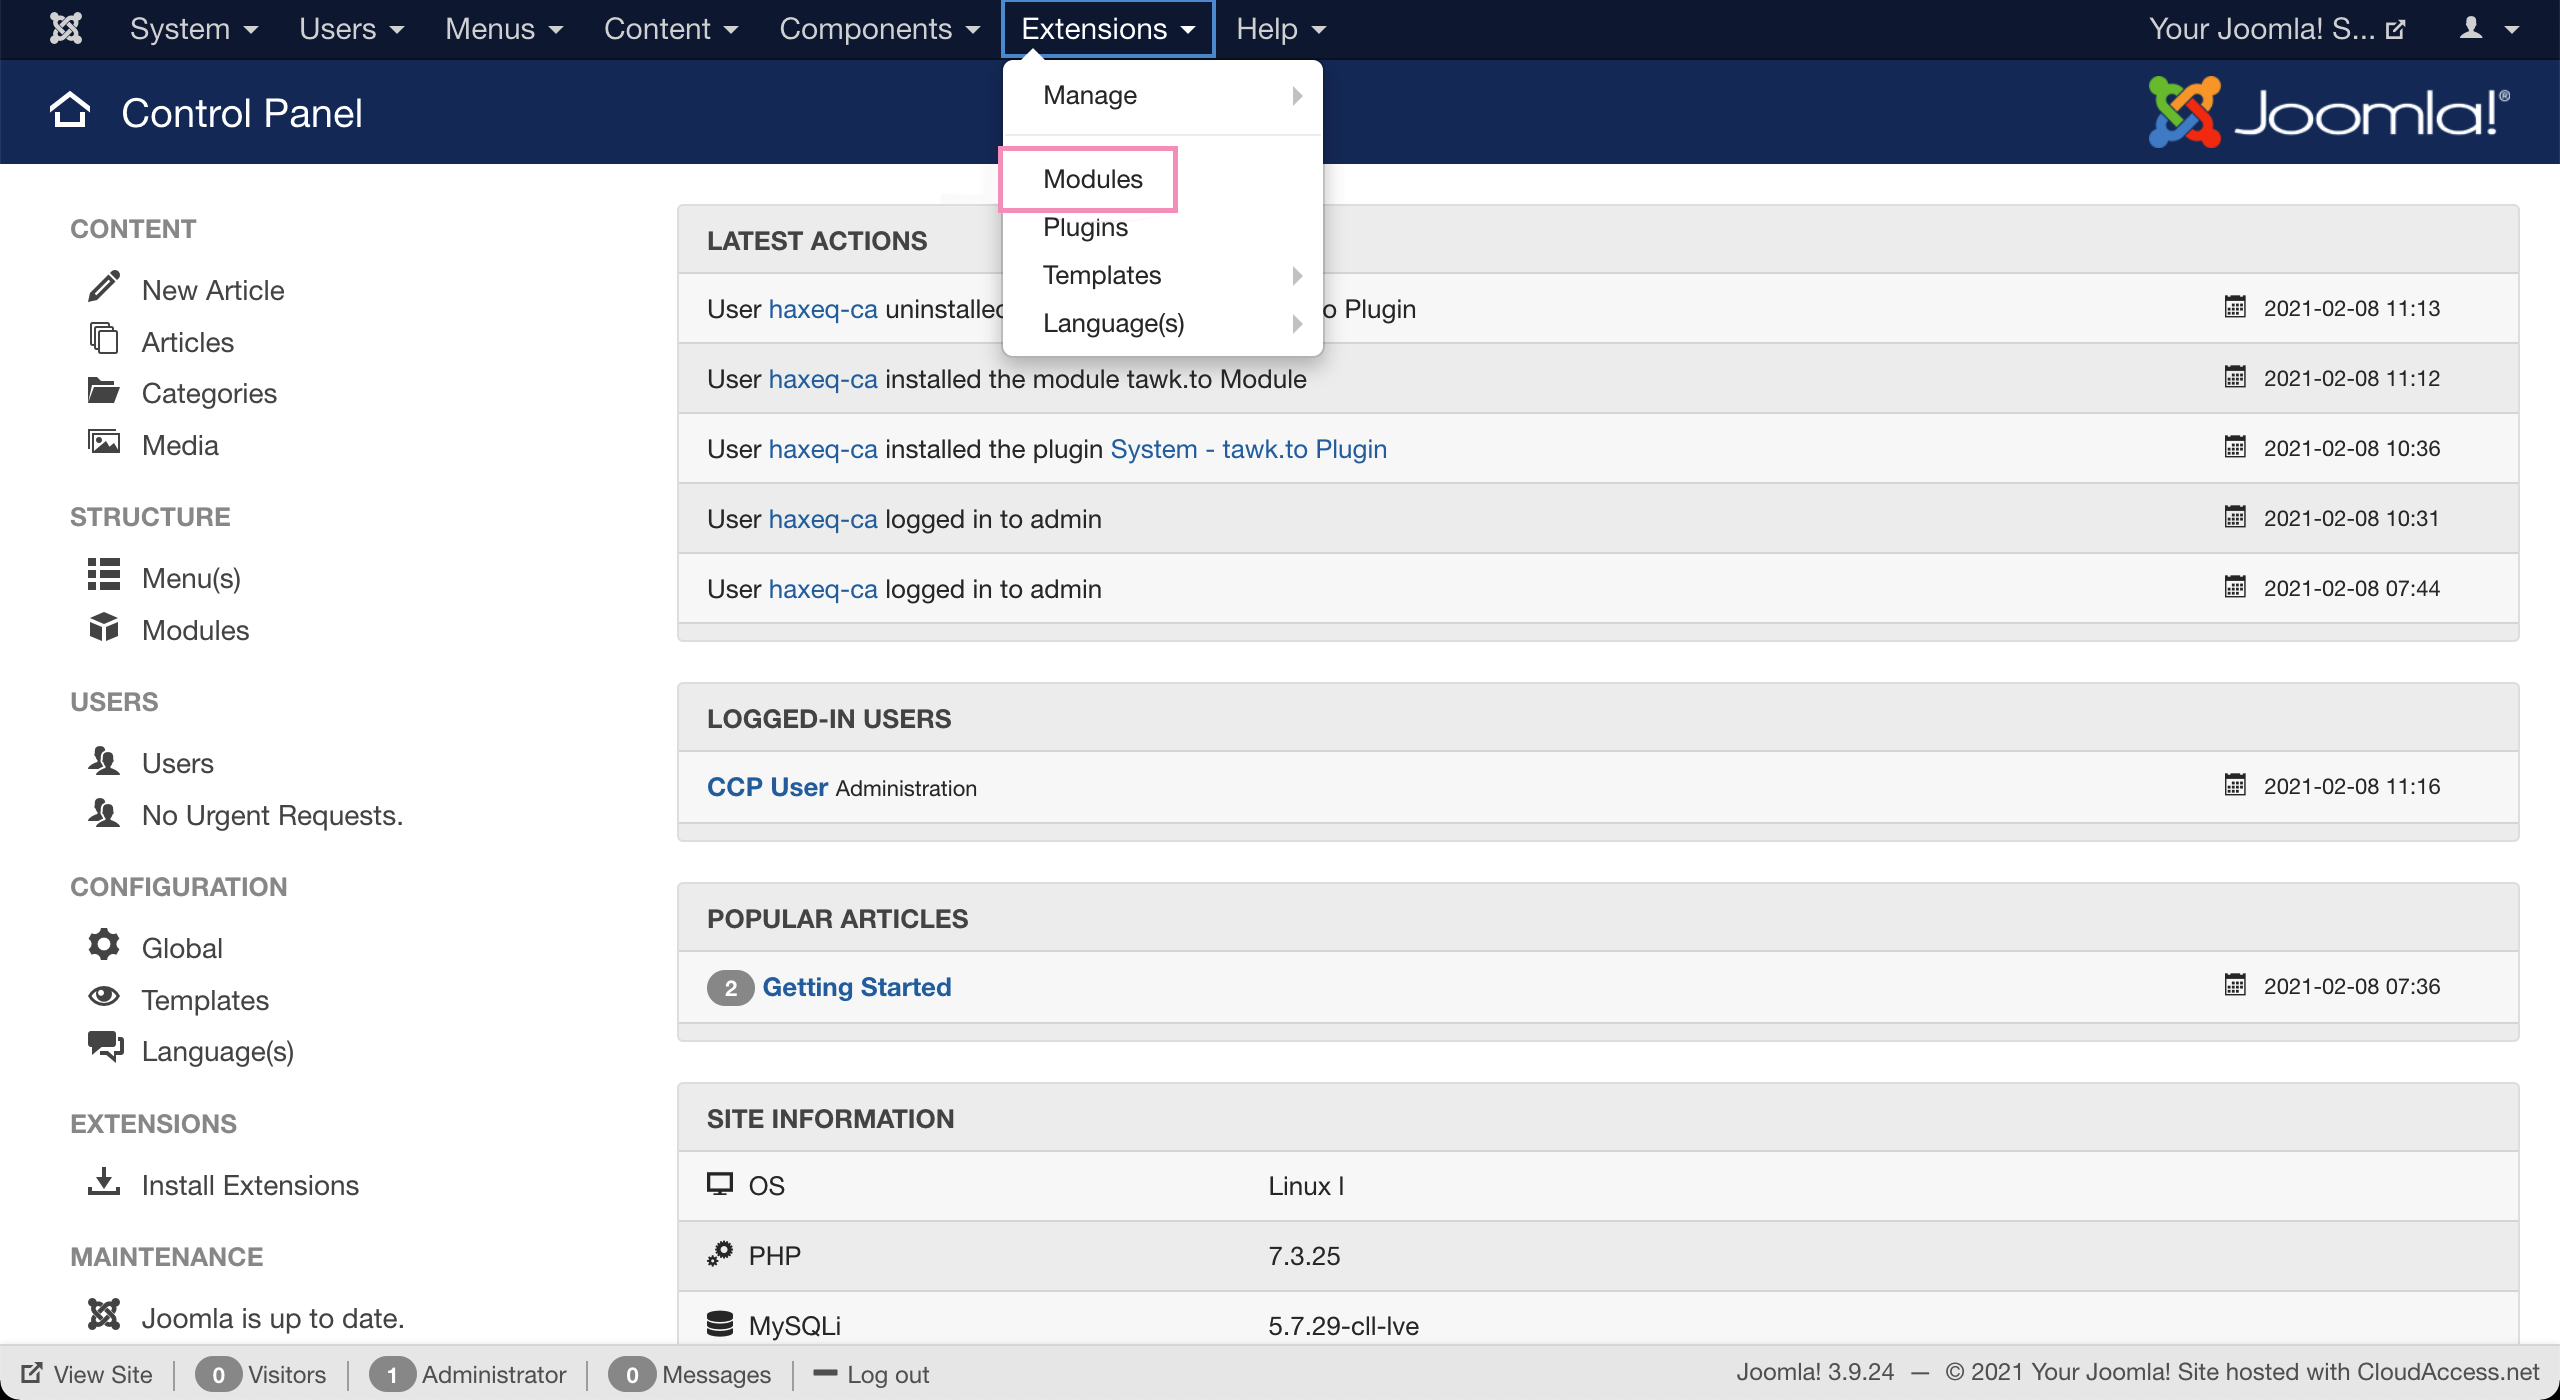
6. To sign in to your tawk.to account, select Modules in the Extensions drop-down menu.
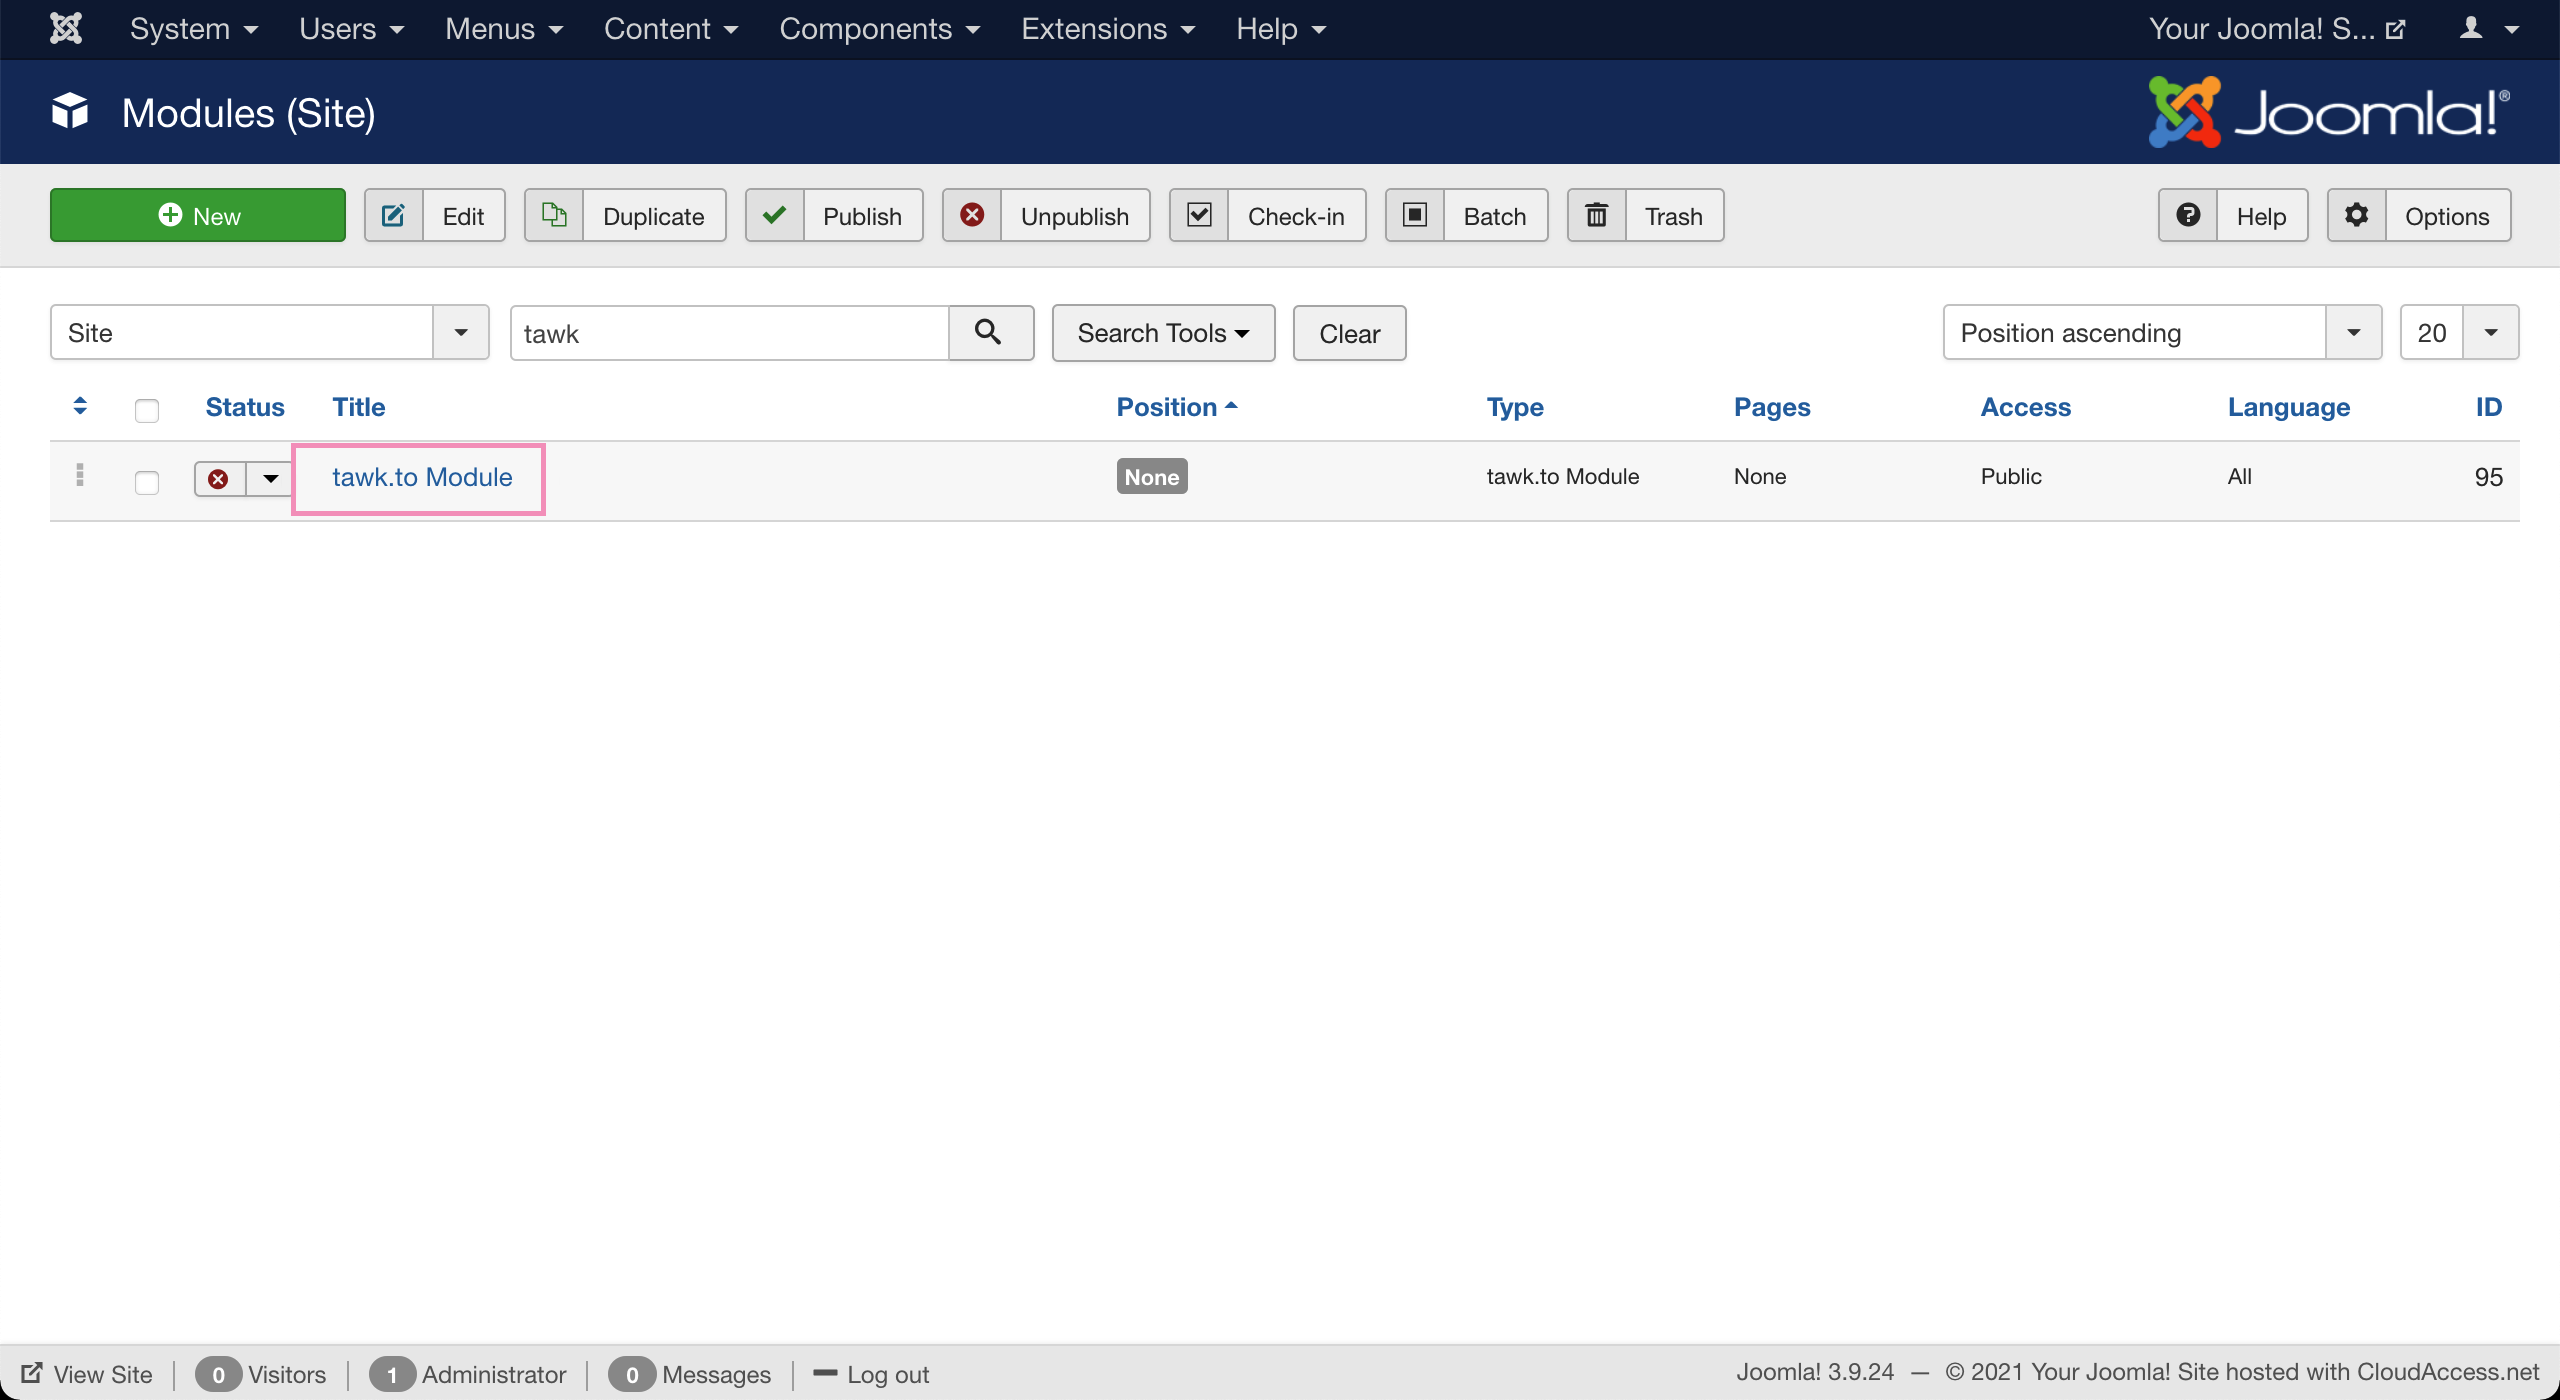
7. Search for "tawk" and select tawk.to Module.
8. Log in to your tawk.to account.

9. Select the Property and Widget and click Use selected widget. Ensure Status is set to Published.
You can also set the module’s Position. We recommend selecting Footer, which loads the widget after everything else on your page.


11. The widget should now appear on your site.
You may also reach out to our support team or schedule a call.
