Delaying the tawk.to widget using JavaScript
[Desktop]
By default, the tawk.to widget loads immediately after your webpage.
If you would like to delay your widget’s appearance on your page by a specified amount of time, you can set a delay to the load time of the widget with JavaScript.
To use this method, you'll need to install the widget manually and remove the WordPress plugin if it is being used, as the plugin does not support multiple widgets.
NOTE: The instructions below can only be completed from a browser or the tawk.to desktop apps. They cannot be completed in the tawk.to mobile app.
To get started, customize the new code by adding your property and widget IDs.
Where to find your property and widget IDs
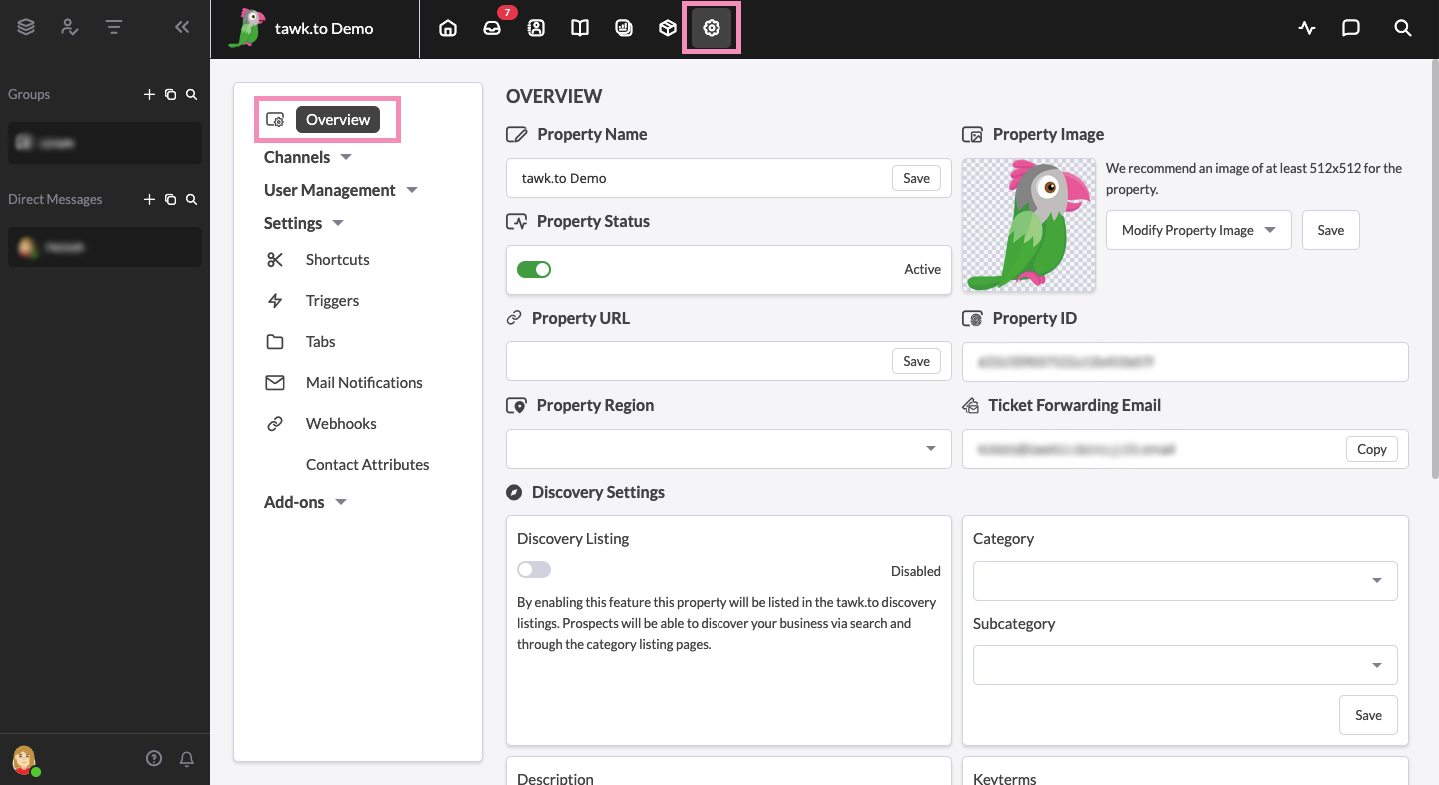
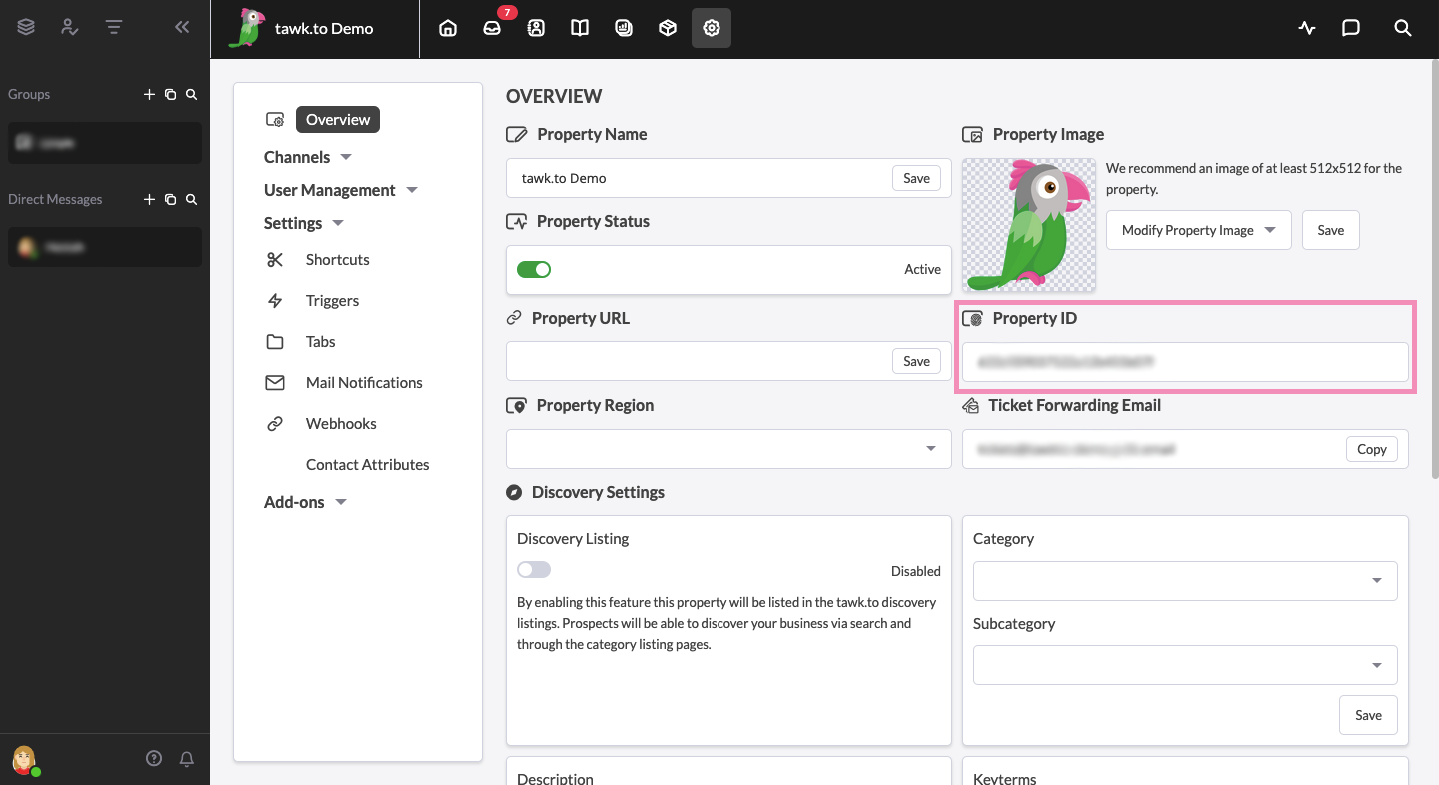
You can find your Property ID in the Overview panel of your Dashboard.
Make your way to ⚙️Administration ➞ Overview.

Then, copy your Property ID.

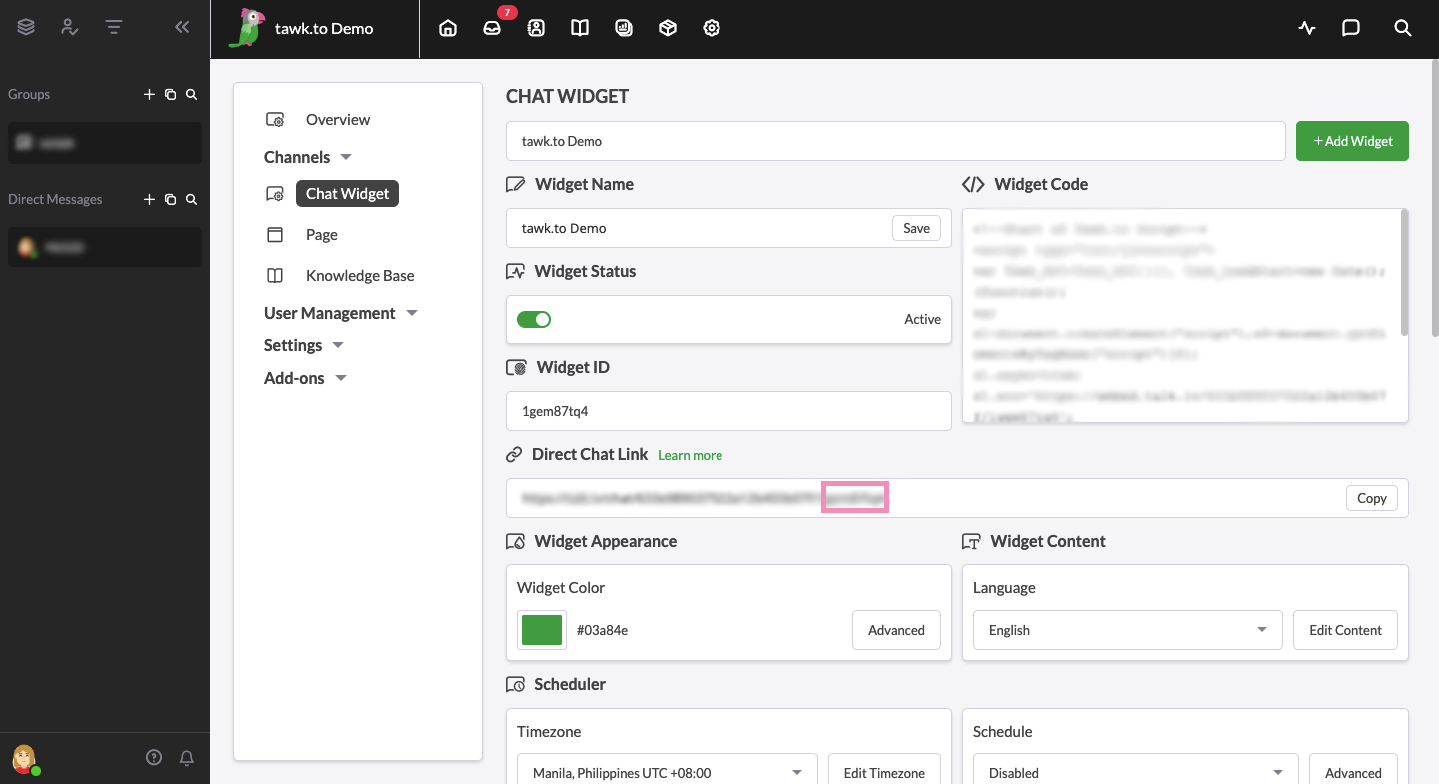
To find your Widget ID, go to ⚙️Administration ➞ Channels ➞ Chat Widget.


In the Chat Widget drop-down menu, select the widget you want to embed. Then, copy the code in the last section of your Direct Chat Link.

Here’s where to add your property and widget IDs to the widget code:
Once you have your IDs, you’ll need to add them to the src attribute in the code as follows:
Replace <property> with your Property ID.
Replace <widget> with your Widget ID.
Here’s what it looks like using the property and widget IDs in the examples above:
Customize the delay time
Now add your source attribute and the delay time in milliseconds to the following code to customize your delay using a setTimeout function:
Need help? Reach out to our support team or schedule a call.
