Adding the tawk.to widget to your Backdrop CMS website
[Desktop]
You can add the tawk.to widget to a Backdrop site using the Module Installer or by downloading the latest release and installing it manually.
Follow the steps below to install and configure your widget, so you can start monitoring and chatting with the visitors on your site.
Module Installer
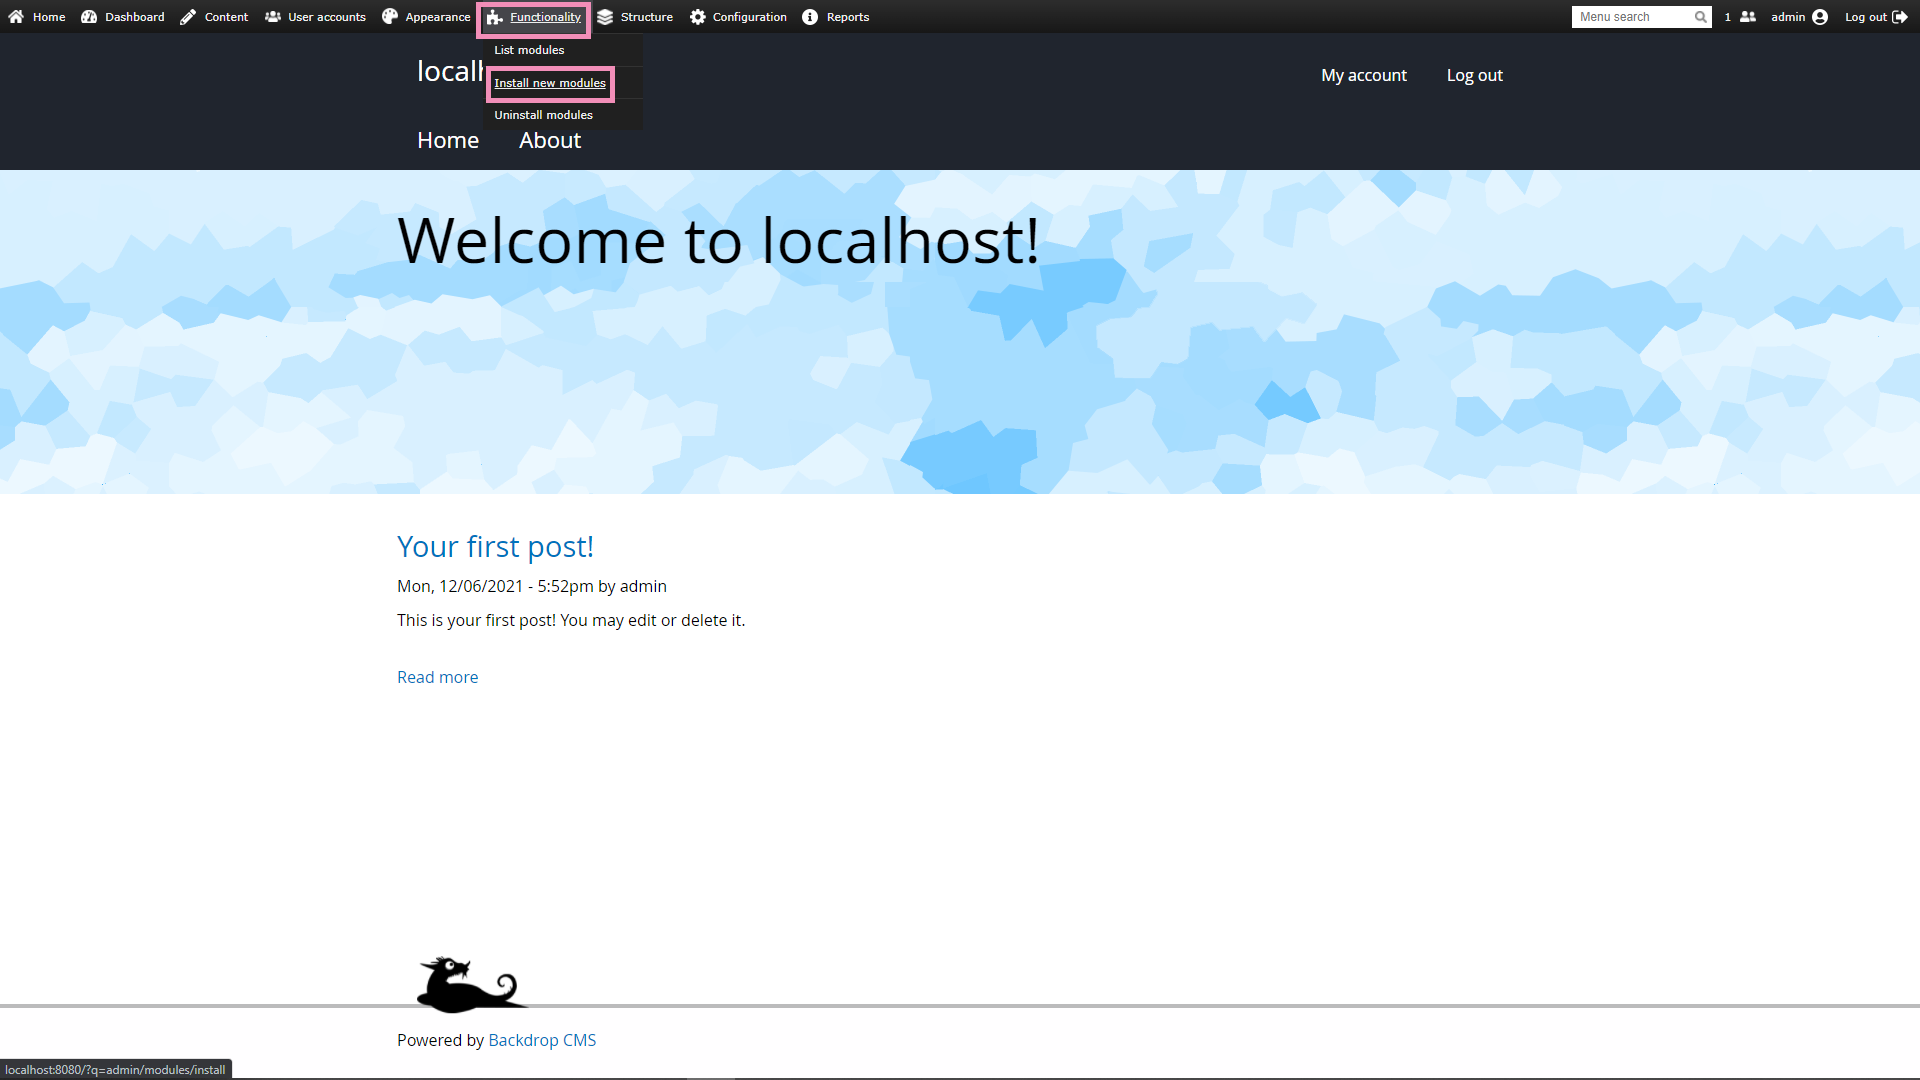
1. Log in to your Backdrop Site. Then, hover on Functionality in the top Admin Bar and select Install new modules.
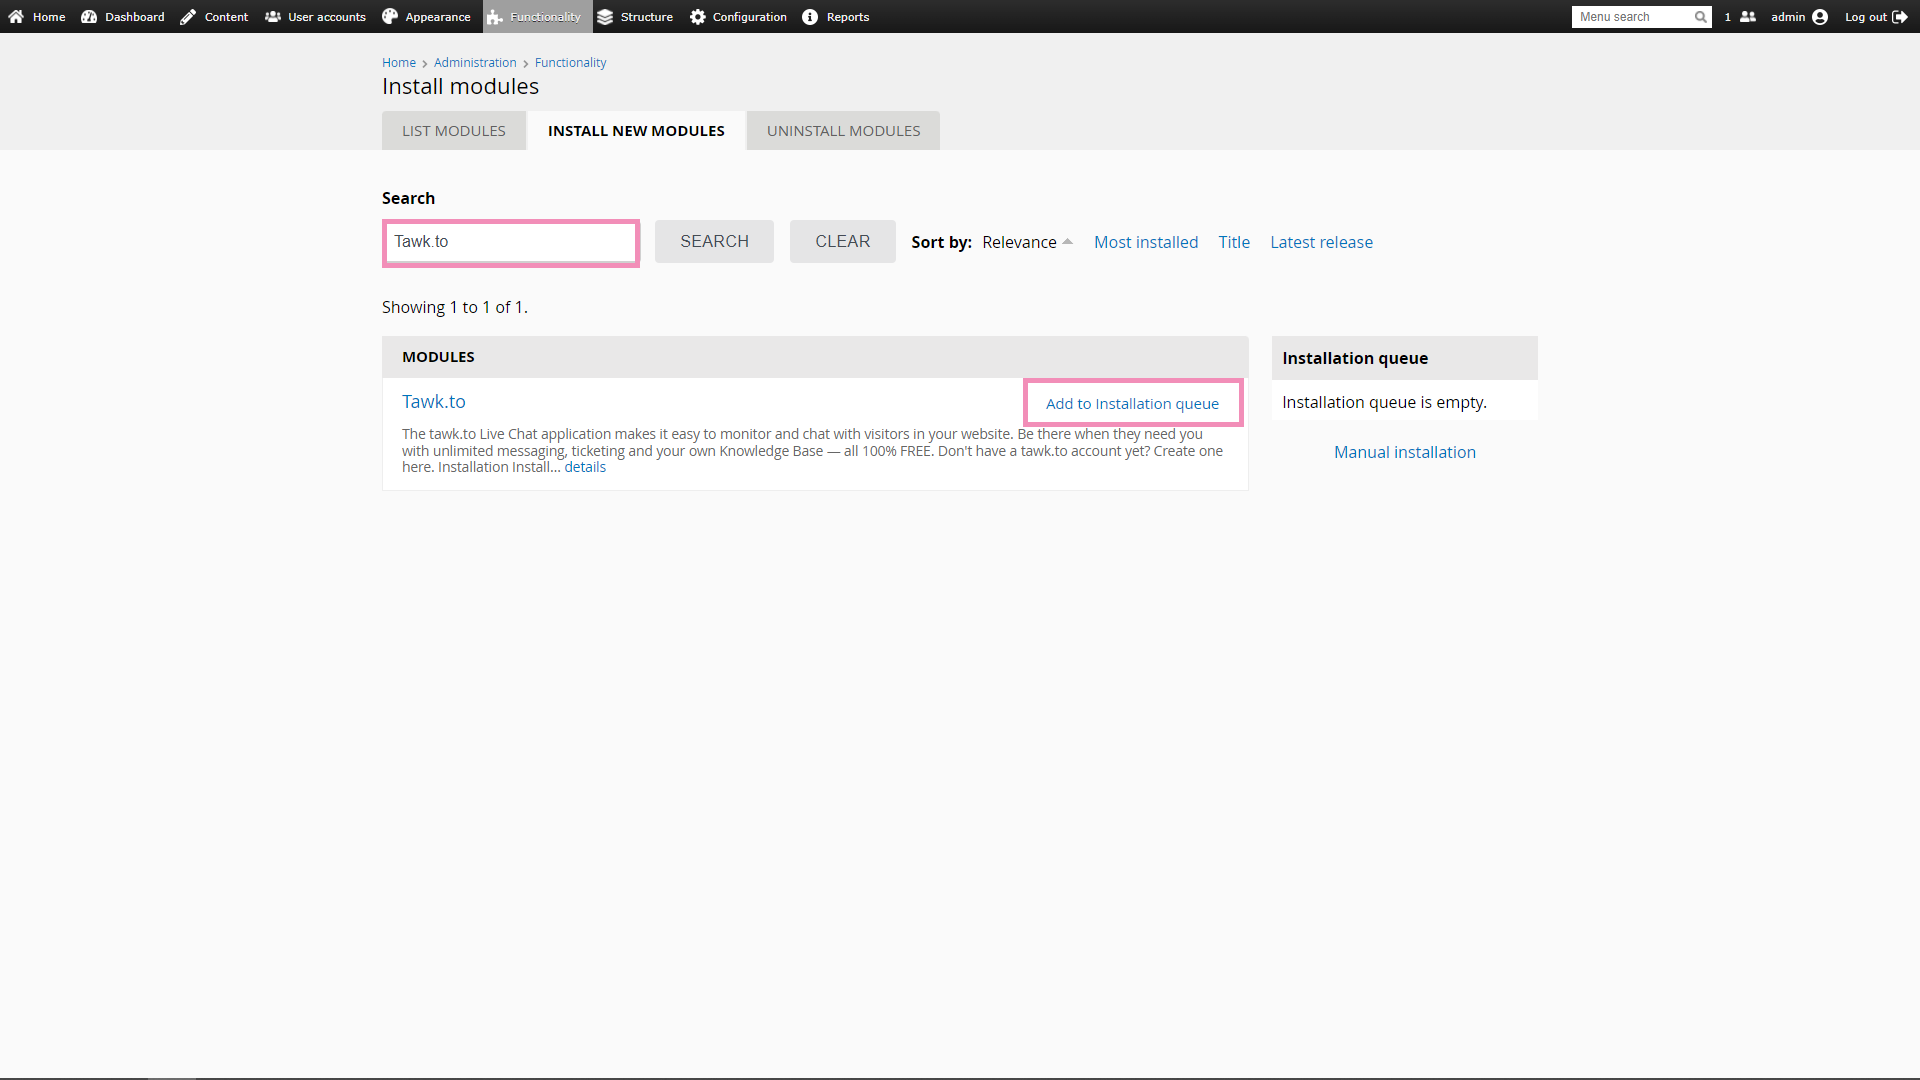
2. Search for Tawk.to and click Add to installation queue.
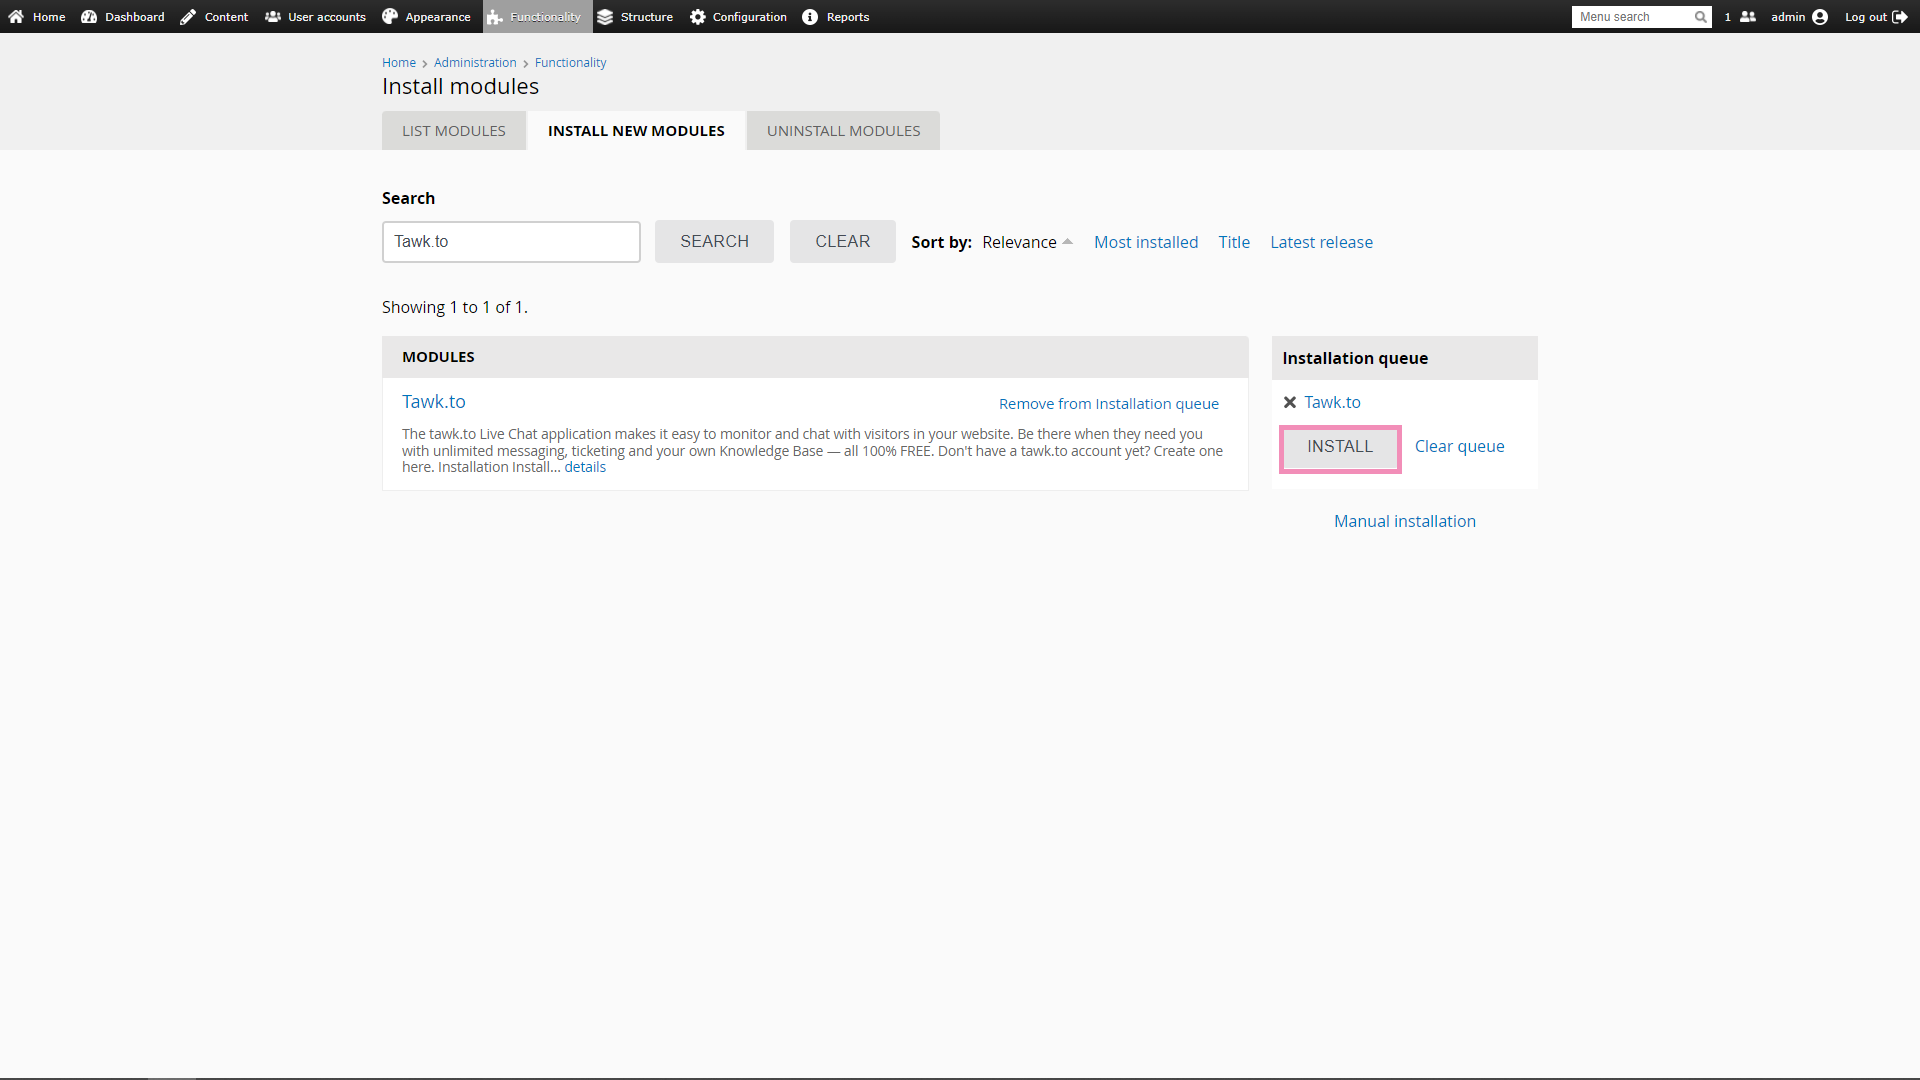
3. Once added, click the Install button. You’ll be redirected to the installation page.
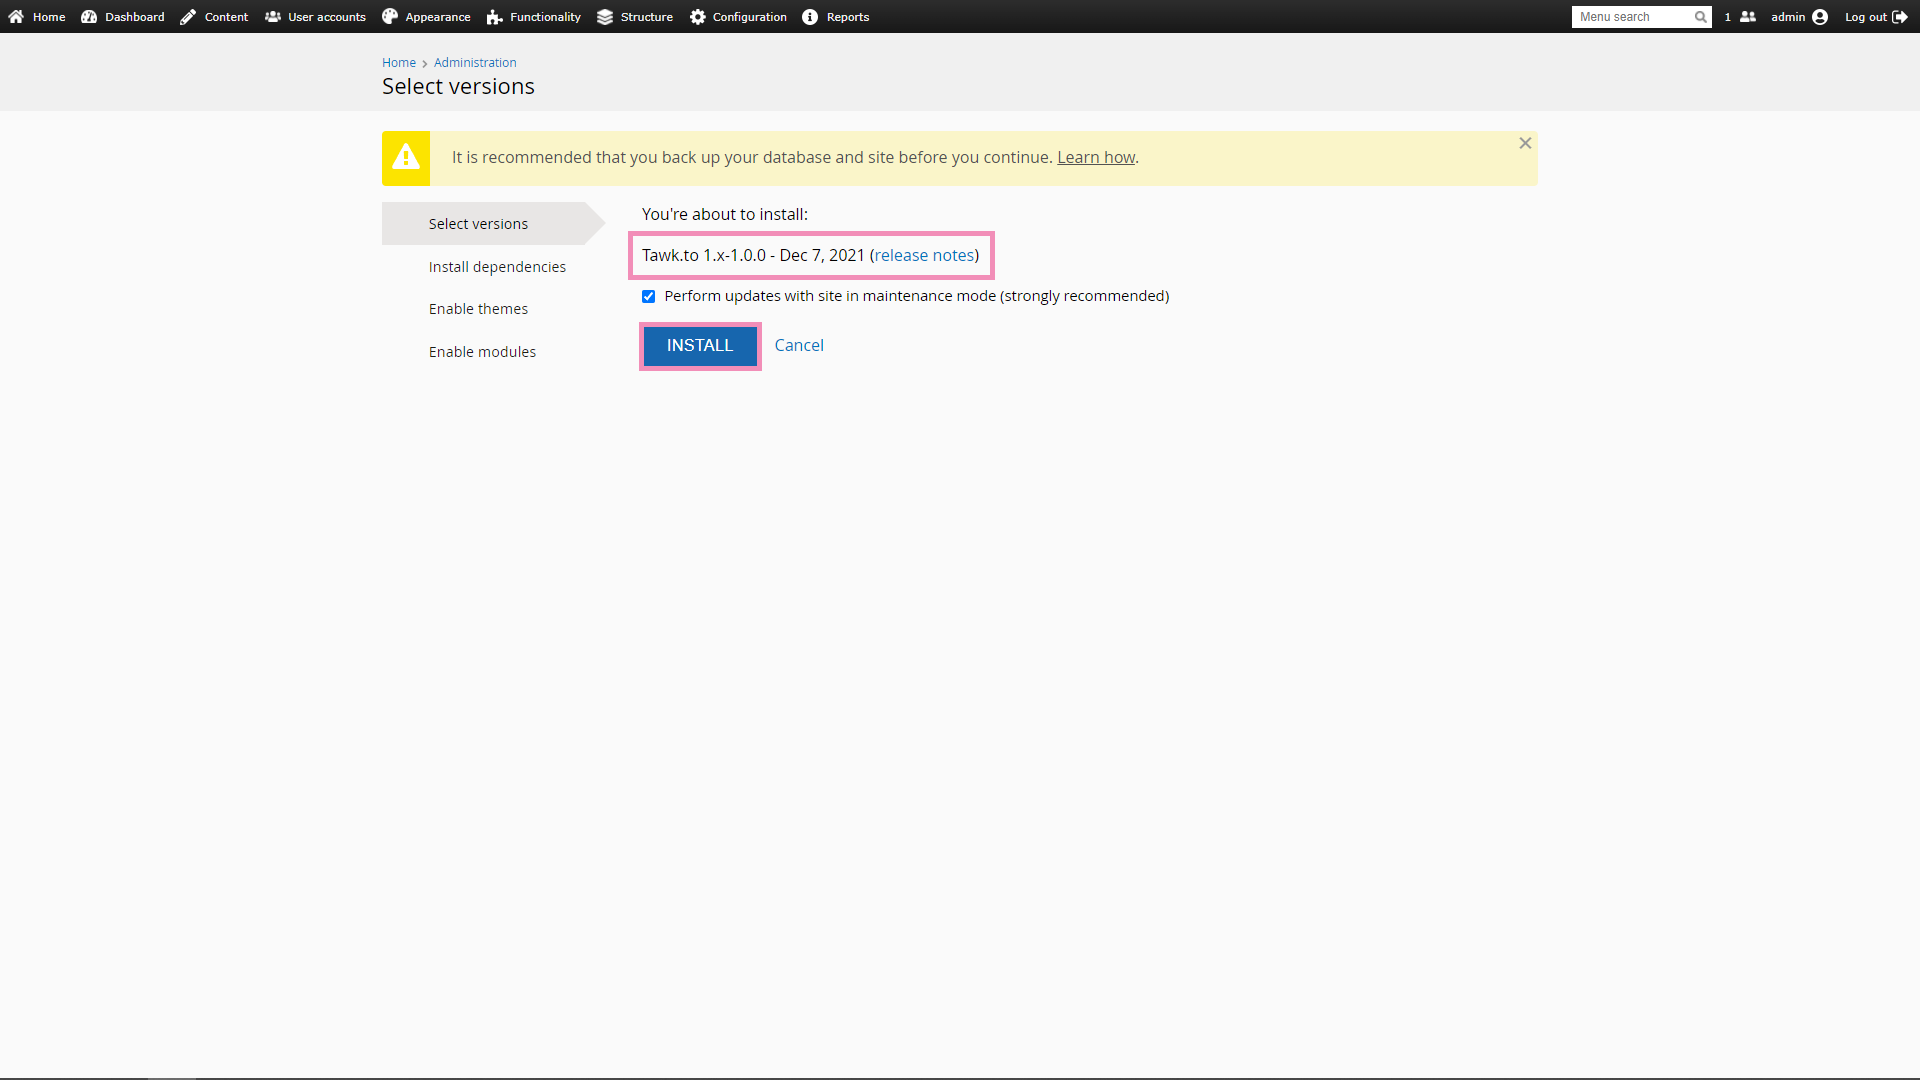
4. On the installation page, you can view a list of the modules you’re about to install. Make sure Tawk.to 1.x-1.x.x is listed there. Once confirmed, select Install.
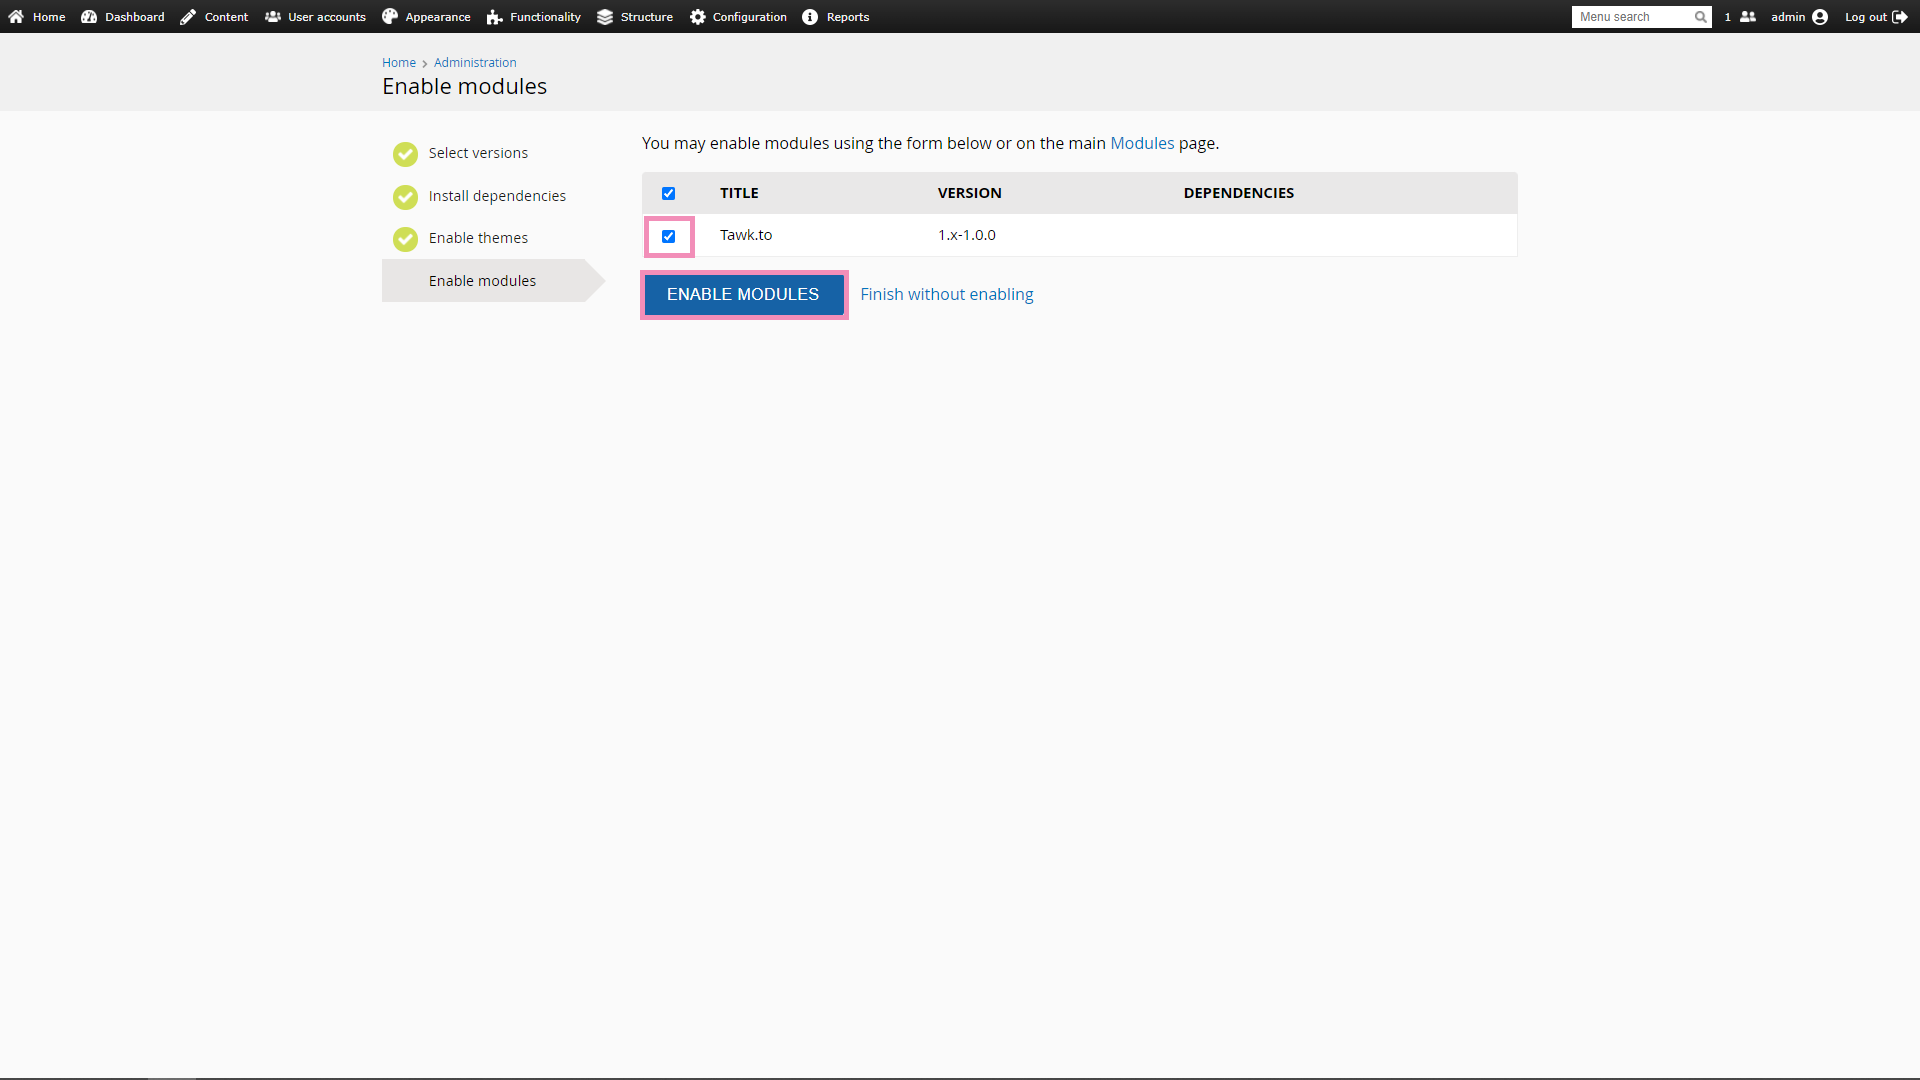
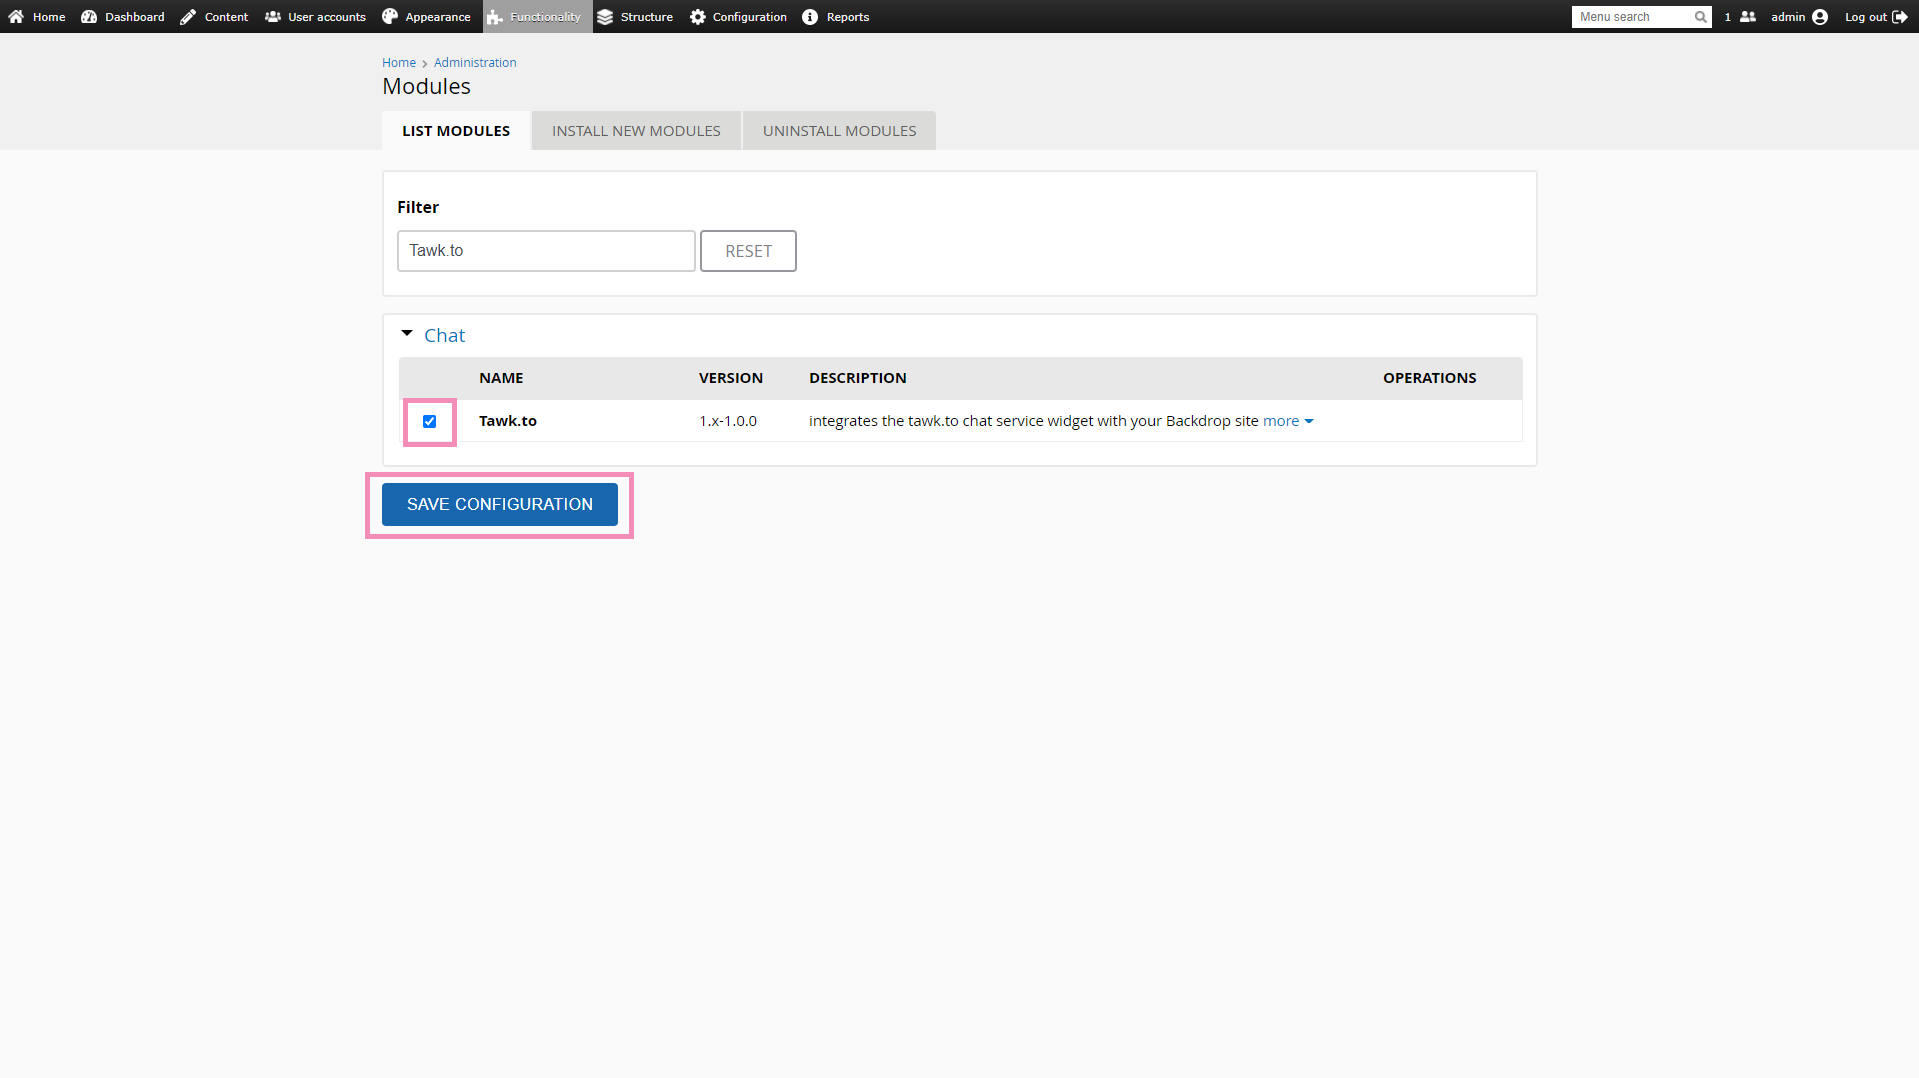
5. On the Enable modules page, tick the checkbox for Tawk.to and select Enable Modules.
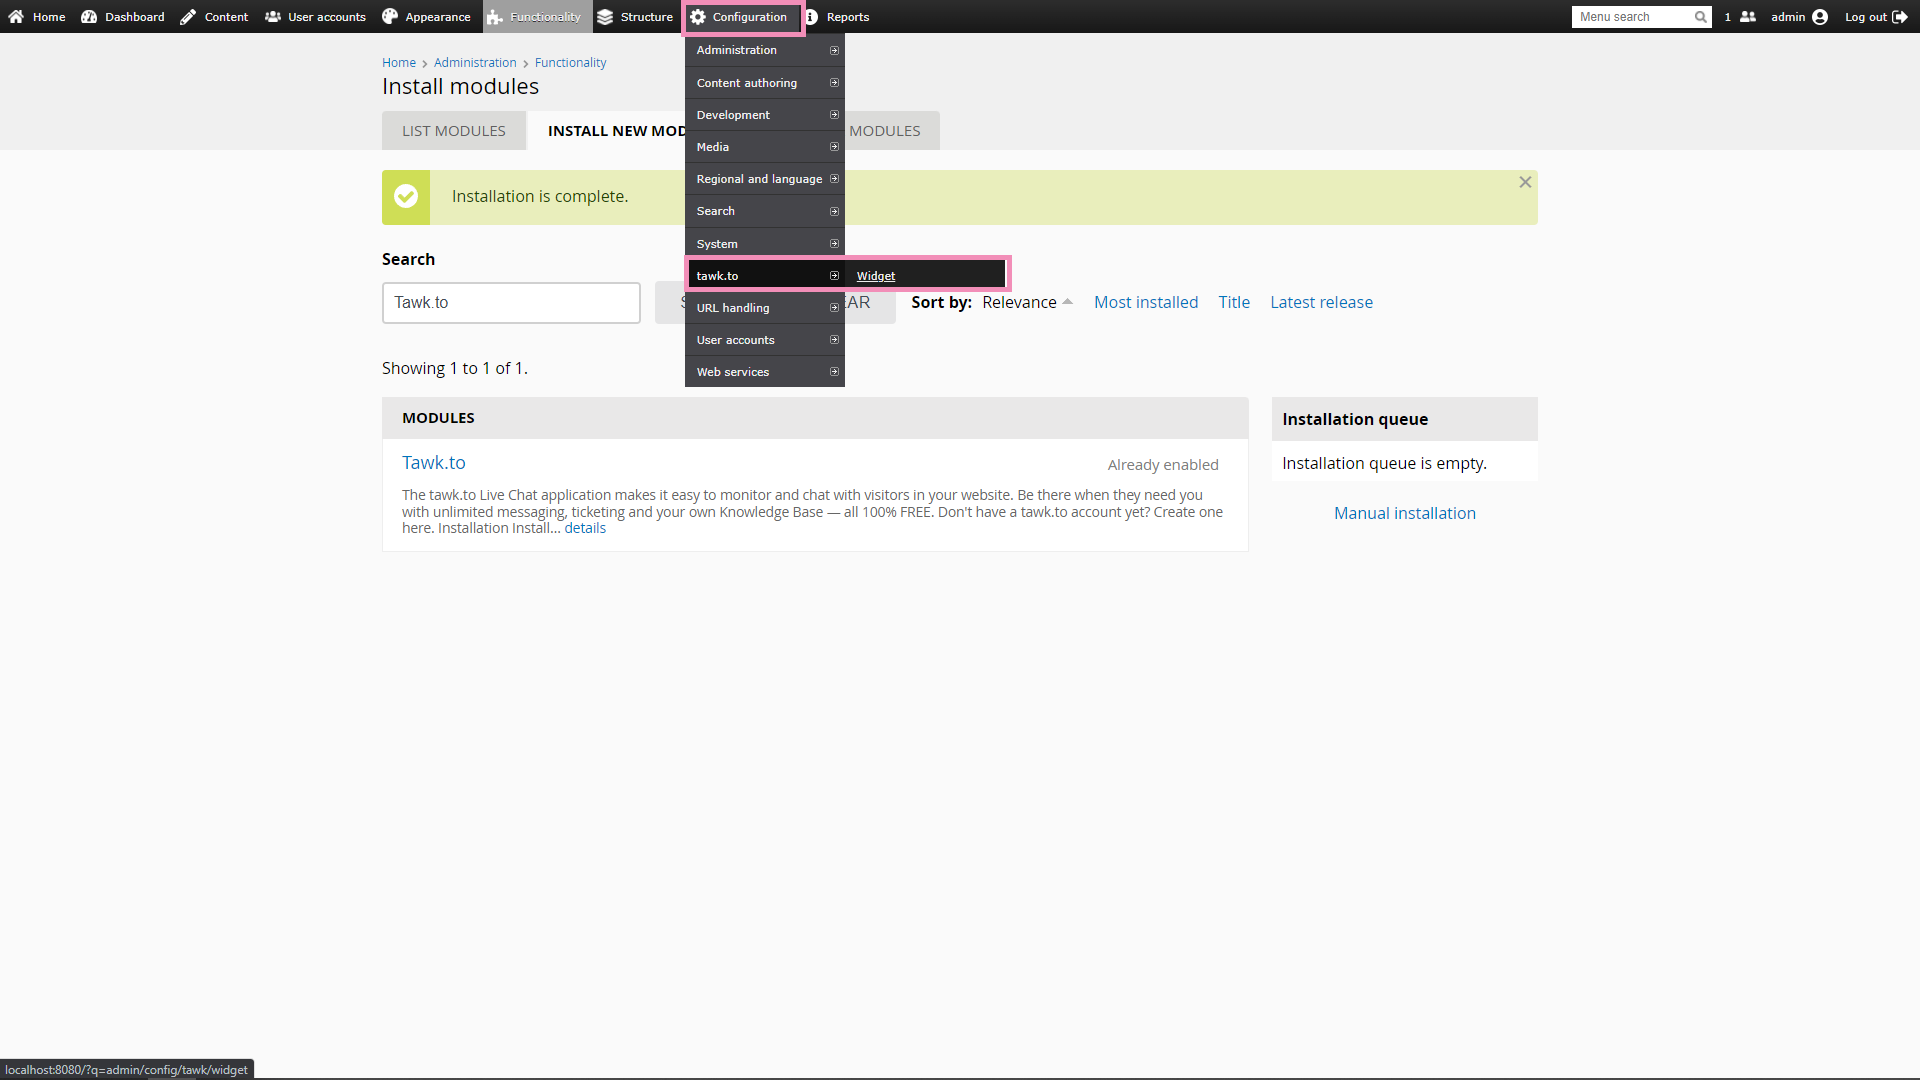
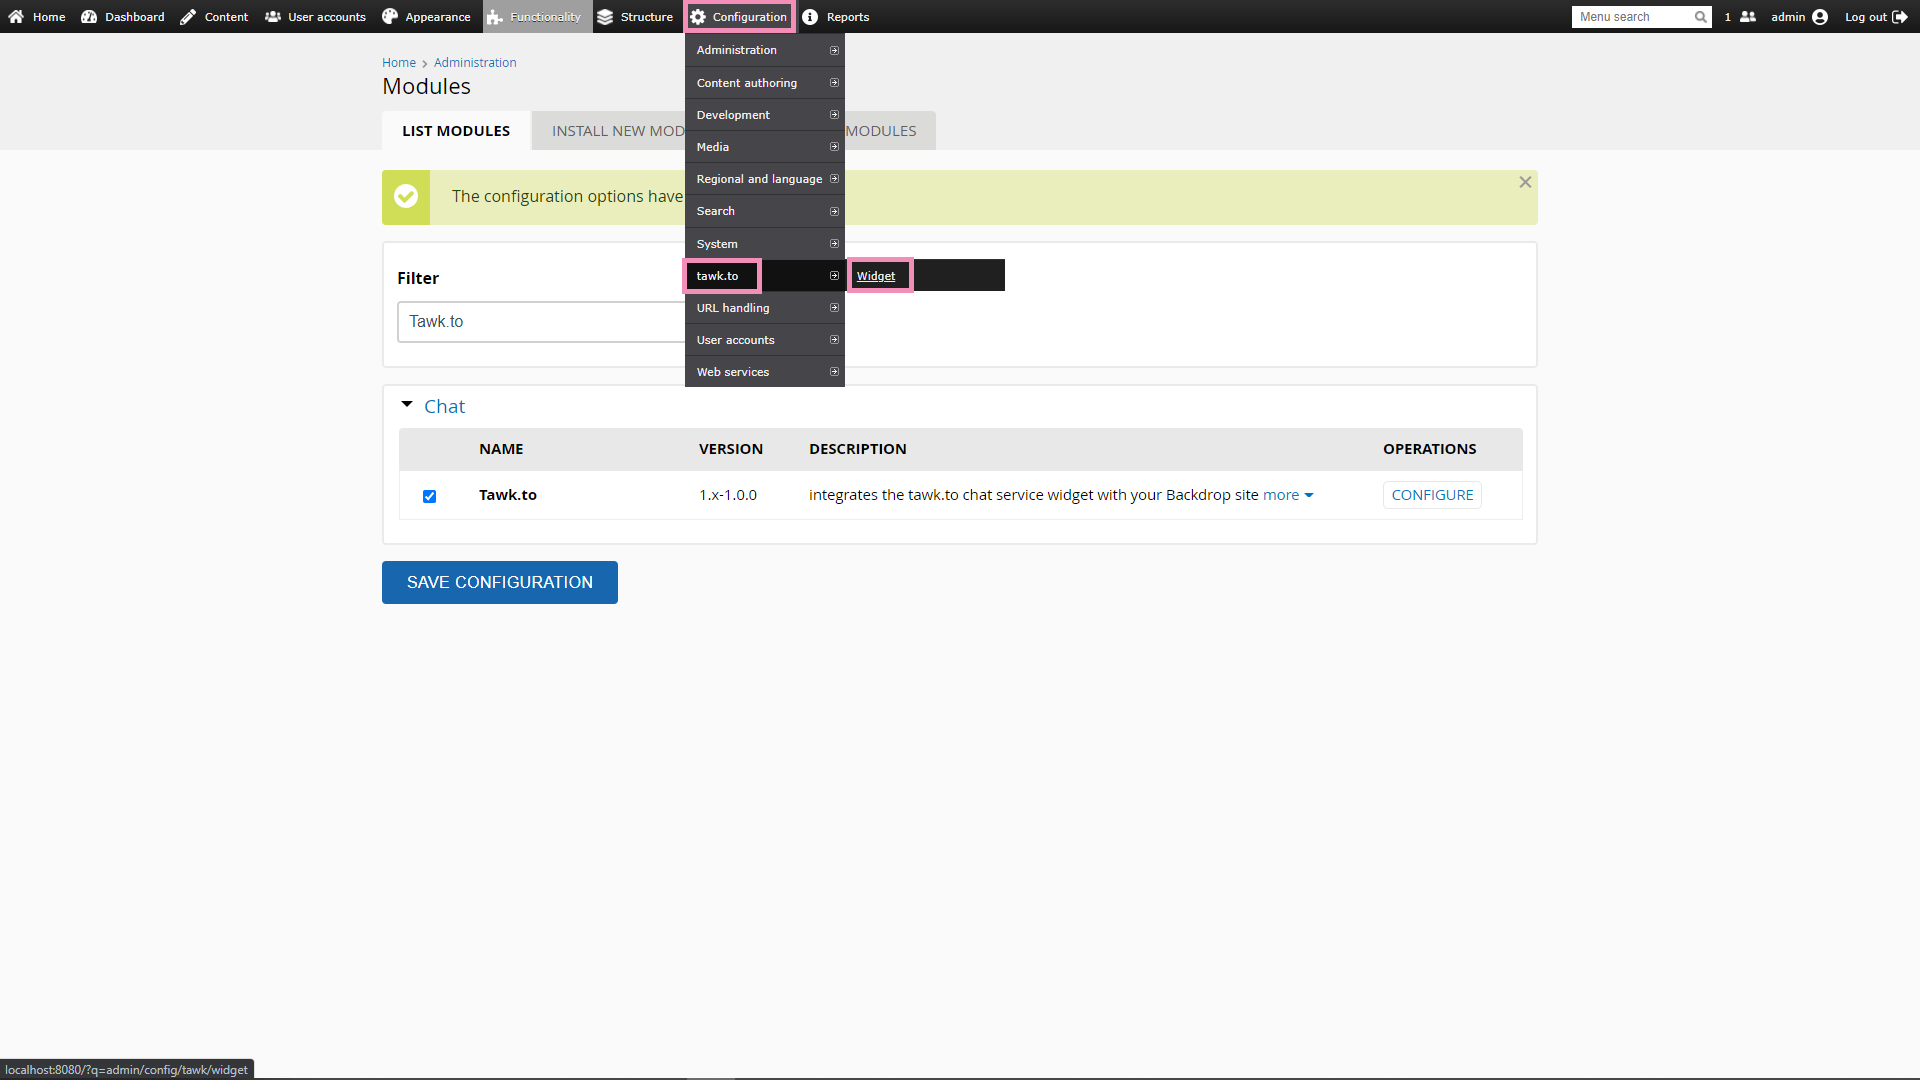
6. Once enabled, you can access the module via the Admin Bar by selecting Configuration ➞ tawk.to ➞ Widget.
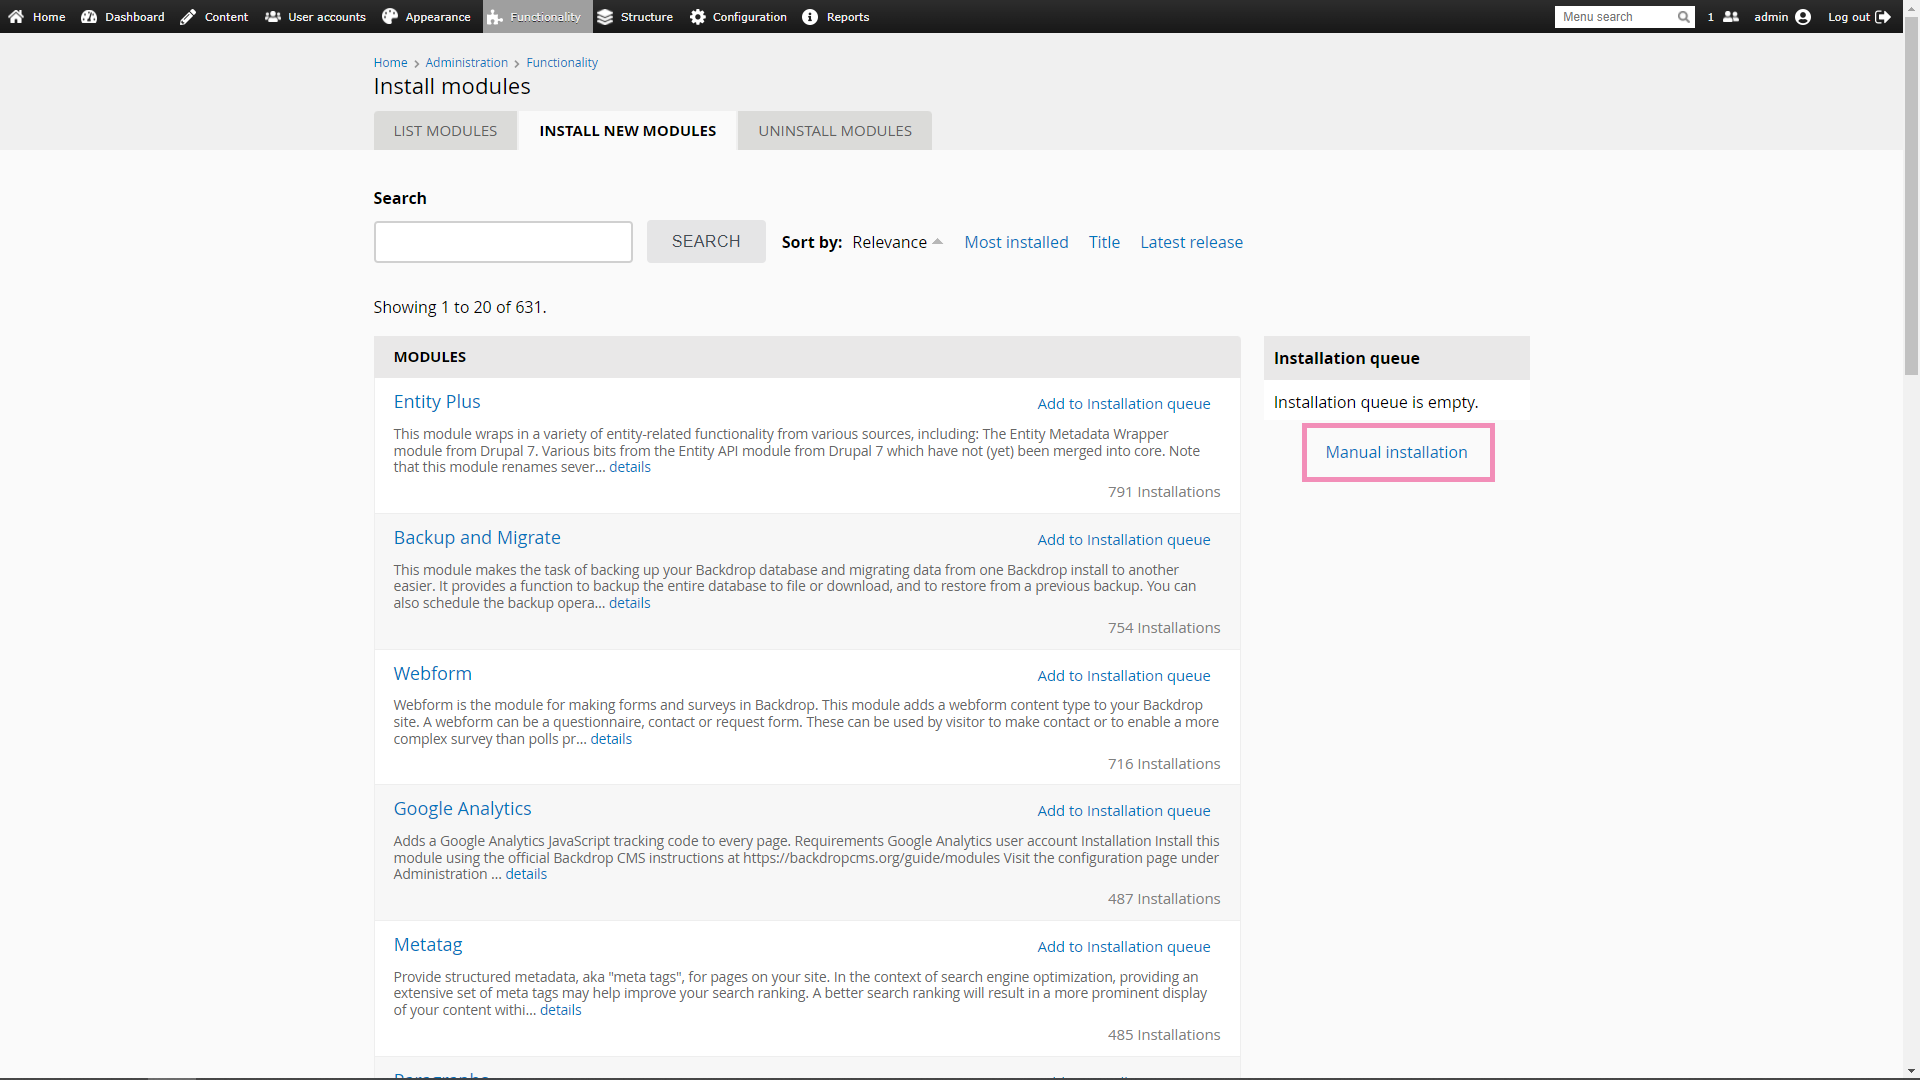
1. Download the tawk_to.zip from the latest release.
2. Log in to your Backdrop site. Then hover over Functionality in the top Admin Bar and select Install new modules.

3. Select Manual Installation.
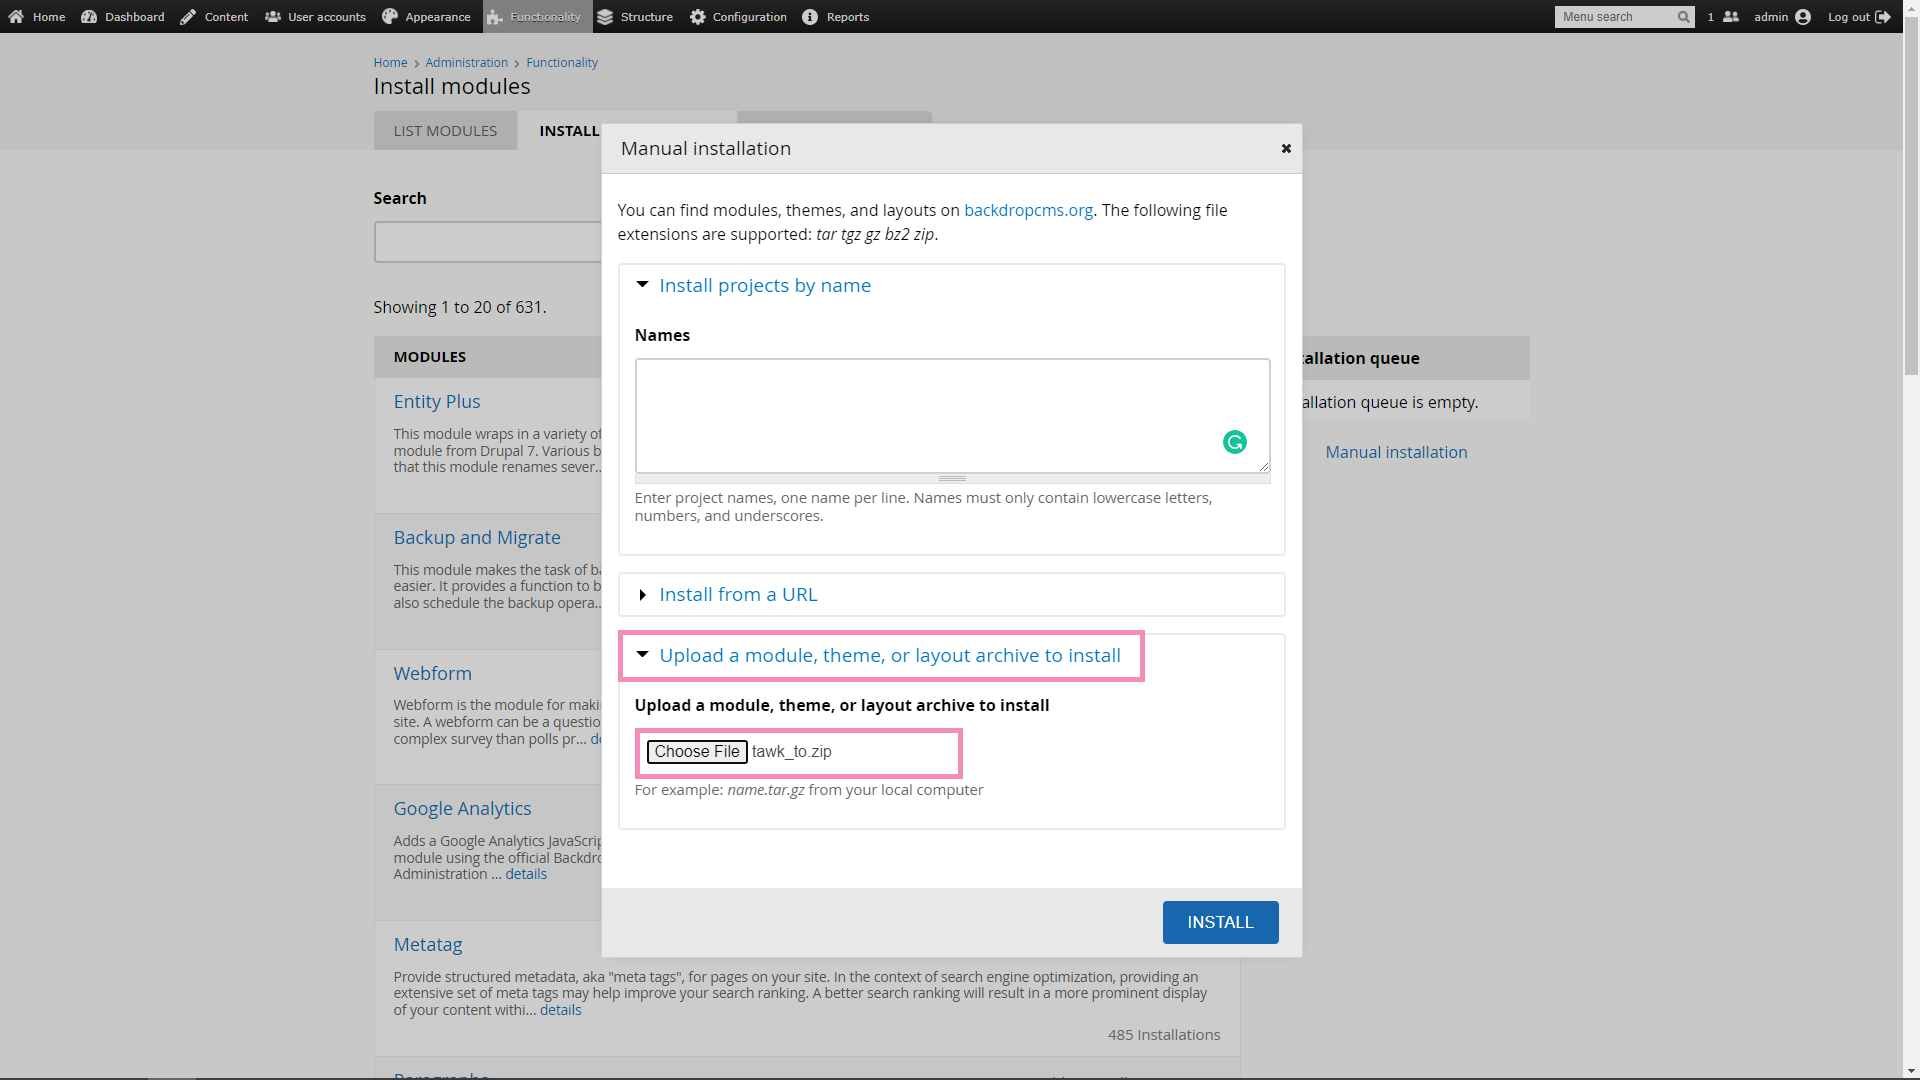
6. Search for Tawk.to, tick the checkbox and click Save Configuration to enable the module.
Widget Configuration
1. Go to Configuration ➞ tawk.to ➞ Widget.
2. Log in to your tawk.to account.
3. Then select the property and widget you want to place on your store and click Use selected widget.
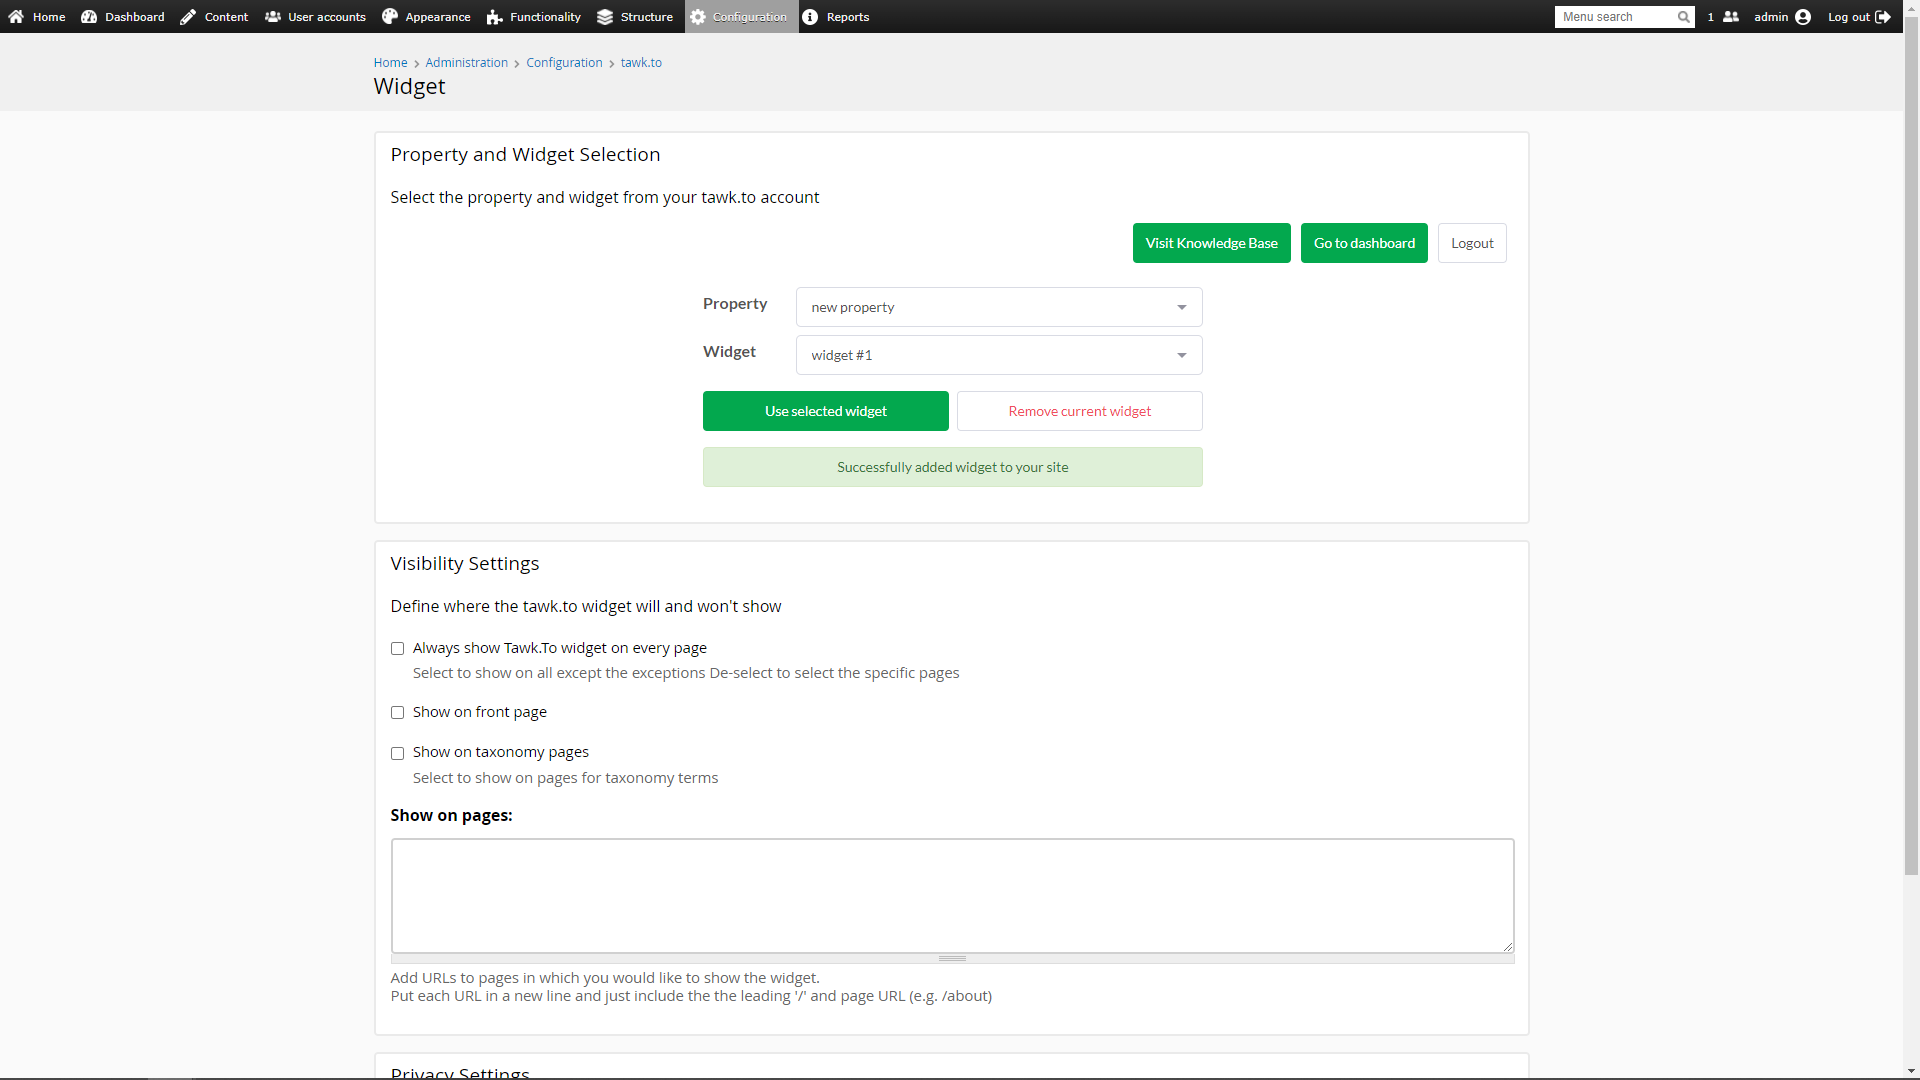
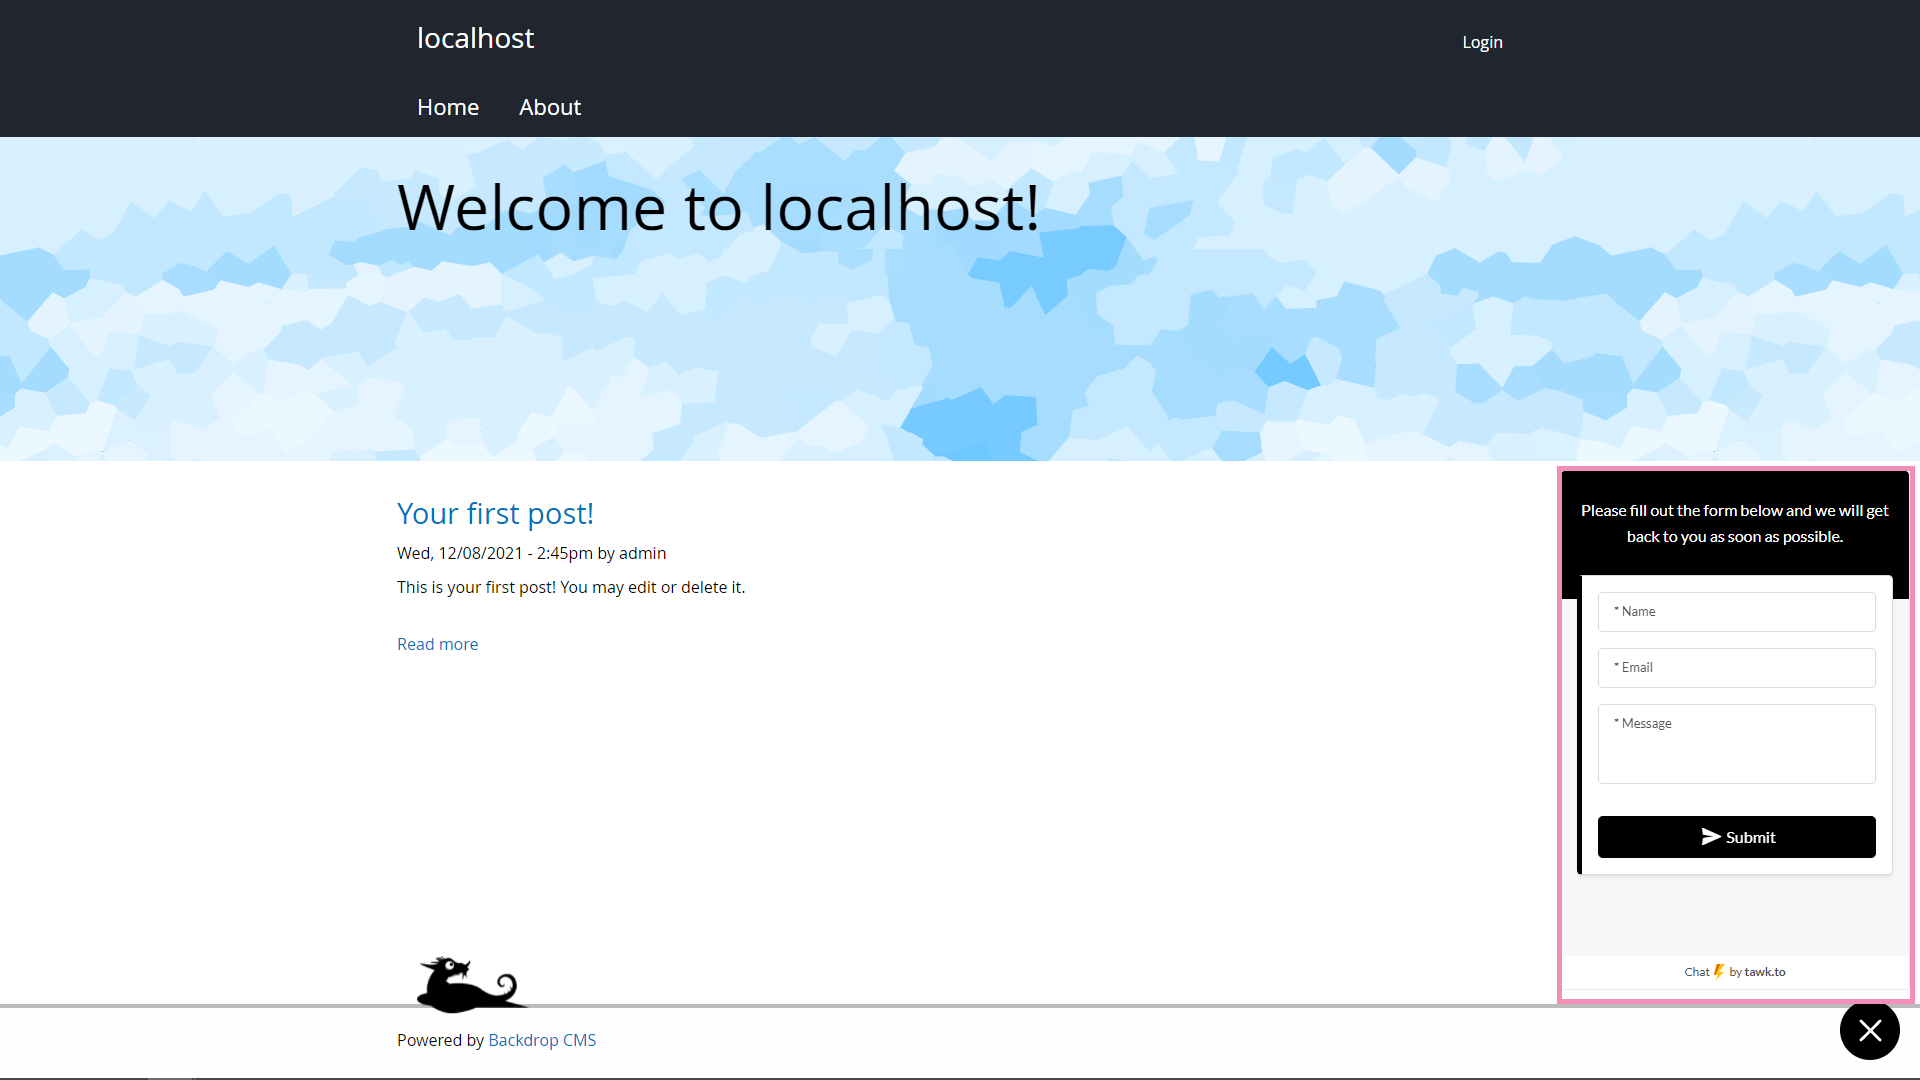
4. Congratulations! The widget will now appear on your site.
Need help integrating tawk.to in Backdrop CMS? Reach out to our support team or schedule a call.